School is out, but yet I am fighting a blog post about school. I am not going to be grumpy about this though because it is my last blog post ever. In a weird way I might miss these blog posts. Nah definitely not, but I will miss these projects. So, back to this project! We just rapped up our final project of the year, BlueSky. If you haven’t read my BlueSky project from last year yet, I will link it here. Anyways BlueSky this year was a little different because we both had more freedom, and less freedom. We got to choose whatever we wanted to do as long as it was interesting to us and wasn’t already invented. We also had to follow the LAUNCH cycle that we practiced lots throughout our projects this year. Through the LAUNCH cycle we created a numbers document that recorded our process. I will link it here.
Anyways this video goes through the process I took to create my final product, but I will quickly go through each individual phase here.
LOOK LISTEN AND LEARN
For this phase I was trying to create a spark of curiosity on a specific group to create my product for. Right away I started to drift to either hockey or film making tools. Hockey has been around for a very long time so many things are already perfect in hockey so I asked more questions about film making. My favourite part of this section was creating a web of all my questions and ideas. Here is that!
ASK TONS OF QUESTIONS
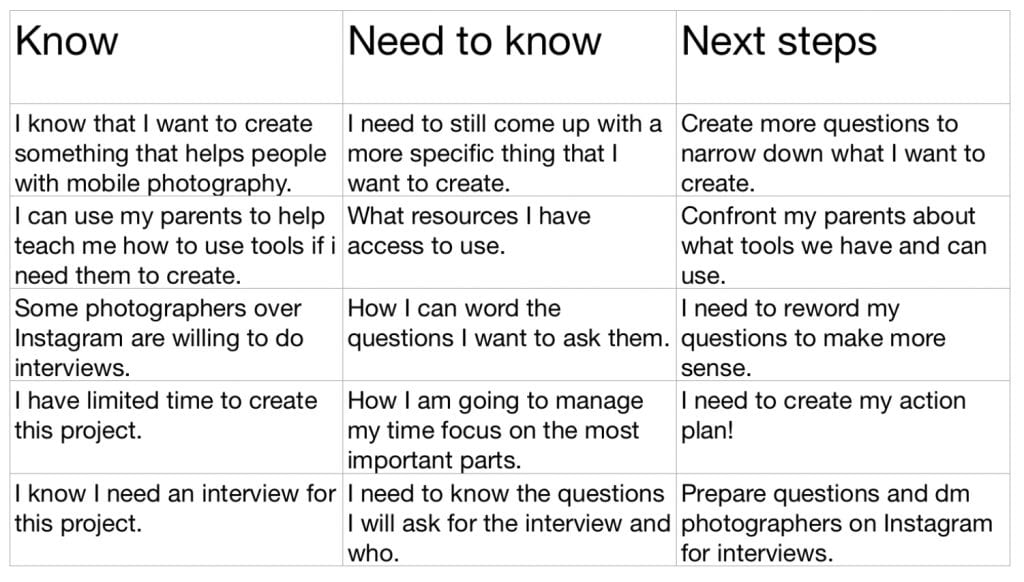
Now that we had our idea for our target audience narrowed down it was time to ask questions about them. During the ask tons of questions phase I kept coming back to the assignments I made in phase L. My favourite part of this stage was the need to knows. These were what we knew, needed to know, and our next steps. I liked making this because it gave me an idea of what I really needed to focus on. Anyways here’s the need to know chart.
UNDERSTAND THE PROCESS OR PROBLEM
This was probably my favourite stage because I reached out to some photographers on Instagram and got to interview them. By then I had known that I wanted to create something to make photography easier for the normal person and for cheap. I got these amazing interviews and it got my creative juices flowing for what to make.
NAVIGATE IDEAS
By now I has handed in my pitch form on what my idea was. I was going to create a cheap stabilizer for your phone using three points of pressure from your neck. I was starting to sketch up my initial ideas and navigate through them. For this stage I used the app post it and rested some sticky notes. These sticky notes were easy to look back on when I created my first draft. Here they are!
CREATE
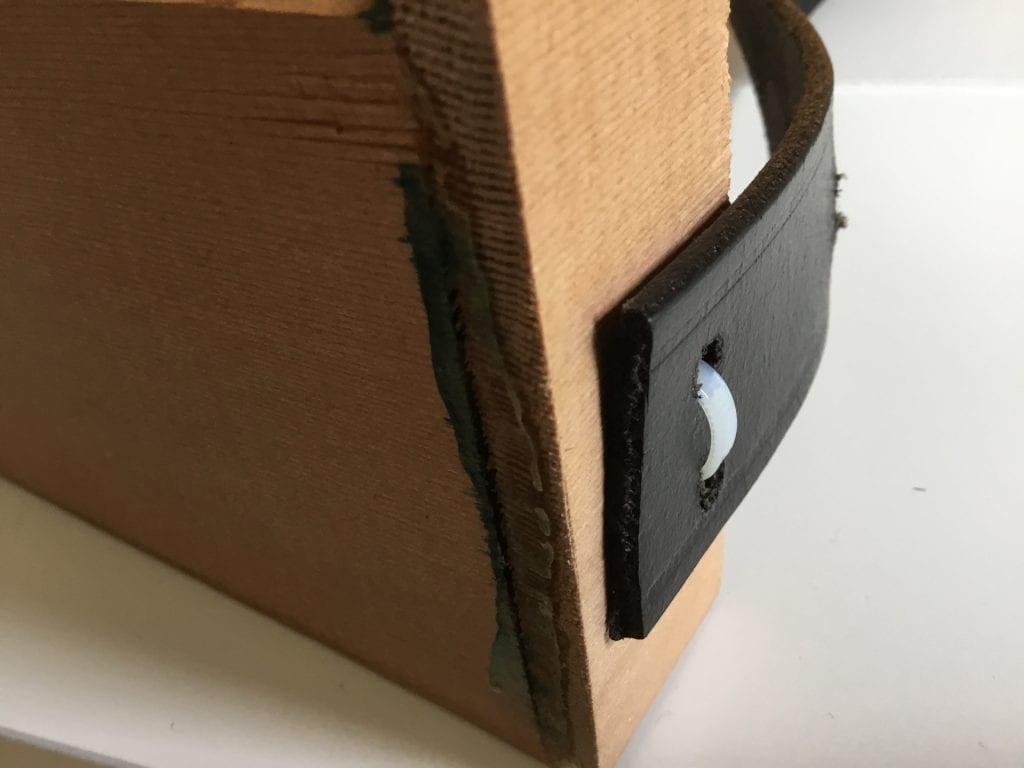
Finally the time had come to actually create what we had been thinking about for weeks. It was tough, but I cut some wood and attached a belt that I measured to be the right length. It wasn’t the prettiest, but it worked really well. I had my brother test it out because whenever I get him to try filming it’s always shaky. When he used my product it was actually quite a bit less shaky. I sent some photos to another photographer on Instagram and he suggested to use zip ties to make it more secure rather than glue. My brother also told me to make it look ‘cooler’.
HIGHLIGHT AND FIX
Now it was time to put in action what I got told about my first draft. I used zip ties to make it more secure and also spray painted it black to make it look ‘cooler’. These were the biggest changes I made and other than that it pretty much worked the exact same. It did feel more secure in the hands though with zip ties.
LAUNCH
Time to launch to our audience. I had my stabilizer with my iPad showing the keynote I made (the vid at the top). It was super fun although just like every BlueSky my legs felt like fried chicken by the end.
Anyways BlueSky this year went well and I think my project went great. Many people loved it and a few said that I should continue it and maybe make some money. It was a great way to end the year and now for the final time I get to say…
Until next time 🙂 Aedan Loughran


Leave a Reply