Hello friends, fellow Blue Sky-ers, or anyone visiting. This is the final post of my Grade 9 year!…….. ahhhhh! It’s crazy how far this blog has come, and it makes sense that my last post is going to be about Blue Sky! For those who are unfamiliar, Blue Sky is our PLP Spring Exhibition, parallel to our Winter Exhibition. At Blue Sky, we had the opportunity to present our inventions with little boundaries. Our projects themselves were open-ended and we hade tons of leeway with what we were going to make. Our actual exhibition went really well, and it was a great way to close the year. But before I get to that, let’s start at the beginning.
We went through a certain process that basically organizes our stages of learning efficiently and makes it easier to track, record and prioritize work. This is called the LAUNCH process.
L- Look, Listen and Learn
A- Ask Tons of Questions
U- Understand the Problem or Process
N- Navigate Ideas
C- Create a Prototype
H- Highlight and Fix
I will go through this project by the LAUNCH process that we used!
Look, Listen and Learn
For this first section, we had NO idea what we were doing for our projects yet. So, we had to dock some research about general ideas that we could potentially be interested in. One of the questions we were prompted to ask was:
Think of a group that is currently mistreated in your school, neighbourhood, or city. What is that group? Describe what is happening.
I was thinking about it, and I realized that there are thousands of people living on the DTES who struggle with poverty, homelessness, addiction, mental illness, and other things that are common in the area. I knew that I wanted to take my project in that general direction from then on, though I hadn’t come up with any particular ideas at that time. This first phase was helpful for scoping out potential ideas, and I’m glad I discovered one and stuck to it, because it really helped me keep on track while going through the rest of the process.
Ask Tons of Questions
This second phase was all about inquiry. This was where ideas were taking hold; potential products we could create, how we could make them, etc. This phase helped us prepared for our Pitch Form, which was a sheet explaining the basis of an idea that we had come up with. By asking tons of questions, we could also figure out what we knew about our potential projects and what we would need to know. These are more commonly referred to as our NTK’s (Need to Knows) and appear in most of our projects.
 I used these when considering my first project pitch, which was a soup kitchen run by those in poverty. However, I realized that that is something most likely already being done, and Ms. Willemse pointed out that it is ‘too hypothetical’ for this project. She definitely had a point— I doubt that I could have built a soup kitchen in the short amount of time that we had to create our projects for Blue Sky!
Understand the Problem or Process
Now that I had gone through one idea, I moved onto the next phase, which was all about research. To further investigate our project ideas we were tasked with conducting primary source and secondary source research. A primary source is a direct account, like a biography or a quote. A secondary source is written about something that happened, but written by someone who didn’t experience the event firsthand. To get primary source research, we were encouraged to interview someone who dealt with the issues that our projects were aimed at solving.
So, I decided to interview Aly Lane, who is the office manager for an outreach program of Carnegie Community Centre. This particular outreach program has an office downtown where people can come seeking help or assistance with housing, financial and health issues. They provide a number of services and I had a great chat with Aly, who informed me more about what they do. While at this interview, I came up with a second idea. My second idea was a warehouse that provided miscellaneous housing items to organizations on the DTES, because one of the issues that they dealt with at the outreach centre that Aly detailed to me was the trouble with acquiring random household items. They could have a company furnish something fully, but it was more difficult to get items like a microwave. Again, I found that this was too difficult to create a model of, so I ended up deciding on an entirely different idea that I had told Aly about in passing.
Navigate Ideas


This next stage required that we organize our ideas inspired by our research into categories. I used the Post-it app, and divided things up into Content and Design. By now, you’re probably wondering…. so, what is my actual final idea? Well……
Yep, that’s right, I decided to make a website. I noticed that it can often be difficult to figure out which organizations on the DTES are ‘good’ for whatever one’s needs are, or for finding volunteering opportunities, or donating, etc. There isn’t a website that compiles all of the organizations into one site that makes it much easier and efficient to get in contact with them, so I decided to create one myself. This stage was simply figuring out how I would set up the website, and the details about its design and specific content.
Create a Prototype
Finally, one of the hardest stages is upon us! This was creating the first model of our product. We had to make different types of prototypes too, if it wasn’t already hard enough!
| Rapid Prototypes | Live Prototypes | ||||
| A rapid prototype is a prototype made quickly and without an excess amount of effort. The prototype is meant to get ideas for design generated easily and set the foundation for your final project. | Live prototypes are similar in the idea that they are meant to develop ideas for the final product quickly and without much detail. They are used as critique for your rapid prototypes, and provide insight into what you could improve on with your rapid prototypes for your final product. |
For my rapid prototypes, I created a quick template of my website using Phonto and Procreate. I also made a chart with Procreate depicting how I would set out one of the pages. For my live prototypes, I decided to interview my mom and my sister to see what they thought of my prototype.
Highlight and Fix
This is the final stage in the LAUNCH process! This is when I got to take my prototypes and bring them to life. I decided to make my actual website using HTML code, which was a challenge since I knew little about coding except for a couple past projects. It was the most tedious part of this project, but also a fun learning curve and new skill gained! I made the background of my website a picture of the DTES, added a page for Home, Organizations, Donation and Volunteering, and customized it all with HTML. On the Home page I provided a basic explanation for what my website’s purpose is and what it provides. I researched about multiple organizations and put links and descriptions to them on the Organizations page, and I linked donation and contact information in a chart on the Donation page. For the final Volunteering page, I inserted images to change up the style of the page from charts, and linked them to the volunteer page from the website of each organization that the image was from.
This probably is pretty confusing to understand, so have a look for yourself:
EXHIBITION TIME….. AHHHH!
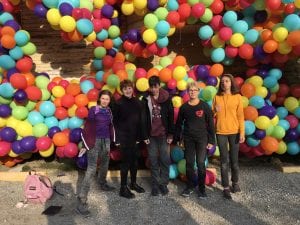
Ok, the scary part now! Finally, exhibition night has arrived. I was in a group with Lucy, Caleb, Alex, Benjamin, Angelo and Malaika. We got put in the Awareness section of the Exhibition, as the entire thing was divided into categories like Home, Sports, etc. The Awareness category itself was split into two sub-categories: Group Awareness and Self-Awareness. I was in Group Awareness. Our entire Awareness section was also located in the back of the library, and we had to decorate it fitting the ‘Awareness’ theme. I made protest signs, and we taped newspaper clippings all around the room to represent raising awareness and activism. The set-up went quite well, and not long after school ended, we had finished the decor and began to prepare our own separate tables for our projects.
On my own separate table, I set up a sign, an iPad displaying my entire LAUNCH process, and my computer with the website running on it. You can see my LAUNCH journal here:
The Exhibition night itself went fairly well; it was very hot so we were all overheating in our business outfits, but it was nice to go outside after and experience the fresh air. I loved explaining my project to everyone, and the praises from my friends and family meant so much to me. The LAUNCH journal helped me derail my process and origin of my project efficiently, so that was helpful. Overall, it went really REALLY well. One day I hope to make this website a real thing!
In CONCLUSION…
My first Blue Sky experience… I rate it a solid 9/10. Points off for the too-hot weather! (Except for this beautiful sunset that came with the drive home.)
This project meant a lot to me, and I could see that it meant a lot to other people too. One of the things I talked about in my tPOL is how grateful I am to have those opportunities to do projects on issues that are current and pressing, especially in the midst of a school world of studying things that happened in the past. This website could truly be a benefit for people and support them to connect with our community. I hope it’s not for nothing, and I am planning on seeing what I can do with this website in the future. I would have never had the chance to create something as meaningful as this anywhere else, so thank you Blue Sky, for being a winding and difficult road. You’ve sure led me to success.


Leave a Reply