Here’s My Canada: A Story

Hello and welcome back to my blog. In grade 9 flight we’ve been learn a lot about making videos, such as making a storyboard, plot graph, script, and much more. Our most recent assignment was to create a video explaining what Canada is to us. Click here to visit their official site. The video could be about almost anything, ranging from values, sports, nature, culture, diversity, or history, we could base it off just about anything. In class and in previous assignments, we’ve done a lot of work with plots in stories and our teachers suggested that we could use that to our advantage and base our videos around a story or an experience of ours. At the beginning, I was clueless as to what I could do for my video and was a little worried because the project description was so vague. Luckily, we were able to do some note taking in class about Canada and that gave me a better understanding of what I could include in my video. Here’s a picture of the notes I took:


I watched a lot of the videos that were uploaded in their app which set the bar that I was to not only surpass, but exceed. Our teacher supplied us with the rubric that would be used to judge all the Canada video submissions. Our teachers had us make a few drafts of the video and we were out in pairs to give feedback on the first draft of each other’s videos. Click here to watch my first draft. Here’s a picture of my feedback from Robbie:

Other feedback from Robbie: ” I enjoyed the effects including the lightning and the translation between the kayak flip and the waves however the narrator needs to sound more confident.”


As I said before, it was very hard for me to find a story to use in my video. I knew what I’d wanted the story to be based around, I wanted an experience of when a stranger helped another out of pure kindness. Unfortunately, my mind would completely blank when I’d tried to find examples of when this happened to me. I could’ve came up with a story but my imagination is very limited and I really didn’t want to. I proceeded to go around the classroom asking people if them or someone they know ever had an experience where a stranger went out of their way to help them. I’d asked nearly the entire class until Adam told me about how his older brother helped a woman during his paddle board race. The women from the organization seemed to enjoy the story, (at least I hope they did) however because my memory is (most likely) worse than a goldfish’s, I had to read it off my cracked iPad.
I showed the first draft of my video to a few other people, including my classmate and friend named Willa. She enjoyed the video and suggested to add some background music so that the ending of my video would be smoother. For the second draft, I added some background music I got off youtube so that the video could seem more professional. As for the voice over, I redid it many times because my throat was acting up and in most clips it were as if a twelve year old boy that was going through puberty had been narrating my video. It took a lot of editing and research to get the audio just right and the timing perfect for all the clips and effects included. At last, you may watch my glorious, inspirational, and meaningful video.

In summary, I had lots of fun making this short video because I was able to bring in all my ideas and be creative with what to include to represent the story. I liked adding cool effects, such as the lightning sound effect at the beginning and the clip of the kayak flipping over. I’m very happy with how this mini-project turned out and I hope to do more like this in the future. Until the next post, goodbye!
Your Destination is Your Imagination


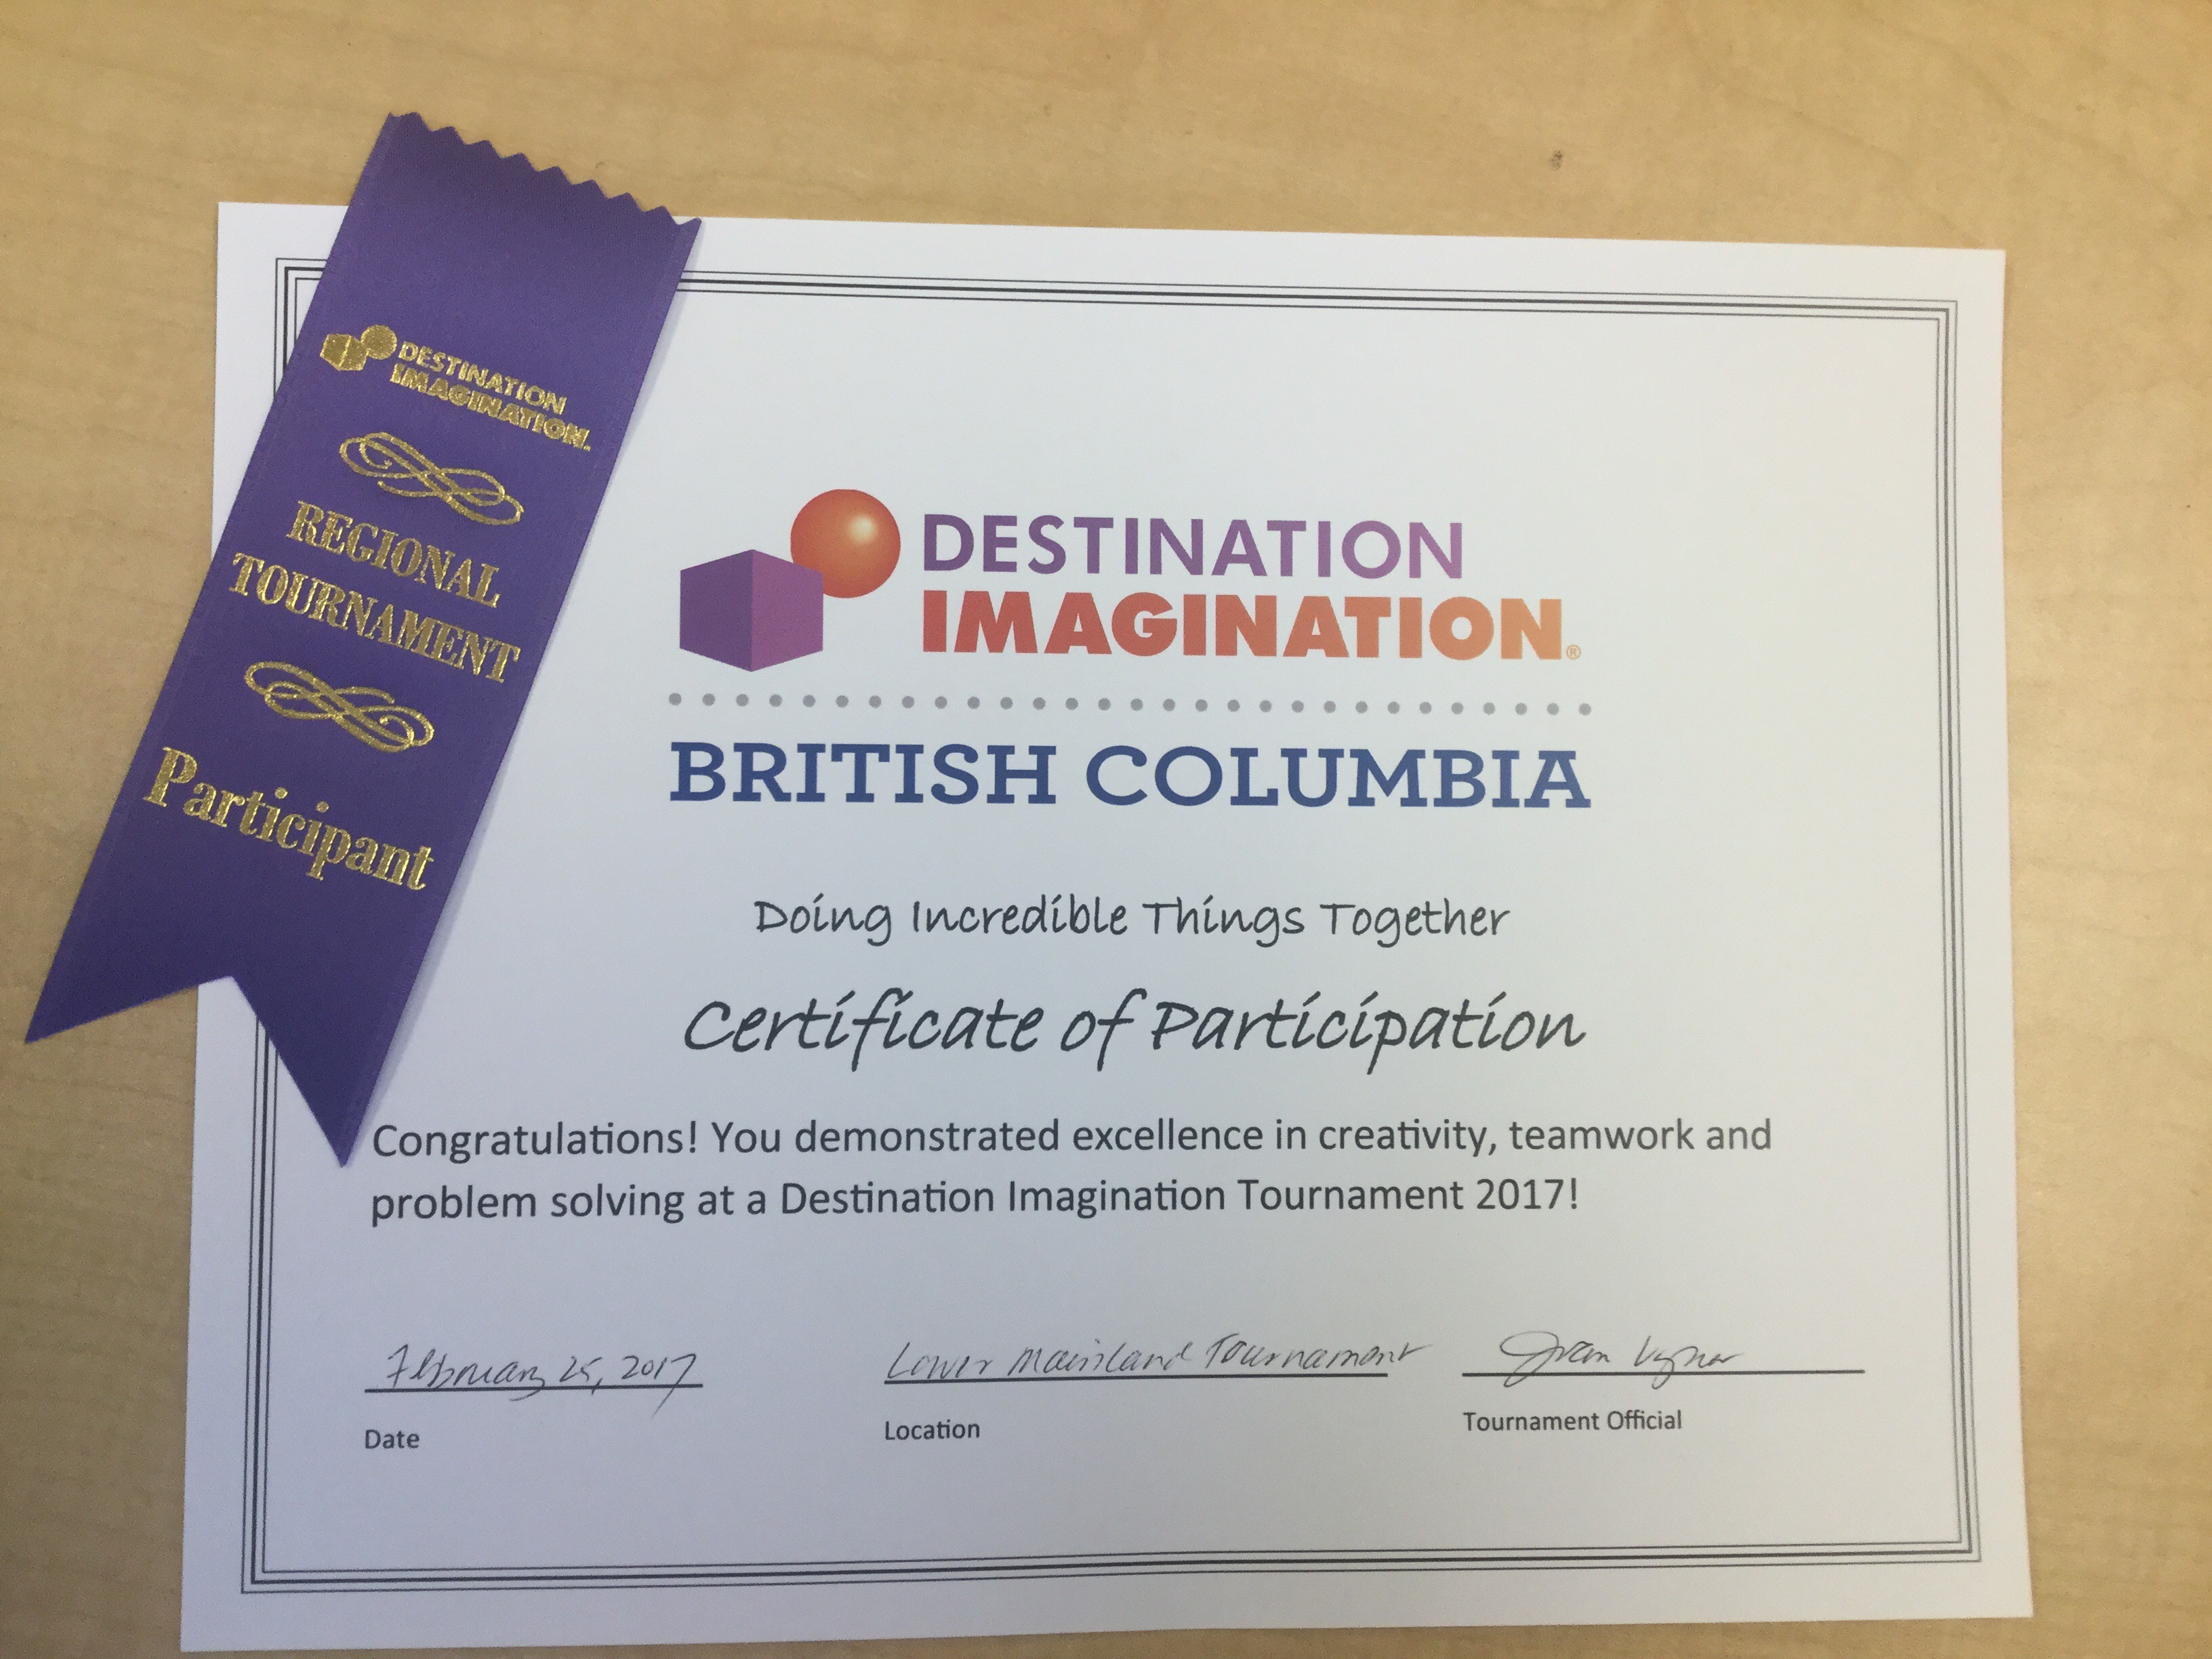
Welcome to my humble abode. Today we’re catching up on the greatness that is Destination Imagination. You can read more about it here. To sum it up in a simple form, it is essentially a tournament where kids form teams and compete against each other in their age groups and challenges. The teams can have a maximum of seven people on them and each team must present their own understanding of the challenge by using a story. The challenges each have a specific task that the team must complete. I was on the improv team and you can watch video about what we had to do here. Every group must also compete in an instant challenge which is basically a challenge with a certain time limit. The teams were scored based on teamwork, creativity, and how well they did the challenge. Our class practiced a lot of instant challenges and my group had a common Kim Kardashian theme. 

Each group is required to have two team choice elements. The team choice elements are meant to shine in your performance and must represent a group’s interest. My group (named Easy 20/20) had Robbie learn how to play the flute in order to represent our passion for music. Our other team choice element didn’t really shine through but I attempted to make the hope diamond out of clay which I’d also made but it ended up being a blue blob in a container. 

Each team competes at regionals and if they qualify will then move on to provincials, which is the qualifying competition for globales. This year, regionals took place at St George’s and at first it was challenging to navigate around the school but it got better as the day went on. At regionals, all the teams needed to be there for 8am and at 8:30 all the groups presented in the gym with their posters. At 9:30 my group watched the grade 8’s present and other than being short on time, did really well. Our instant challenge was at 10:45 and I think we did really well but we could’ve improved on our teamwork. Then at 1:00pm came our challenge, which was very interesting. As you know, we must present 3 skits with the same plot but the stock character and genre changes each time. Our first skit didn’t go too well, to say the least. It was probably the most agonizing three minutes of our lives. The second skit wasn’t bad but there was some room for improvement. Then, we have the third skit. This was the legendary skit that saved our group from last place even though we were the only group competing in our age group. Something we could’ve done differently would definetly be practicing in front of an audience just before the competition to get into the rythme of improv. I think that it went really well in general and you can watch the video of our presentation here. We have provincials in about a month which will be held in Surrey. See you then!

I’m a Mad Scientist

We’ve seen some very fascinating things in science this year, but this lab has been one of the coolest. Pretty much we mixed some things, we poured some things, we shook somethings, and we changed the colour of a flame. But that’s not the very in depth or detailed description that’s expected of me in the plp program, so prepare to witness the tutorial to teach you how to be a magical science geek. 
You will need to begin by making sure you have all the right materials. We used two 500ml beakers, a graduated cylinder, safety goggles, copper chloride, a bunsen burner, some paper towel and aluminum foil. To ensure maximum safety, put on the safety goggles. Once maximum safety is ensured, fill one of the beakers with copper chloride. Following suite, add the aluminum foil and let it sit for a couple minutes. If you’re patient, you’ll likely notice a chemical change in which the foil changes to a rustic, dark brown colour. Bubbles rising to the surface, a subtle smell, and of course the new rusty substance are also indications of the chemical change that has occurred. 

When the elements slowly begin to come apart, pour out the copper and wash the beaker and contents a couple times. To wash it, fill it a little with water, let it settle for awhile and then pour it out. This will ensure the copper is as pure and clean as can be. After that magnificent step, add chloride and do yet another wash with that. Scrub-a-dubdub. Then, scrap the aluminium from the bottom of the beaker and pick it up with your pair of tongs. Using the tongs to pick up a little bit of the material, hover it over the Bunsen Burner which will magically transform a blue flame into a green flame. 

Congratulations! You’ve just completed the experiment based around the equation CuCl2+Al=Cu+AlCl3. You get a gold star. 

New Year New Me

Welcome to my very first blog post of 2017! I sometimes look back at my older posts and just cringe. A lot. I think that says quite a bit about how I learned about how blog posts can be different from a regular write up that you make for your teacher. I’ve learned to add links to certain things which make writing these so much easier because I don’t have to do a lot of explaining. I’ve learned how to add gifs which add humour and they make my blog posts more enjoyable for people to read. These posts have also gotten more entertaining to write just because I can make these and have my writing reflect my personality by using humour, sarcasm and many puns. 

A little while ago in the flight 9 class, we did a project called “The Harry Potter Project” This was another Blue Sky project where we had to come up with an inquiry question related to Harry Potter that we could answer with our project. Myquestion was, *drumroll* “How can I recreate the Marauder’s Map to work at Seycove?” This question was inspired by an 11th grader named Chloe on a presentation night when I realized that the two previous questions I came up with sucked. After I had seen that my question had been approved, I began to worry a little bit about what I was going to do to answer this question. I don’t know a thing about coding and I’m just bad in general with technology. So, I spoke to ms Willemse and found out that in order for this project to work, I’d need to use beacons and place them around the school in the chosen areas and they’d send an alert to people’s iPhone as long as they’d already installed the app called “Locly“. Within this app, I made a Treasure Hunt. I first had a google docs document where I put in all the places that I thought had a deep meaning or that was a big part of Seycove. I researched and took pictures of these places that I would later insert into my treasure hunt. I made an account within the locly website and I got to know it a little by exploring the site. I then came across some really helpful tutorial videos for the locly app. These taught me how to put together the treasure hunt and how to bring in other apps. At times this could be very frustrating because I would want to make something one way but the app wouldn’t let me or nothing was explained about it in the tutorial videos. Other than that, this project was pretty fun to make and I loved making the clues for the treasure hunt. You won’t guess what I brought in for the treasure, peppermint candy canes! They were so cute and small and I was obsessed with them! Unfortunately, there wasn’t any treasure hunt because I couldn’t get my peppermint hands on the beacons but not to worry! I served them as our group’s food at the exhibition night and it went really well.
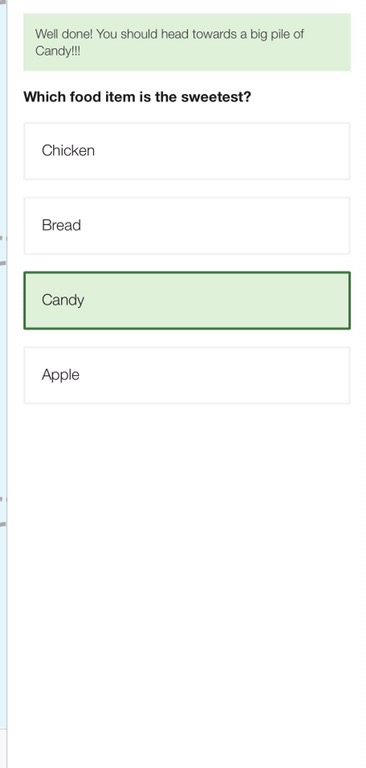
Now, for what you’ve all been waiting for, the clues! My first clue had been placed in ________ and I put it there because sports are a huge part of seycove. The second clue was an animated scratch kinda thing, like where you buy a 1 million dollar lottery ticket and you scratch to reveal whether you’ve lost or you’ve lost. This clue reveals a clue leading to the ___ room because so much incredible learning happens in that very room. The next clue was a trivia! The answer to this quiz was _____, because that’s what I brought in! And finally, you are told to head to a big pile of _____. 
As I explained before, I brought in a few more apps outside of Locly. The one I probably spent the most time and effort on was Paper by 53. This app allows you to draw just about anything and it’s very easy to use once you get the hang of it. I used this app to draw a clue for the treasure hunt and to draw the “I solemnly swear that I am up to no good” art and I used it to draw “Mischief managed” art. All of these took quite a bit of time to do. Now, I’m not the best at art and Ms Willemse and Mr Hughes could tell you that so when I found out that I had to do shading, I froze in fear and despair. It didn’t end up being too bad though, right? I think I deserve an A for effort in that piece because out of almost everything, I think that the shading was probably the most difficult part of this project. It took a lot of valuable time and had me fuming the whole way through. I guess that in the end my hard work shows but the thing is, it doesn’t. Because long ago, in a land far, far away, my dad jammed the printer. And so now, my project pays the price.
Another app I used as part of the treasure hunt is Bookry. This app allows me to make fun interactive clues to put in my treasure hunt. It allowed me to bring in photos and use them for the clues with some animation added on to the discovery of the clue. Once again, there was no coding that was required to make any of these animations.
In summary, this project had its ups and downs but it was all around a fun project to make. I loved how my poster board turned out and I loved how the clues worked. At the beginning, I was worried that the project wouldn’t work out but I was happy in the end when it all came together. 
Here’s a picture of my poster board:

I’m Batman

Hey there my dood how you doing? In science we’ve been working really hard on our newest project, the Super Hero project. We were put into groups of 4 or 5 in a mix of girls and boys.  In order to do this group project we need to know a thing or two about the Periodic table so that’s more of what we’ve been studying. We also made a big poster of the periodic table which includes all the groups, elements, atomic number, charge, symbol, names, and so on. We’ve done a few worksheets and notes which included information and activities to help us learn about elements, atoms, and the periodic table. My group has all been working on a 3D model of the atom of our choice.  The model we’re all making is based on the Bohr version of the atom and we chose to make a model of the Phosphorus atom. We were given some class time to work on the atoms and it wasn’t very difficult to make the base of the model. We used thick wire, white styrofoam balls, and a little bit of clay for the base. We began making it by using a bigger styrofoam ball in the centre to act as the nucleus. On the next shell (the one closest to the nucleus), we placed two small styrofoam balls to represent the electrons. We placed eight more on the next election shell and seven more electrons on the valence shell (the shell that holds the electrons the farthest away from the nucleus). Once we were all finished the layout I twisted the wires together so that they’d stay and Claire and I hot glued everything together so that everything would stay put and wouldn’t fall apart. We did such a great job one could say we make a MARVELous pair. Me, being the clumsy person I am, hot glued my thumb and because the glue was so hot I immediately ripped the glue from my skin…bad idea. My thumb had many layers of skin torn from it and I had no idea what to do so I put on a band-aid and hoped for the best. Tomorrow, my group plans to do some decorating to the atoms but I don’t think I’ll be allowed to touch the glue gun at all…

Well that’s all and I know that you’re just FURYous that this is over but don’t worry there’ll be a WHOLE LOT MORE to come in the near future! And for my thoughts on this project, I’ve Loki got to say that I THORoughly enjoyed it and I hope my teacher will assign us more like this in the future.

I Like Big Mutts and I Cannot Lie

Hey stalker. What’s up? You may’ve noticed that I’ve been blogging a lot recently and I hope that this keeps up. At this point, you’re probably really sick of my puns. Don’t worry, I don’t plan on stopping any time soon with this legendary word play. Just recently, we participated in an event for grade 9s called, “Take Your Kid to Work Day” It’s pretty self explanatory, and I went to my mom’s work. My mom works at a vet clinic and she’s the manager there, so I’ve already been there a few times. When I visited for take your kid to work day, I started off with some cleaning. I cleaned the exam rooms and it was actually a lot of work to do. I had to dust and wash shelves, picture frames, etc. I even washed walls! After some cleaning, my mom had an appointment with someone from a pet insurance company who was telling my mom more about the insurance company and what they offer.

After that, my mom had an appointment with a woman who was fostering a dog that was surrendered by a boy on the streets. The dog’s name is Marley, and he’s up for adoption. I absolutely loved him when I met him and I noticed that he is very energetic and loving. He’s a husky, shepherd, rottweiler mix and they think he’s about six. I really want a dog so I was prying my mom to adopt Marley but she said no:( I think Marley would make a great pet for a family that has a lot of time to take him on walks at least twice a day. Here’s a picture we took as the adoption photo: img_9750

My favourite part of this would be meeting Marley just because I’m an animal lover. I didn’t really dislike any jobs that I did. If anything, when I got home I noticed that I was exhausted. In addition, I wasn’t really passionate about what I was doing here and I don’t think that this might be a career I’d have in the future. However, this did influence me by realizing that when I do get a job, I hope it would involve animals.

Also, I learned a lot about cleaning. As boring as it sounds, it’s actually quite important for any hospital. If a hospital isn’t cleaned properly, there’s the risk of spreading disease. It’s happened before, just not at any of my mom’s places because she and the staff ensure everything’s squeaky clean. 

In summary, I had a lot of fun at the clinic. The staff were really nice and I was able to learn a lot about work in general. I look forward to learning more!

Metaphors Be With You: Episode II

img_9733Heyyy what’s up? I had a really, really good name for this blog post but I would’ve gotten expelled if I had put it up:( Anyways, welcome once again to the extravagant and remarkably beautiful blog. (that you have once again attempted to avoid) Today I ate warm carrots and drank tea, so I’m very excited to be doing just about anything right now. Happy November 6th, everyone. And now, for the reason that you came here, The Cool Russian Revolution Vladimir Terasenko group’s Metaphorical Machine! This Rube Goldberg machine reflects on all the work that we’ve been doing so far in this term, so we’ve all been at least a *tad* STRESSED OUT. This project goes by a driving question: How does an idea drive change? We answer this question with this project. I have so, so, so much to tell you about this project. First off, my teacher suggested to us all a really, really good way to organize ourselves and the work we do in class. She had us all make a chart in a pages document, which is kind of like a word document but there’s more options in certain areas. We filled out the chart with the times we were going to do certain things we wanted to get done that class. Kind of like setting goals. I had managed to completely rebel this chart, and I will explain how I’m such a rebellious, and daring person. My group had set jobs and roles for everyone and I was the Documenter, but I didn’t get any say in which role I had wanted to partake in. Which for the record, was definitely NOT the Documenter, since you could be documenting everything you do yourself, it’s not rocket science. During the first few classes, I went by the chart and did what I had written down that I would get done. Slowly, I began to drift. It started out with me doing a little bit of spray painting here and there, but I was still documenting other people doing what they were doing. It eventually ended with me doing the job I had actually wanted to do, the Steampunk Aesthetic person. This happened because I guess everyone in my group was a little desperate for more decor on the machine because the guy assigned to the aesthetics job wasn’t doing what his job was (you know who you are) On the very last day that we were able to work on this I made many gears with the 3D pen just because I’m so fancy and cool. I’m surprised they turned out so well with the amount of time I had to make them. Robbie gave me a really cool tip and trick with the 3D pen that he doesn’t know he gave me. This secret trick allowed me to make a lot of gears in very little time. I had so much fun making these gears, it was my favourite part of the entire project. One of my favourite parts. I honestly found it so relaxing and soothing watching the gear form, at the beginning it always looks really bad and once you’ve finished you truly can’t believe that you’ve just made that. It’s this kind of feeling, you know?

To help our machine even more, our science teacher had us make blueprints of the machine. It includes the scale factor we used to draw this blueprint and in order to get that, we needed to measure a lot of our machine. It was easy finding the scale factor after that because we already studied this in math. Fun times. Another part of this project is the video, which needs to include us explaining the project step by step and the process. We made a storyboard for the video which includes pictures we drew of what each different shot will include. It also explains what we’re going to say in the video to go with each shot in the voiceover.

There were many requirements for this project that we needed to fulfill in order for it to turn out. For example, every little piece in the machine must have a metaphor and meaning behind it. Like how in our project, we have dominos that tip over and they are the very beginning of the whole thing. Domino #1 represent world war 1 (i’m pretty sure) domino #2 represents the dude, domino #3 represents his money, and domino #4 represents him losing the money. (my life, except I lose my money to food and a $70 sweater that I forgot to check the price tag on pls don’t tell my mom) On all these dominos, there are things painted on them to show what they represent. They’re small drawings, like a dollar $ign, but they’re still drawings.

Generally speaking, I quite enjoyed this project and the idea was pretty cool. As shown above, there were a few things that were frustrating and difficult, but this wouldn’t be a proper project if it wasn’t challenging and we didn’t learn anything from it, now would it? I genuinely enjoyed this project and I hope we do something similar to it in the future.

Barbie in the Dream House


img_9521Hello friends and welcome to my humble abode! Today we will be covering my most recent math project: The Dream House. The house that only exists in your dreams, has come to life! YOU get to see the house everyone’s been going crazy over, The Tatgela. Creative name, right? It wasn’t easy putting together this masterpiece, we had quite a bit of stuff we needed to do before building it on the app. Before we made the design, we studied scale factor and did some worksheets similar to what we did for the Dream House. After that, we were given some time to work on designing and building the house. The designing was fairly easy, but when we began building it in the app we ran into a few road blocks. The first was the stairs, which I couldn’t figure out how to build a second floor even though we’d already designed one.

i cri
The second difficult part was the kitchen. I hated that thing. It was very hard to follow all the rules, such as
-appliances must not be blocking each other
-The fridge, dishwasher, and oven must be ___ far away from each other.
-etc

Eventually we made it work, but there was another problem with the app. After I’d already built the kitchen, dining room, and living room, all my work was deleted after I joined back into the app.
So, in summary, I had a lot of fun doing this project but it was frustrating at times. I used an app called RoomPlanner to make this project. Be sure to tune in soon for part 2 of my metaphor machine!

Metaphors Be With You

Welcome back to the blog you tried to avoid. This blog is true punishment, and yet you read it anyway. It’s not always bad, right? It’s like they say: a good pun is it’s own reword.

In Flight this year, we’ve all been working really hard on our latest and greatest project; The Metaphor Machine. At the moment, we’re about halfway through and I’ll walk you through what we’ve done so far. If you read through my other posts that I’ve recently posted here, you’ll see that I’ve posted a bit about Crane Brinton, Steampunk, and the industrial revolution. All of these are involved in this project. For this project, we had to first make a timeline with all the events of the assigned revolution. Our group chose to do the russian revolution. The timeline also had to include metaphors we wrote that connected to the events in the revolution and how it relates to Crane Brinton’s Theory . In the machine, we had to give it “Steampunk Aesthetic” to give it more life. We do this by bringing in steampunked decor and by painting parts of our machine in copper, silver, and black.img_9415img_9411


This project also needed to include a circuit of some kind, and it was very convenient that we’ve been studying electricity in science. Once the timeline was approved, we drew a blueprint of our machine on paper. We used the timeline as our guide to building the machine. Before we started building, we needed to sort out who was bringing what. Some of the materials took longer to get, and that made finishing the first draft of the machine by the due date challenging. We probably could’ve been more productive in the first few classes but that was pretty hard because not many of our materials were in order. But as time progressed, so did we. We drew on the wood where we wanted to have the parts and we ended up eliminating an idea that wouldn’t have been all that easy to do. img_9515We began building and painting parts of the machine. The hardest part of putting together this machine was realizing that some of our ideas won’t work. An example of this was when we wanted to make a scale but instead of using those plates on the scale, we’d replace them with top hats. The idea was creative but the top hats we made were fragile and didn’t work the way we had originally wanted them to. Our machine is sequential, so we’ve been building everything in logical order.In the beginning
We made a 2 minute video that goes over the process we went through when we made the project. To help the video, we were given a storyboard that will be the outline of the video. What I think will make our video special and unique is the fact that we decided to make it with the same style as the show “How it’s Made”. We’ve been documenting a lot of the process of this project. We always try to have one person in our group filming or taking pictures of what we’re working on. This project has been really fun and I’ll have a part 2 to this blog post up soon!

All These Trains and We Still Ain’t on Track

Recently in Flight, we’ve been studying revolutions. Mainly, the Industrial Revolution in Britain. We were assigned a project where we had to make an explain everything answering this question: what were the causes and consequences of the development of the railway during the Industrial Revolution in Britain? There was lots of criteria that we had to follow to make this visual essay. For example, our video must include a beginning, middle, and end, show at least three different causes (the reason why/how railway had that change) and their consequence (the impact of that change), and more. We did lots of research on the Industrial Revolution and the causes and consequences of the development of the railway in Britain.

Our teacher had us hand in multiple drafts of this project. My first draft was very bad to say the least. It had no audio at the beginning and no conclusion at all. It covered pretty much everything I’d wanted to go over, but it was still very lacking. I’m disappointed to say my second draft was all that much better. I added a few more things in and tweaked it a little, but I would just call this mild improvement. The process of making these things can take so long. Especially when Explain Everything deletes your audio after you’ve recorded. Over and over again. My life is a train wreck.
My final draft is the one. It’s the masterpiece everyone’s been missing in their lives. It’s the peanut butter to your jelly. The Mona to your Lisa. This one has taken the cake. I spent more time on this than I should’ve but it was kinda fun in a way that you would only understand if I explained everything. I am a person of low expectations. Please feel free to follow in my footsteps when watching the following presentation. Now, for what you’ve all been waiting for: http://www.youtube.com/watch?v=0v3aT4q_BwE

How large of an impact do you think the railroads have on the industrial revolution?