Chug Life

Welcome back! Recently in social studies we’ve been learning all about the Canadian Pacific Railway and we’ve got a cool project to go along with it! We could choose between two options, either make a poster to recruit workers for the CPR or, write a three-minute speech to organize the workers into a union. I pride myself on my creativity with visuals and so I chose to do the poster. My poster appeals to the Chinese and I tried to make it seen like coming to Canada to build the railway would be a retreat of some sort, not mentioning any possibility of injury or death. I made it seem like they would be a part of making Canada a successful country with their help. I used pictures of people in groups to give them a sense of family. I made a few drafts for this project, here’s my first one:


cpr first draft

After finishing this, I asked Ms Willemse if it was good and it seemed as if it needed more than a little improvement, so I got to work. It took a long time to choose my template, but here’s the next draft I made:

second draft


After we did some peer critique, it turns out that the image I used on the top was “The Last Spike” and may not have existed at the time when they were recruiting workers to start building the railway. Here’s the final draft of my poster:

final draft


I had a lot of fun making this project. I used the app called Canva and it has a lot of different templates for all sorts of posters or images you’d like to make. See you jn the next post!

Gifted

What does it mean to be “Gifted”? To have such raw talent that others watching would stare speechless, in awe of your brilliance. This is what we’re studying in health & career and it’s very thought-provoking. We read the piece of writing above and were told to write a 100-150 word “plan of action” to become gifted at whatever we pleased. Here’s my paragraph: 

gifted writing

The word count may be a little over the limit, but I’ve just got a lot to say. This piece of writing can from my heart and presenting in front of others while having confidence is something I’ve desired for longer than I can remember. I’m working towards this goal and I hope I can become more accustomed to sharing my opinions and thoughts in front of other people. 
Toodles!

Morris the Moose Goes to School

Hello, welcome to my blog! Today I’ll be sharing with you a long lost tale about a Frankenstuffie. This little guy was a creation part of the “Who’s in Control: People or the Environment?” unit we’ve done in PLP. We’ve worked on this unit for a huge chunk of the year and we’ve been very busy bees. To start it off, we read Andy Weir’s ‘The Martian’ and filled out sheets that asked questions like, “Who is in control in this section of the novel: the humans or the environment? Justify your answer with at least two examples from the book.” We would read a handful of chapters every week and fill out these sheets as a reflection to the section we read. Here’s an example of one of the sheets we filled out.


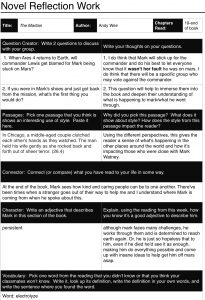
This reflects on the very last few chapters in the book (Warning: SPOILERS AHEAD!) where Mark makes his way to return to his team on the Ares 2 mission. He gets there safely and everyone is happy. But as you can see on the sheets, there are still a few unanswered questions that are driving me crazy. This book had an interesting style because it would include different perspectives from different characters/groups of people. We were introduced to that style of writing so that incase we wanted to include something like it in our epistolary story, we’d have the option.

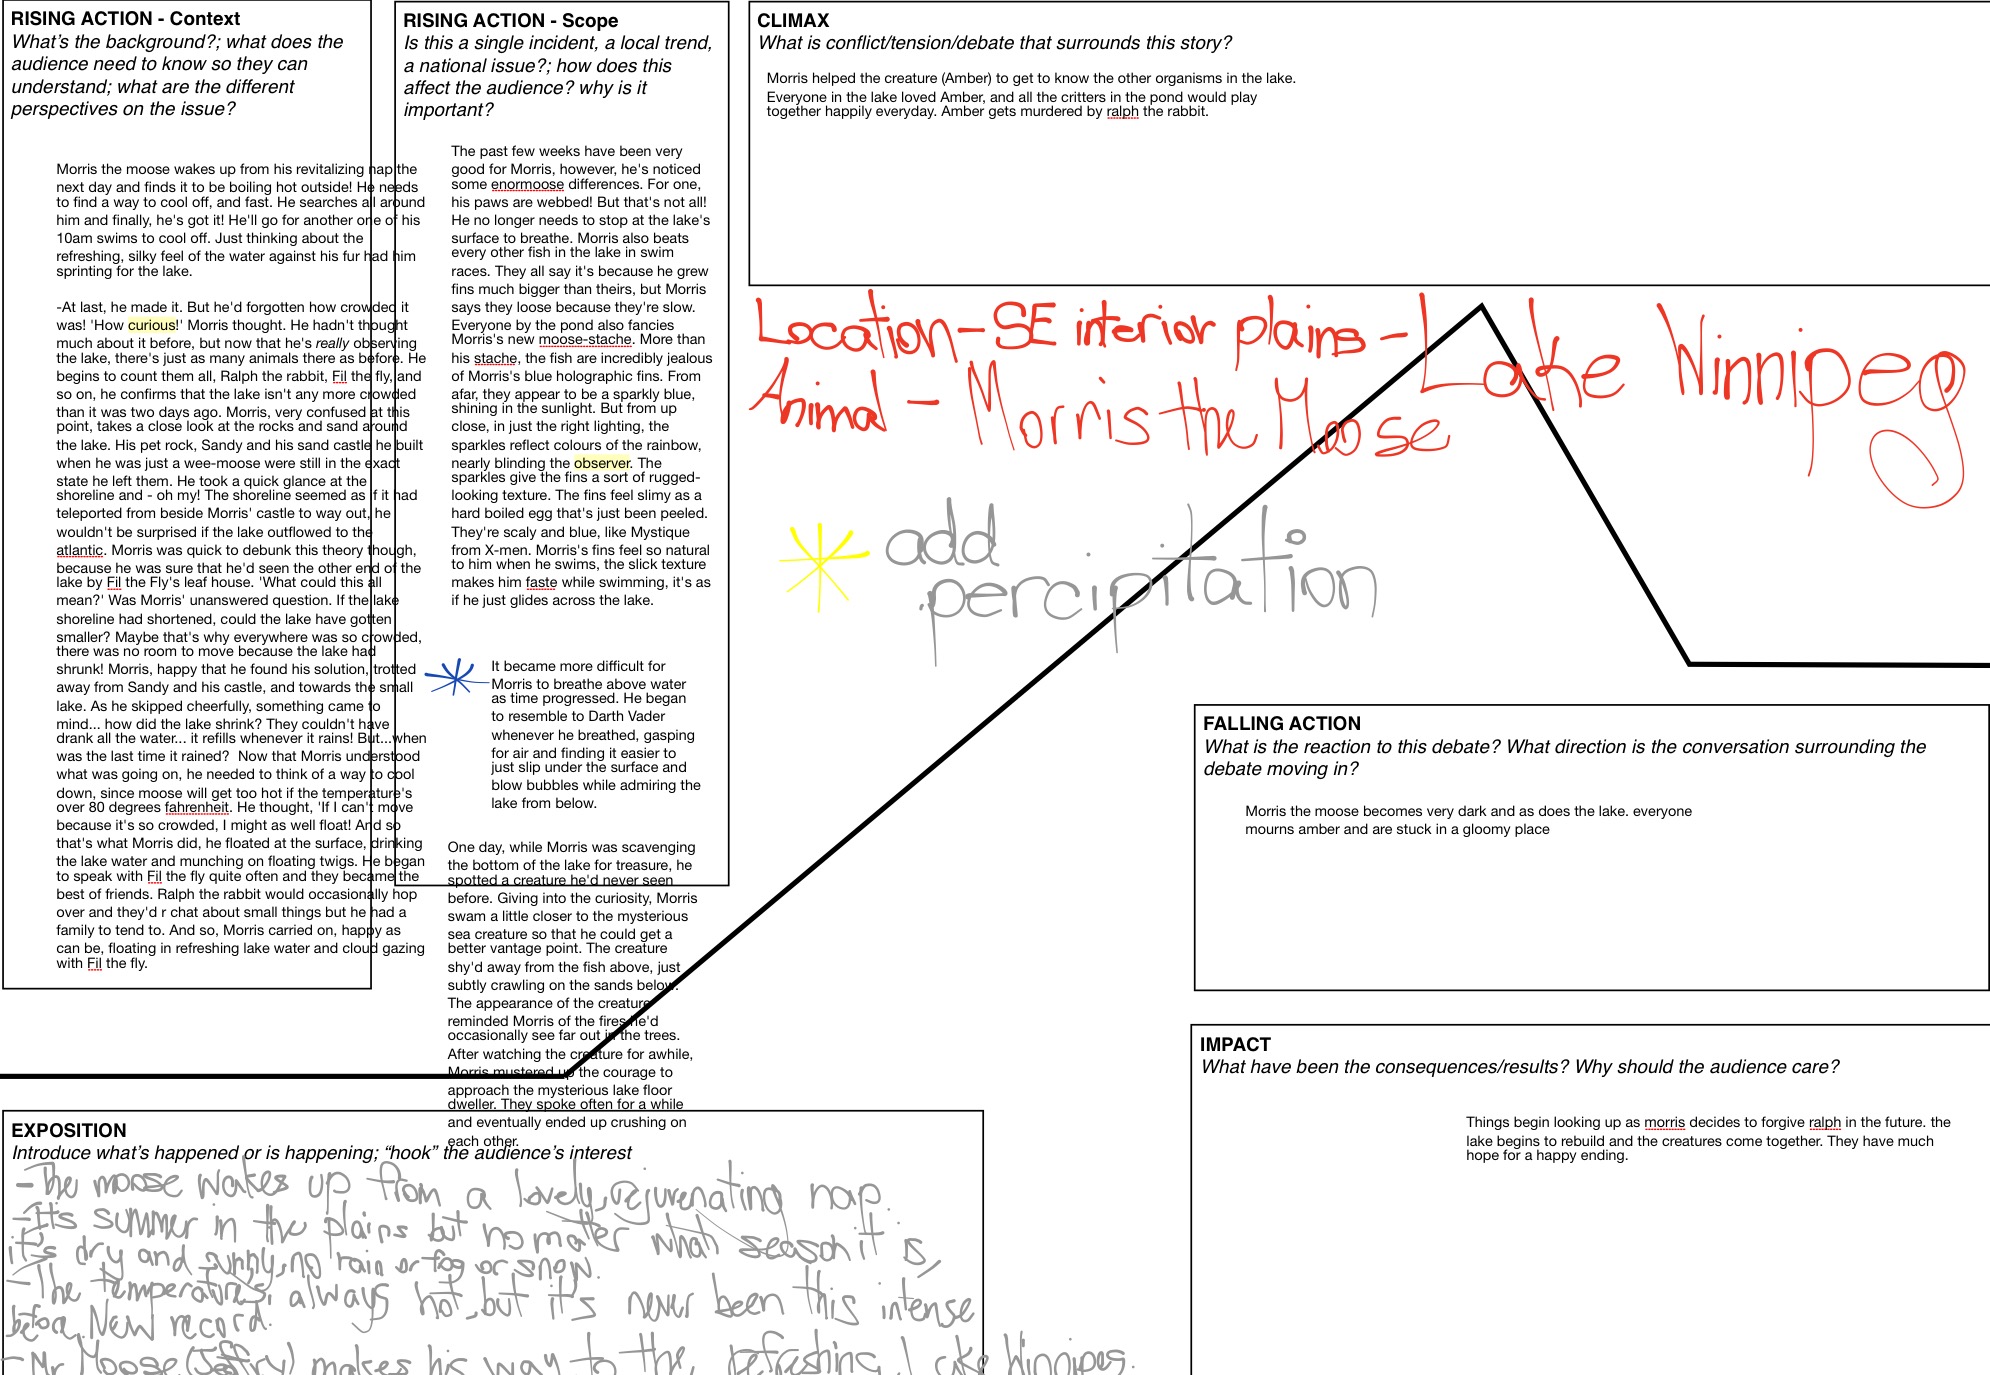
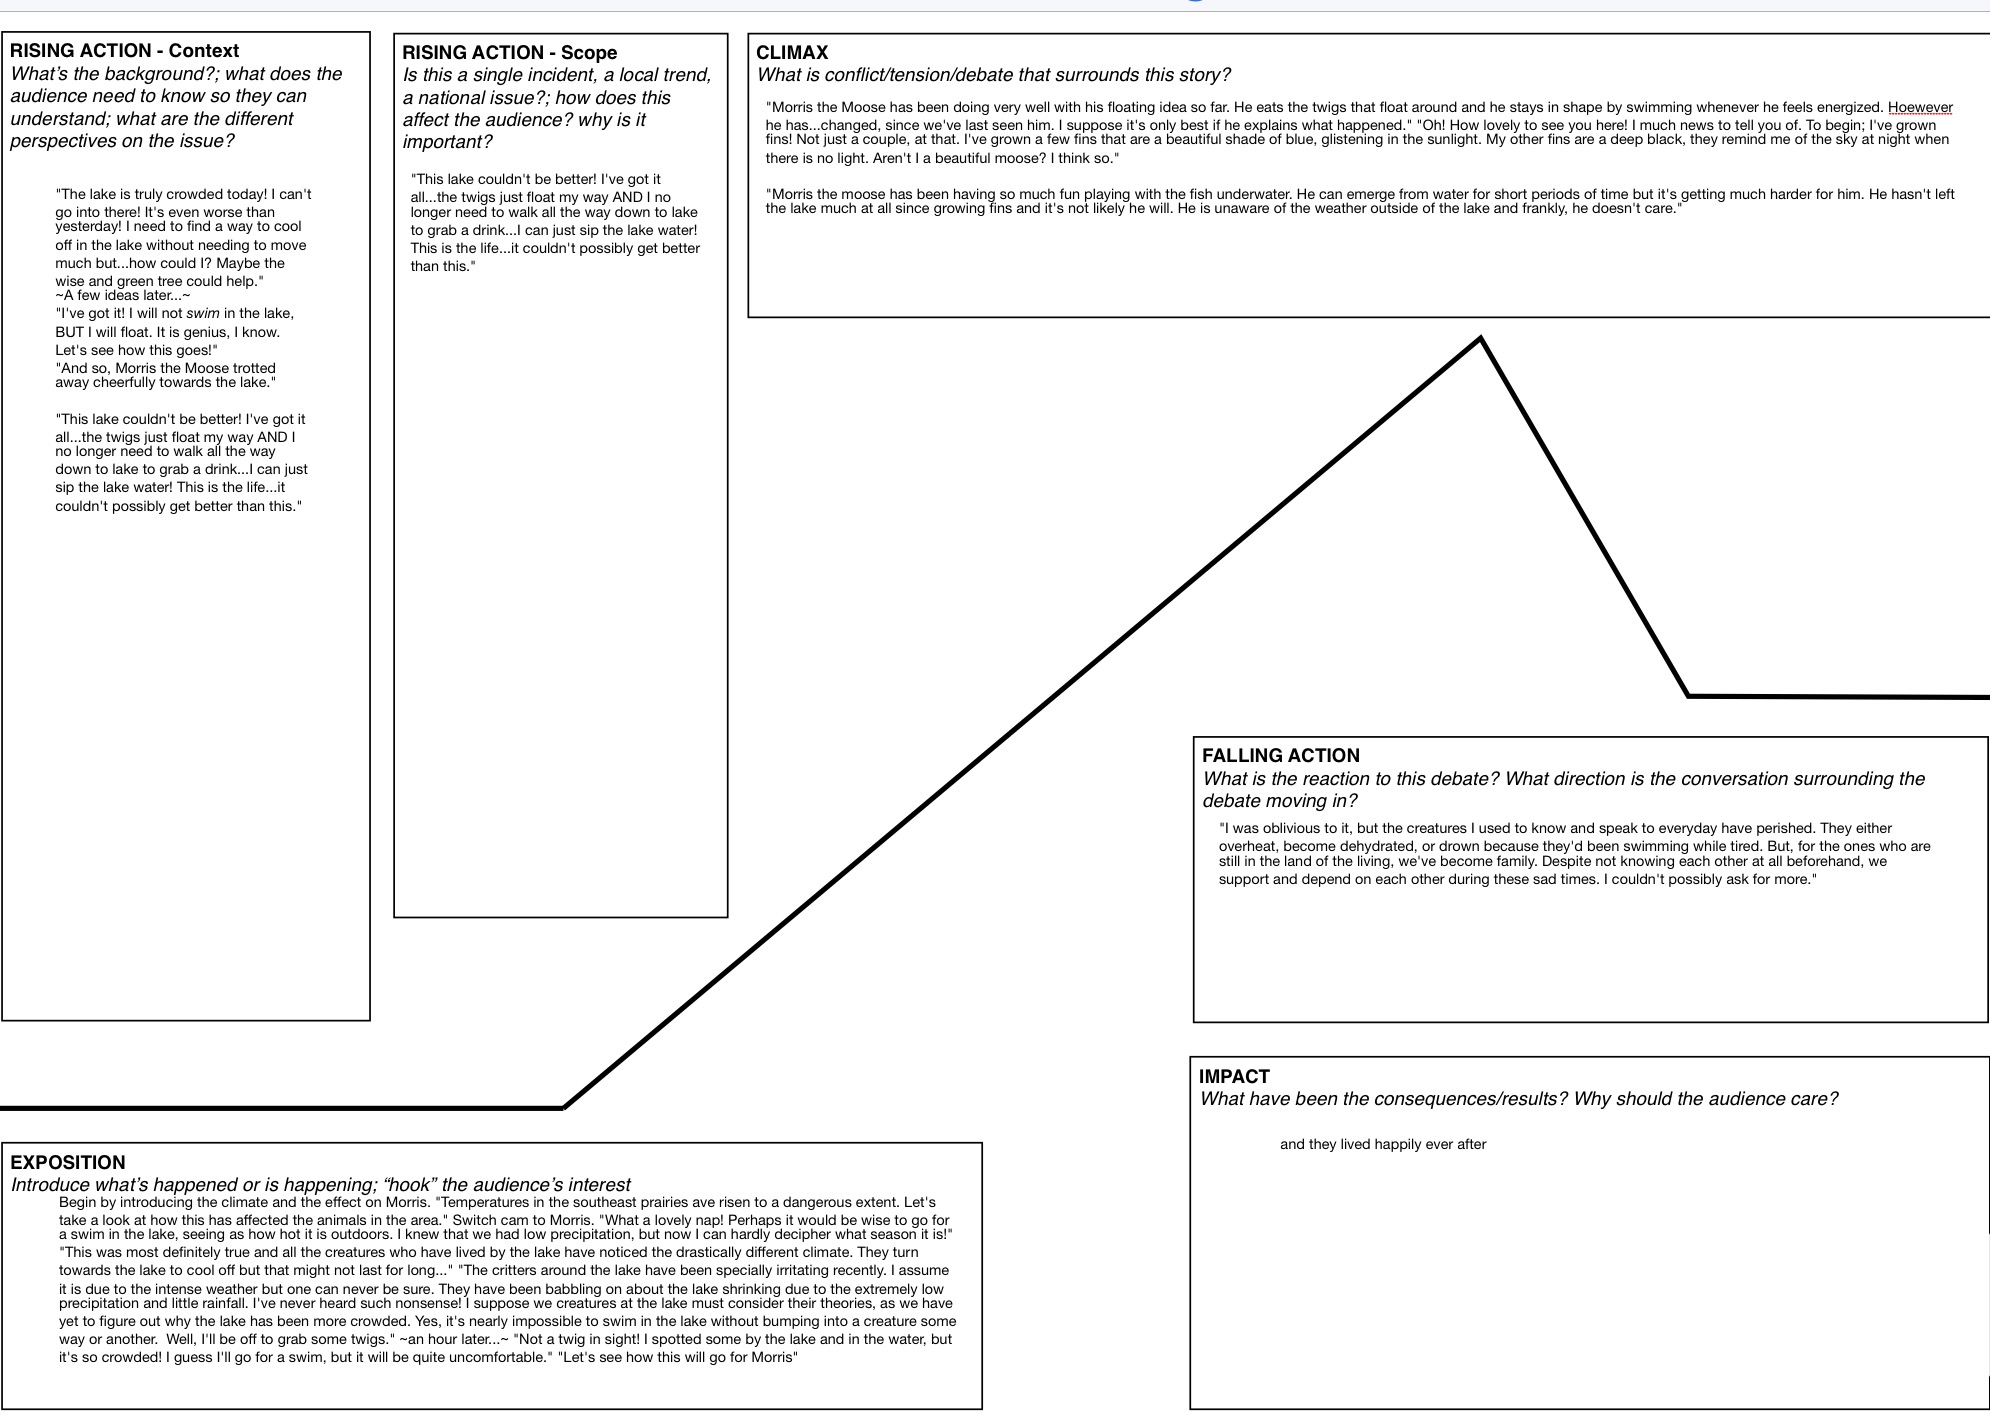
To give you a better understanding of the epistolary stories, it was basically entries we wrote about the whole story arc of our creature and its adaptation to this new change to its physiographic region. Meaning, the environment changed and so the animal had to change in order to adapt to it. We were first given a place with a certain climate around Canada and my group was assigned the Prairies. I chose to do the SouthEast Prairies and brainstormed what I could put into my story. Here’s a picture of the storyboard I came up with:

After making the storyboard for the epistolary story, it was time to get writing! We did drafts of our epistolary stories and after finishing them had our peers critique them, giving us feedback.

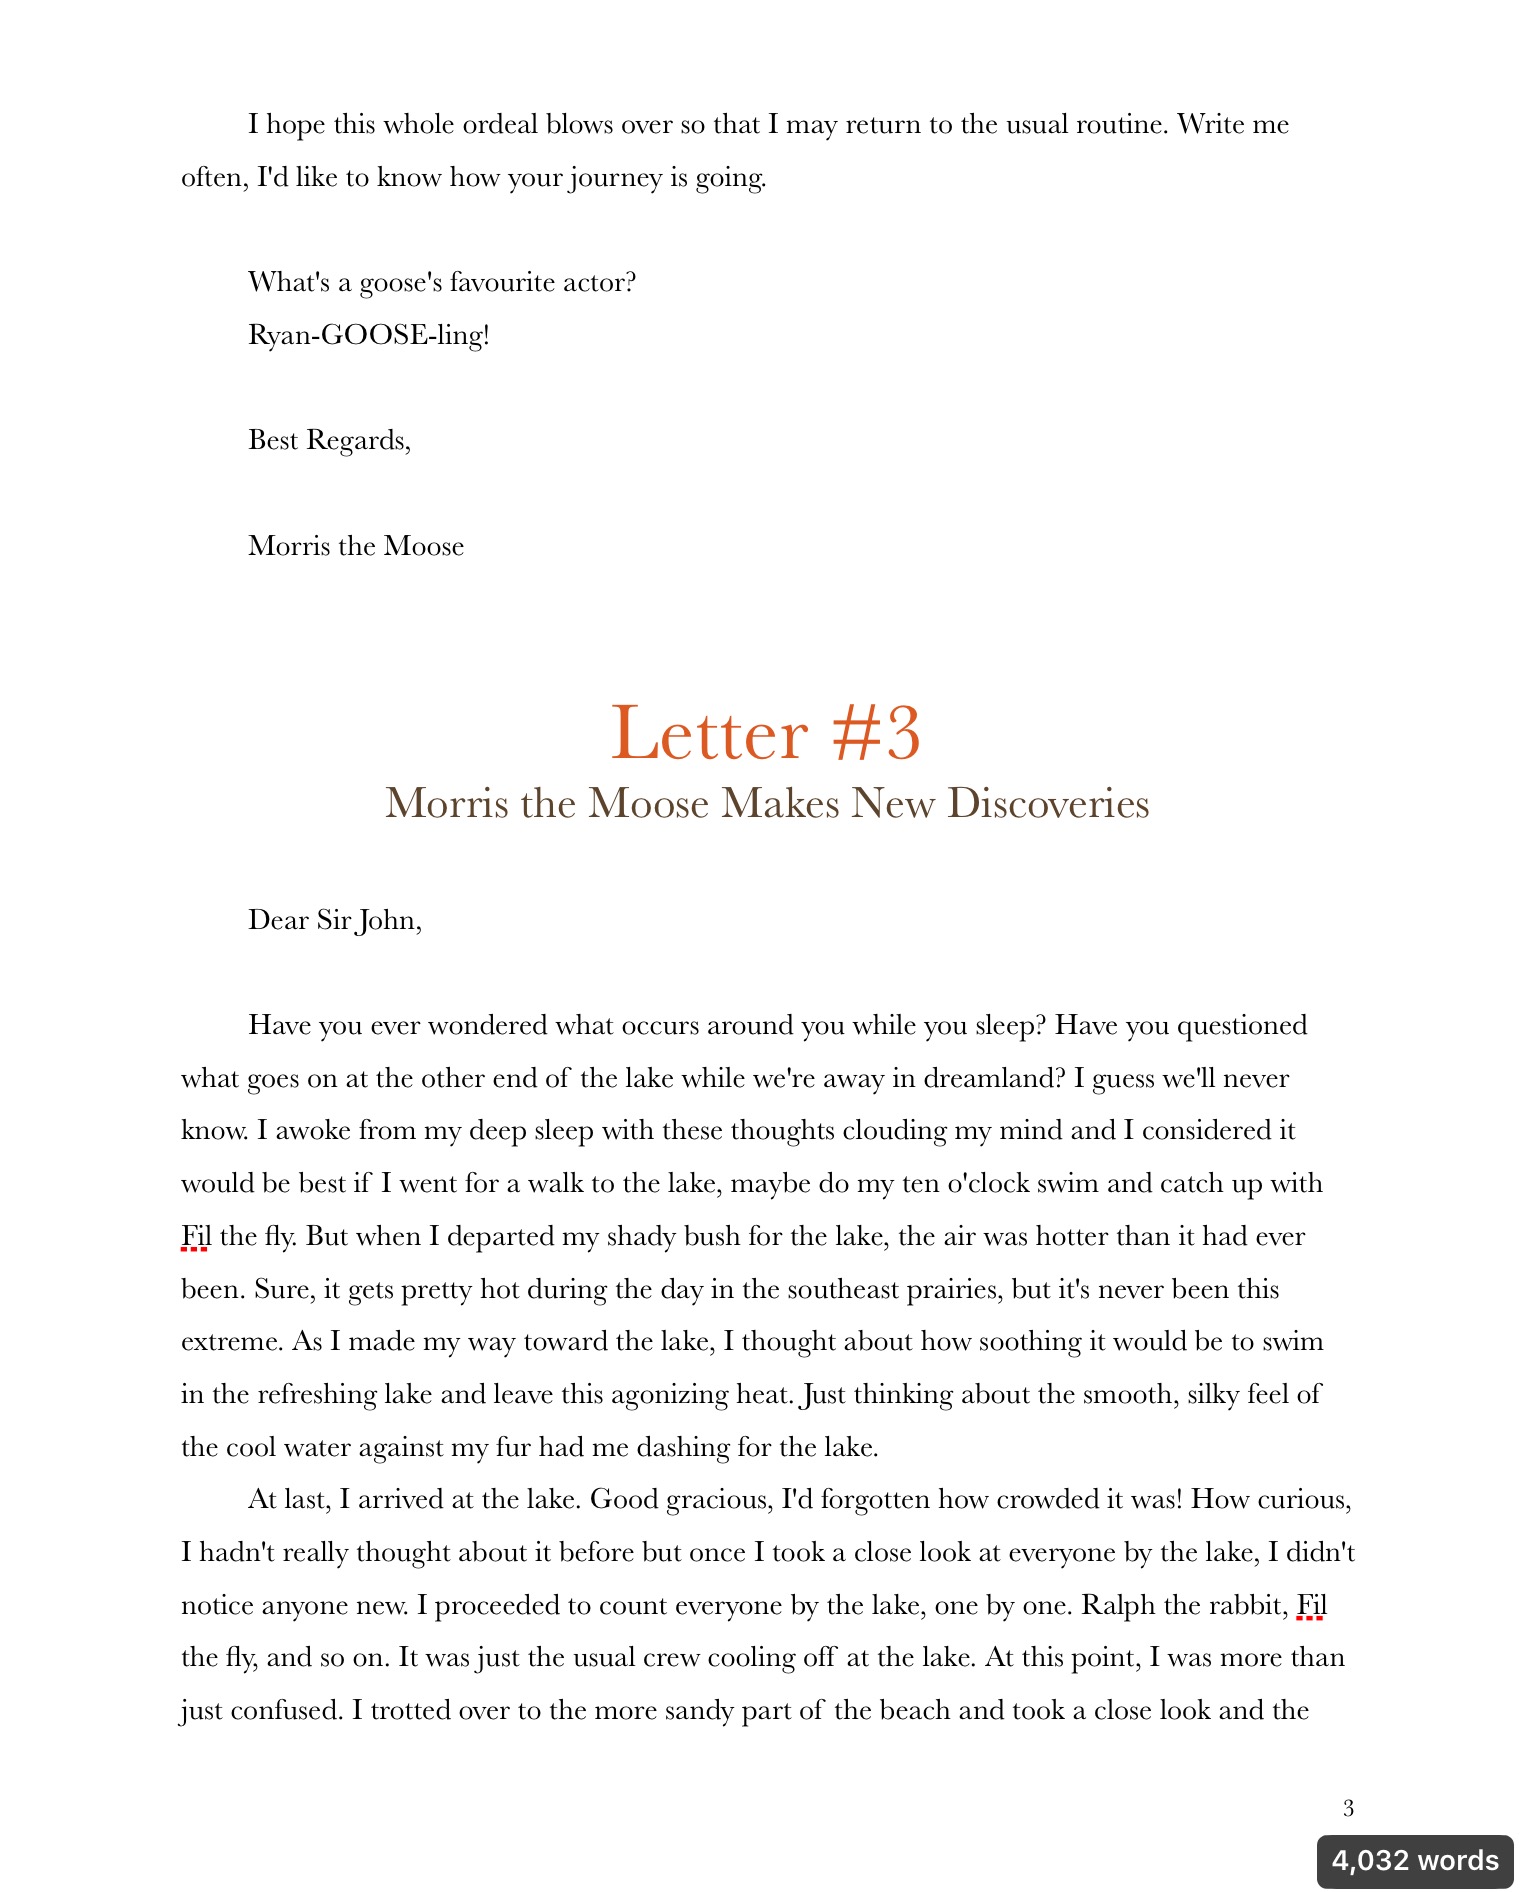
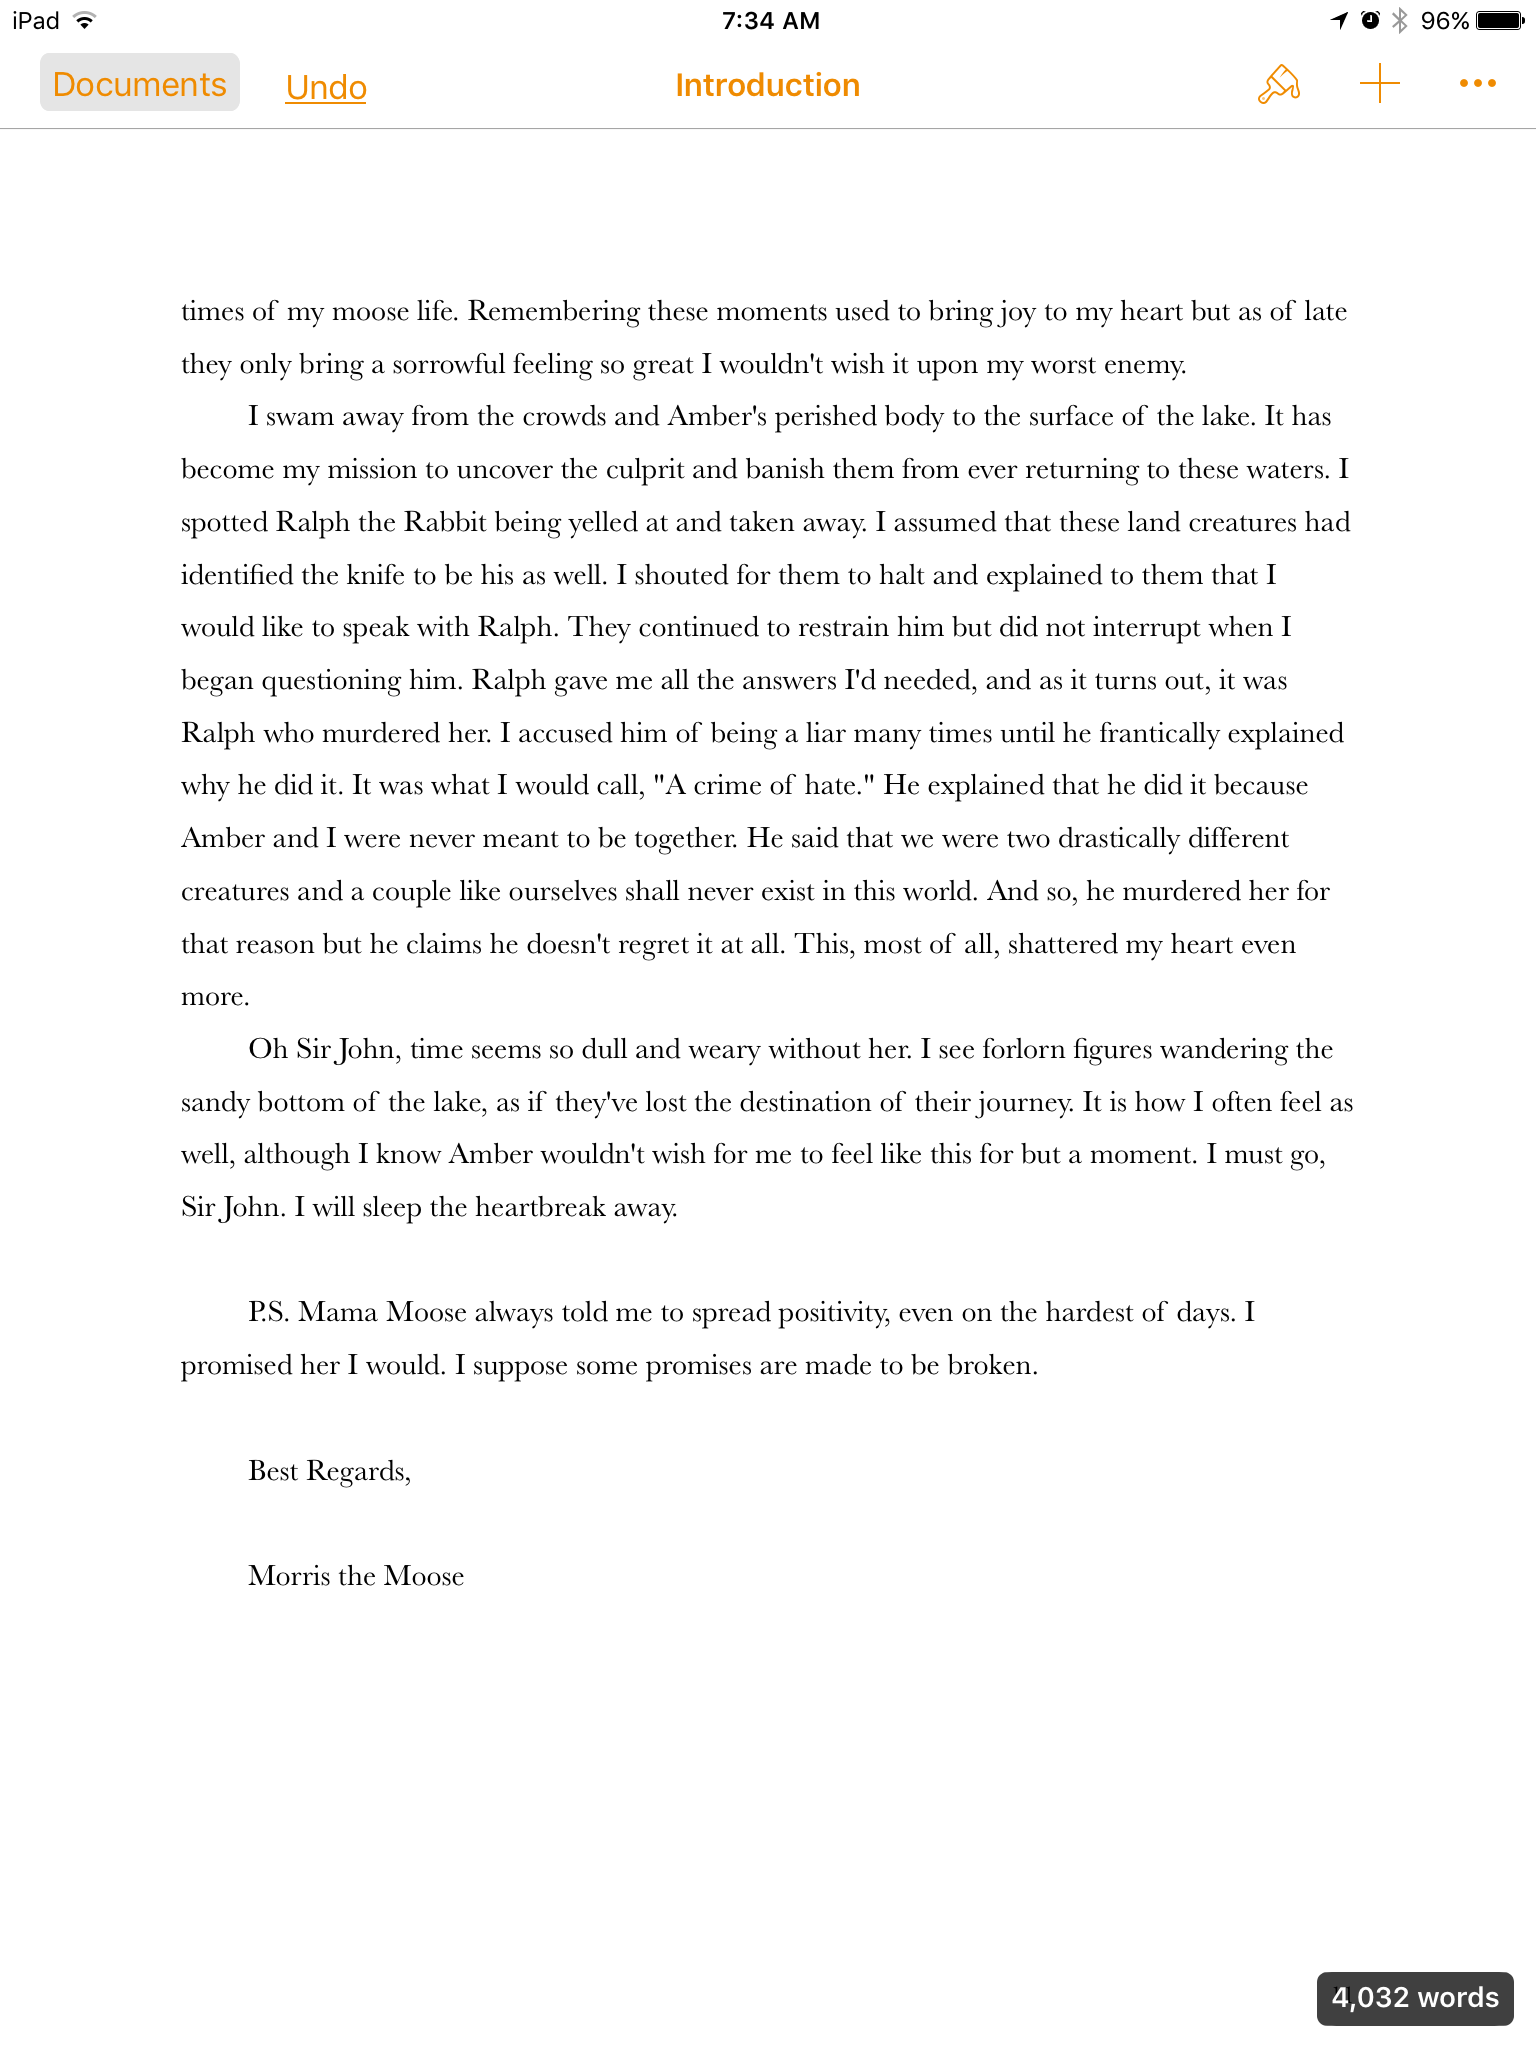
For my epistolary story, I wrote it in a way that Morris the Moose would be writing letters to a friend who’d gone traveling. I went for an older style of writing and was inspired by the language and expressions included in the letters sent in the time period during WW2. I got my inspiration from the letters on this website and found it to be quite easy to adapt to that writing style. Here’s my final epistolary story:

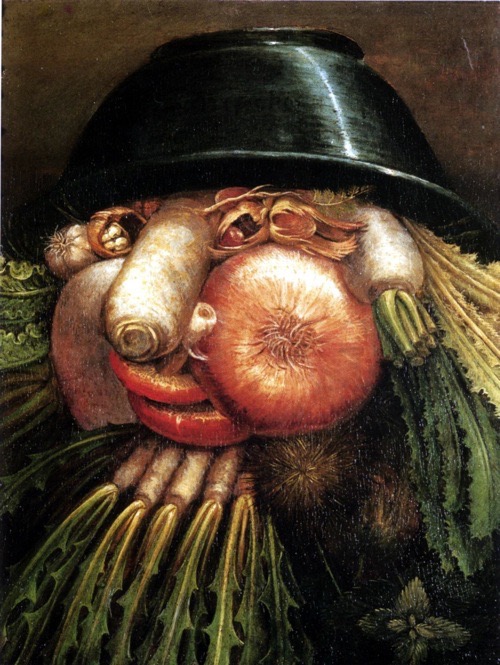
If you read my epistolary story that i’m so proud of, you’ll notice the antagonist. This was a monster we made as a part of a math project and it was really fun to put together.

The final part of this project was the video. Our videos were based off of our epistolary story but we were allowed to change a few things. Here’s a picture of the storyboard for my video:

In the end, I didn’t include the antagonist because I just thought it would be a simpler and easier to comprehend if there weren’t any complications with the characters. In its place, I took the environment struggles to a new level and they went on for a long time. Here’s my video:

https://youtu.be/1FRejfJZvdg

Snow White’s ~spooky~ Adventures

Greetings and welcome back to my lovely blog. Today I’ll be sharing with you a tale about the most recent project in the flight 9 class, Making Fantasy Real! This project was integrated with the trip to Florida and much to my dismay, I was unable to accompany the flight kids but I’m sure they missed me a lot. Instead, I was blessed with a loving fever and nasty cold right after that. You can bet everyone in Florida envied me for my sickness while they were on rides at Disney. I have the best of luck. Incase you’d be interested in reading about the Florida trip, you can visit some of friend’s blogs by clicking here to look into that. I’m not sure why you would rather read about the fun rides and amazing weather over me describing mucus and vomit, but you do you.
To give you a short summary of this project, each of us were to choose a ride at Disney World to base our projects around. My video is about Snow White’s Scary Adventures, a ride that used to be a part of Disney world but got replaced.

Snow White’s Scary Adventures Disney World

Because I wasn’t able to attend the field trip, I didn’t really include any interviews. I included lots of clips from the original movie so that I could keep the audience engaged. Our teacher mentioned something about sending the videos to some really big Disney fans, so I included a few deleted scenes from the original movie. Try and spot them!


I Eat Lots of Chicken…

🎶it’s that time again🎶
what time, you ask?
🎶blog time🎶
Flight 9 in PLP is back at it again with the great projects. This time it’s a pretty interesting one so let’s get right into it. We wanted to start off health & career with a BANG and so, we are doing the ‘You Are What You Eat!’ project. With the inspiration of the artist, “Giuseppe Arcimboldo” from Italy, we are filling a self portrait of ours with the different foods we eat in hopes of learning about maintaining a healthy diet and about the challenges to food supply in the future.

Vegetables in a Bowl (The Gardener)

I’ve made a short video that shows the process I used and I think that it would’ve been a lot easier to do this project by beginning with a silhouette but I guess it worked out in the end. In the video, you can watch as I change certain things throughout the project and that’s just because explain everything has a way of layering the different photos so it’s a little difficult to get it just the way I wanted. Midway through the portrait, Explain Everything would keep on crashing whenever I brought in a new photo but not all was lost! I simply saved the video I already made and created a new document with the video inserted. I used quite a few different apps to make this project including Snapseed, iMovie, Explain Everything, Eraser, and Documents. This project was really fun once I got the hang of it and it was really awesome to see what monstrosity I’d created with a few peppers and some raw chicken.
Now, behold my video so good you’ll never want to stop watching…

New Year New Me

Welcome to my very first blog post of 2017! I sometimes look back at my older posts and just cringe. A lot. I think that says quite a bit about how I learned about how blog posts can be different from a regular write up that you make for your teacher. I’ve learned to add links to certain things which make writing these so much easier because I don’t have to do a lot of explaining. I’ve learned how to add gifs which add humour and they make my blog posts more enjoyable for people to read. These posts have also gotten more entertaining to write just because I can make these and have my writing reflect my personality by using humour, sarcasm and many puns. 

A little while ago in the flight 9 class, we did a project called “The Harry Potter Project” This was another Blue Sky project where we had to come up with an inquiry question related to Harry Potter that we could answer with our project. Myquestion was, *drumroll* “How can I recreate the Marauder’s Map to work at Seycove?” This question was inspired by an 11th grader named Chloe on a presentation night when I realized that the two previous questions I came up with sucked. After I had seen that my question had been approved, I began to worry a little bit about what I was going to do to answer this question. I don’t know a thing about coding and I’m just bad in general with technology. So, I spoke to ms Willemse and found out that in order for this project to work, I’d need to use beacons and place them around the school in the chosen areas and they’d send an alert to people’s iPhone as long as they’d already installed the app called “Locly“. Within this app, I made a Treasure Hunt. I first had a google docs document where I put in all the places that I thought had a deep meaning or that was a big part of Seycove. I researched and took pictures of these places that I would later insert into my treasure hunt. I made an account within the locly website and I got to know it a little by exploring the site. I then came across some really helpful tutorial videos for the locly app. These taught me how to put together the treasure hunt and how to bring in other apps. At times this could be very frustrating because I would want to make something one way but the app wouldn’t let me or nothing was explained about it in the tutorial videos. Other than that, this project was pretty fun to make and I loved making the clues for the treasure hunt. You won’t guess what I brought in for the treasure, peppermint candy canes! They were so cute and small and I was obsessed with them! Unfortunately, there wasn’t any treasure hunt because I couldn’t get my peppermint hands on the beacons but not to worry! I served them as our group’s food at the exhibition night and it went really well.
Now, for what you’ve all been waiting for, the clues! My first clue had been placed in ________ and I put it there because sports are a huge part of seycove. The second clue was an animated scratch kinda thing, like where you buy a 1 million dollar lottery ticket and you scratch to reveal whether you’ve lost or you’ve lost. This clue reveals a clue leading to the ___ room because so much incredible learning happens in that very room. The next clue was a trivia! The answer to this quiz was _____, because that’s what I brought in! And finally, you are told to head to a big pile of _____. 
As I explained before, I brought in a few more apps outside of Locly. The one I probably spent the most time and effort on was Paper by 53. This app allows you to draw just about anything and it’s very easy to use once you get the hang of it. I used this app to draw a clue for the treasure hunt and to draw the “I solemnly swear that I am up to no good” art and I used it to draw “Mischief managed” art. All of these took quite a bit of time to do. Now, I’m not the best at art and Ms Willemse and Mr Hughes could tell you that so when I found out that I had to do shading, I froze in fear and despair. It didn’t end up being too bad though, right? I think I deserve an A for effort in that piece because out of almost everything, I think that the shading was probably the most difficult part of this project. It took a lot of valuable time and had me fuming the whole way through. I guess that in the end my hard work shows but the thing is, it doesn’t. Because long ago, in a land far, far away, my dad jammed the printer. And so now, my project pays the price.
Another app I used as part of the treasure hunt is Bookry. This app allows me to make fun interactive clues to put in my treasure hunt. It allowed me to bring in photos and use them for the clues with some animation added on to the discovery of the clue. Once again, there was no coding that was required to make any of these animations.
In summary, this project had its ups and downs but it was all around a fun project to make. I loved how my poster board turned out and I loved how the clues worked. At the beginning, I was worried that the project wouldn’t work out but I was happy in the end when it all came together. 
Here’s a picture of my poster board:

I’m Batman

Hey there my dood how you doing? In science we’ve been working really hard on our newest project, the Super Hero project. We were put into groups of 4 or 5 in a mix of girls and boys.  In order to do this group project we need to know a thing or two about the Periodic table so that’s more of what we’ve been studying. We also made a big poster of the periodic table which includes all the groups, elements, atomic number, charge, symbol, names, and so on. We’ve done a few worksheets and notes which included information and activities to help us learn about elements, atoms, and the periodic table. My group has all been working on a 3D model of the atom of our choice.  The model we’re all making is based on the Bohr version of the atom and we chose to make a model of the Phosphorus atom. We were given some class time to work on the atoms and it wasn’t very difficult to make the base of the model. We used thick wire, white styrofoam balls, and a little bit of clay for the base. We began making it by using a bigger styrofoam ball in the centre to act as the nucleus. On the next shell (the one closest to the nucleus), we placed two small styrofoam balls to represent the electrons. We placed eight more on the next election shell and seven more electrons on the valence shell (the shell that holds the electrons the farthest away from the nucleus). Once we were all finished the layout I twisted the wires together so that they’d stay and Claire and I hot glued everything together so that everything would stay put and wouldn’t fall apart. We did such a great job one could say we make a MARVELous pair. Me, being the clumsy person I am, hot glued my thumb and because the glue was so hot I immediately ripped the glue from my skin…bad idea. My thumb had many layers of skin torn from it and I had no idea what to do so I put on a band-aid and hoped for the best. Tomorrow, my group plans to do some decorating to the atoms but I don’t think I’ll be allowed to touch the glue gun at all…

Well that’s all and I know that you’re just FURYous that this is over but don’t worry there’ll be a WHOLE LOT MORE to come in the near future! And for my thoughts on this project, I’ve Loki got to say that I THORoughly enjoyed it and I hope my teacher will assign us more like this in the future.