Mar
2017
Scimathics
I haven’t blogged about scimathics on my learning portfolio yet, so why now you may ask. Well we’ve been doing a lot of cool things in science and math and I figured it was time I told you about them. Also we were told to, but that’s not the point!
What is scimathics?
Scimathics is a combination of science and math. It is taught by Ms Klauses. She calls us her lambs/plamps/little lammies.We have scimathics every day because it is two blocks combined into one. I explain how this works more in my Day one Day two blog post.
 At the start of the school year in scimathics we (PLP 8) were introduced to The rightness of being wrong. In September I wasn’t completely used to the idea that being wrong can be right but as the year carried on I became more comfortable with it. Now that I’m so comfortable with the idea of the rightness of being wrong when I’m in my other classes I am less stressed. This doesn’t mean that I put less effort into my work, just that if I fail or get something wrong, I don’t get as disappointed and I know that I can learn from my mistakes. This also ties into growth mindset and fixed mindset and learning from your mistakes.
What have we done this year?
Lemme/Llama
Our lemme project, or as Ms Klausen called it, our llama project was mostly  about the Pythagorean theorem. We learned about the spiral of theodorus. We started out outside where she challenged us to first make a triangle using only three cubes. She then challenged us to create a curved line using straight lines, on a piece of paper. Then we were challenged to do the same thing, only this time we had to add right angles. I didn’t figure out how to make a curved line with right angles, but once she showed us the spiral of theodorus, I understood.
My door is a bore no more
for this project we got into groups of three and had to increase the surface area of a door by three fold. Even though we were in separate groups, we had to work together with the other groups to make sure that when we were done, the total surface area of the door was increased by three fold. To increase the surface area, we built 3D shapes out of paper and taped them to the door. Before this project we were working with surface area and volume, so we knew how to calculate surface area. At the end we wrote an engineering report on it.
Minecraft earthquake proof project


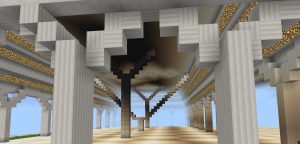
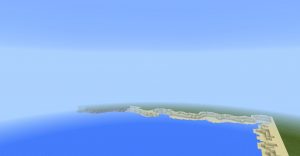
 For this project we made an earthquake proof structure using Minecraft. We were in groups of two. Our main objective was to add earthquake proofing features to a 100×100 building. We had to choose an earthquake prone region of the globe and base our architecture off of the kind of buildings they have in that certain area. Tamara and I chose Ancient Greek/Rome. We painfully placed all 10 000 blocks down for the floor, 968 blocks for the pillars, all 429 blocks for the arches, 10 100 blocks for the roof and 260 blocks for the Y beams. If you think that was a lot, there was also the HUGE amount of blocks we had to destroy for the ocean that for some reason we decided to build, (it was actually so our landscape looked more like Ancient Greece). You know, that and the fact that we had to redo our structure about 6 times due to complications with running into mountains, rivers and TNT exploding too close to our building (that may or may not have been my fault). We made half of the building the same as how they were originally built, and added earthquake proofing features to the other half. Once we were done, we made a video explaining how our earthquake proofing features work.
These are all of the main projects that we have done so far. I will continually update this post as we learn more.
Trish
March 25, 2017 at 5:38 am (8 years ago)Wow, those scimathic projects are fascinating. Mind you, living in NV, you could work on a modern Noah’s arc☔️ rather than earthquakes. I like the idea of wrong being right……Trump would like that concept too. I think your teacher’s nicknames for her students are charming.