We’re All In This Together
“It broke on the way to school”
Yeah. Great timing. Fabulous. JUST BREAK THE DAY OF THE EXHIBITION WHY DON’T YOU.
That is the true sound of a Blue Sky mood. A June mood in the PLP students lives. Fiery tempers and looping ridiculous music to keep your insane brain cells in place.
It’s Blue Sky again—
Remember last year?
June?
A time of hysteria and chaos and anger and sleepless nights and its all to show our creative skills off to the people of the Deep Cove community.
And we do it with style.
For those who don’t know:
Blue Sky is a project we do in PLP where we create a product solution to a problem. For example, last year, my project was an immunization kit to help people with needle anxiety when they need to get their immunizations.
This year however, I am quite a bit more proud of my Blue Sky Project.
Before The Project—
My project this year was based around the theme of outdoors. Or at least that’s the theme I chose. We chose from different “departments”. We had choices such as (but not limited to);
-Outdoors
-Bedroom
-Bathroom
-Pharmacy
-Pets
-Kitchen
-Stationary
I was on edge choosing between bedroom and outdoors. I went with outdoors in the end because the departments could only have 3 people in them and bedroom was full.
Before we started working on our project, we looked at something called the “Launch Cycle”. This would be our guidelines for our creative process.
L-isten, look, learn
A-sk questions
U-understand
N-avigate
C-reate a prototype
H-ighlight
We followed this plan for the most part. Creating three (or more) prototypes and making mistakes along the way. Doing our research and becoming experts in our field.
My Project—
The weekend we had to come up with our blue sky ideas, I went camping. Really useful when your theme is outdoors and you’re spending your weekend outdoors.
While I was camping, I was trying to come up with an idea of something I could do for Blue Sky. And while we were setting up our tent, my foot asleep from being bent at an annoying angle for a while, my arms sore, from driving in tent pegs, the idea came to me.
I was going to build a self-driving tent peg.
Approval—
As per our usual exhibition “rituals”, our project has to be approved before we can actually start on it. Luckily for me, one again, my project was approved first try, with a few tweaks. All good! Lets get this project on the move.
Requirements and Documenting—
One of the things you learn in PLP is that you should always document your work. Be organized. Be amazing. Make the blog posts SHINE.
And so that’s what we do.
However sometimes we forget, and then we regret.
This year, I documented the creation of every physical aspect of my project. Which is good, I was determined to do it right this time.
But.
One of the things we were recommended to do, was record an interview with a professional in your subject.
Now I did the interview. I was very proud of myself, go me! I made a phone call (it was terrifying) to MEC and asked if I could come in the next day to talk to someone. They asked my name, and I told them, then we organized a time and went on with our lives.
I went in the next day and did the interview, taking notes along the way.
Taking notes.
I didn’t film it.
Now that would be fine, if I hadn’t forgotten to do it the second time too. But there was still hope, as I remembered many things that the people I interviewed said.
Prototype One—
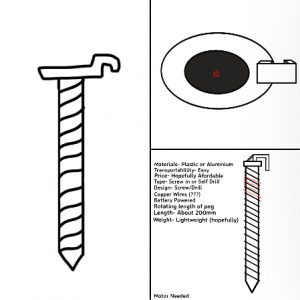
My plan was to make a self driving tent peg. So for my first prototype, I designed it.
The designs looked like this:
A motorized tent peg. Genius.
Except that it wasn’t.
So the plan was to make a tent peg that would drill itself into the ground with the touch of a button.
Good thinking, bad planning.
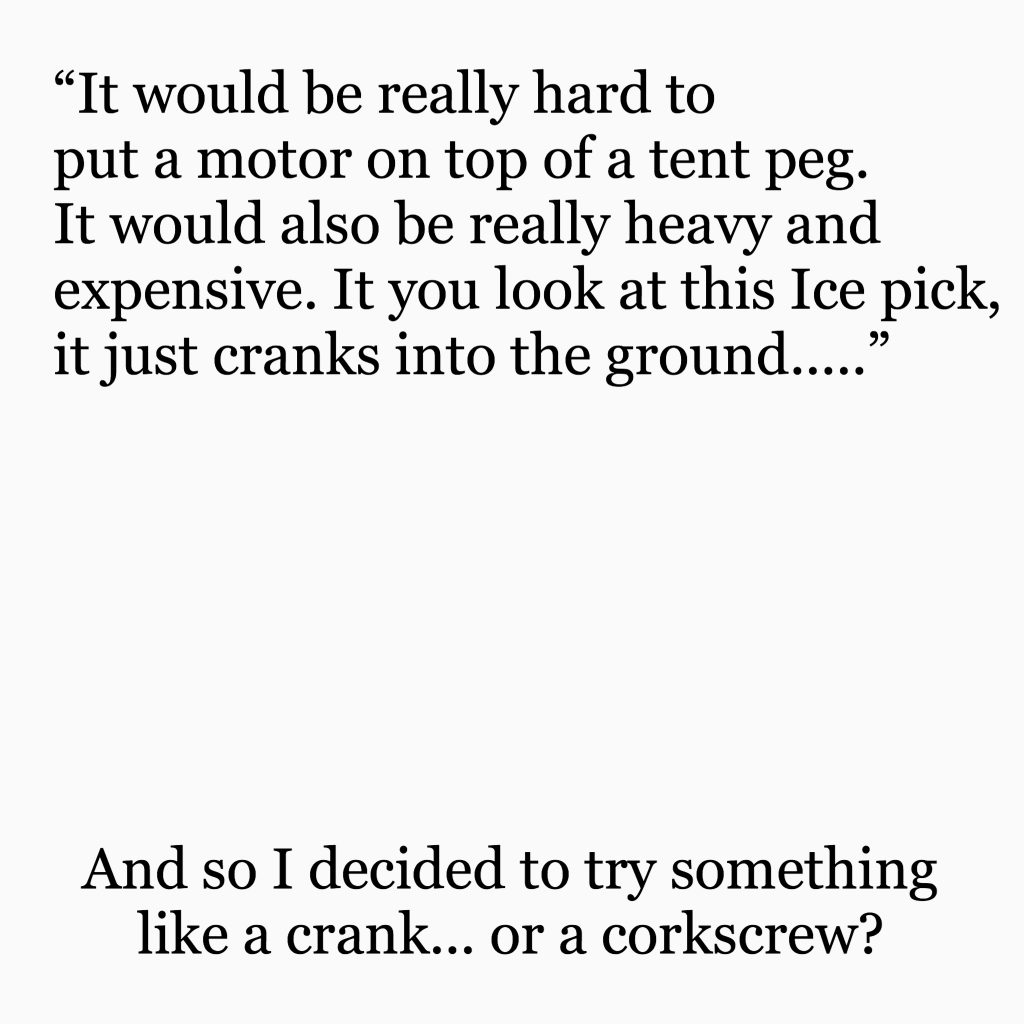
I went to MEC to ask about my prototype with Melanie and Emily. They guy there said the following:
So it was back to the planning board.
Prototype Two—
I sketched out my plan two, and then I made it out of clay. That was my prototype two. Pretty fabulous right??
These are the “blueprints” I planned the prototype with
And this is me making it:
Now after making the model and planning it out, it was time for prototype three.
Prototype Three—
Step One- Get the Materials.
For this, I took a trip to Rona, and got some supplies;
Step Two- Build
Pretty easy right? Except it wasn’t. Now if I had thought this properly through, I would have saved more time for the creation of prototype three, and gone to saunter the pieces of my prototype together. But I didn’t, I glued it. And that took a LOT of time and a bunch of re-dos.
This is me creating my final prototype(s):
I actually made two prototype threes, two different designs of the same product. One worked better then the other though, so it was worth the effort of making two separate products in the end.
The Exhibition Plan—
When it comes to the exhibition, there’s only one thing that matters more then your project. Your presentation.
The checklist is something like this;
Most people make a video, a poster and bring their prototypes with them for presentation. Or at least, that’s what I did.
This was me making my poster:
Decor—
When the week of the exhibition rolls around, it becomes plan-and-do week. It’s project shark week.
We work in our groups with whom we present alongside to get our presenting space ready and exciting for the people of the earth.
For my groups decor, we built a little community, as we were presenting around the idea of making a good community.
We decided that each presenter station would be a shop of some sort. We had the Newspaper Stand, Transit Office, Community Garden, and Outdoor Equipment Company.
Each shop was shown by signs on their post saying what shop they are and what they are selling.
This is me making my sign:
The Exhibition—
The one and only light of horrors. Forget Halloween, the scariest thing in the world is parents.
Not really. Maybe kinda.
It’s set up for hours and present for an hour or so and then take down with the speed of over-exhausted children and their equally exhausted teachers.
My set up looked like this:
And our room itself looked like this:
Everything went really well. Everyone looked pretty great, there was interest in projects and, there was some pretty nice food.
What I’m Proud Of—
The thing I am most proud of about this exhibition was my presenting. While I am in fact very happy with how my prototypes turned out, the thing I was most proud of way my presentation.
For me, I’ve had to work really hard to come out of my shell this year and get better at talking to people, publicly and normally.
And as I said in my tPol post, I think I’ve made some real progress. And I said that before the exhibition. I don’t think I’ve ever slipped into a “I know what I’m talking about lets do this” personality for presenting so easily in my life. The first few presentations were me trying to figure out my script a bit, but after the first two or three, I had it down packed.
I was and am happy with the way I presented, including my information on the topic and the story of how I chose my project.
What I Would Change—
I wasn’t a fan of my poster decorating skills.
But that’s a very minor thing I would have changed.
One of the more major things was testing my prototypes.
After making my (workable) prototypes, I think it would have been nice if I had saved more time for testing and adjustments. Something to keep in mind for next year.
Another thing I would have changed would be my tools to make the third prototypes. Now, most of the stuff I used was good, but my method of sticking it all together was not nearly as good.
If there’s ONE thing I would have changed, it would have been to saunter the pieces together so that my prototype doesn’t BREAK the day of the exhibition.
Luckily I had two prototypes. Even if they were slightly different.
Conclusion—
For me this year, the exhibition was a success. I am really happy with my project and my presentation.
Thanks for reading about this exhibition! Byeeee


