My First Film!

In the latest PLP 9 Project, I created a 6 minute documentary about nuclear power to answer the driving question: “How can I engage and entertain an audience using my video and storytelling skills”. This blog post will cover my journey making the final film.

The first activity in this project was recording an interview. We were put into groups and had to create a short video about a chosen topic, using interviews. In this activity, we learned how to shoot interviews, which would come in handy in the final documentary.

Interview Video

After this exercise I started thinking about what my documentary could be about. Some of my ideas included nuclear power, rubiks cubes, or parkour. In the end, I chose to make it about nuclear power because I thought I could make a clearer message about this topic. I did end up regretting this though, because it is very hard to get b-roll of nuclear reactors.

Then, the next step was to write a screenplay for my film.

As it turns out writing a screenplay for a documentary is quite difficult, but I managed to get it done. I also made a treatment and logline in my documentary planning DOCs.

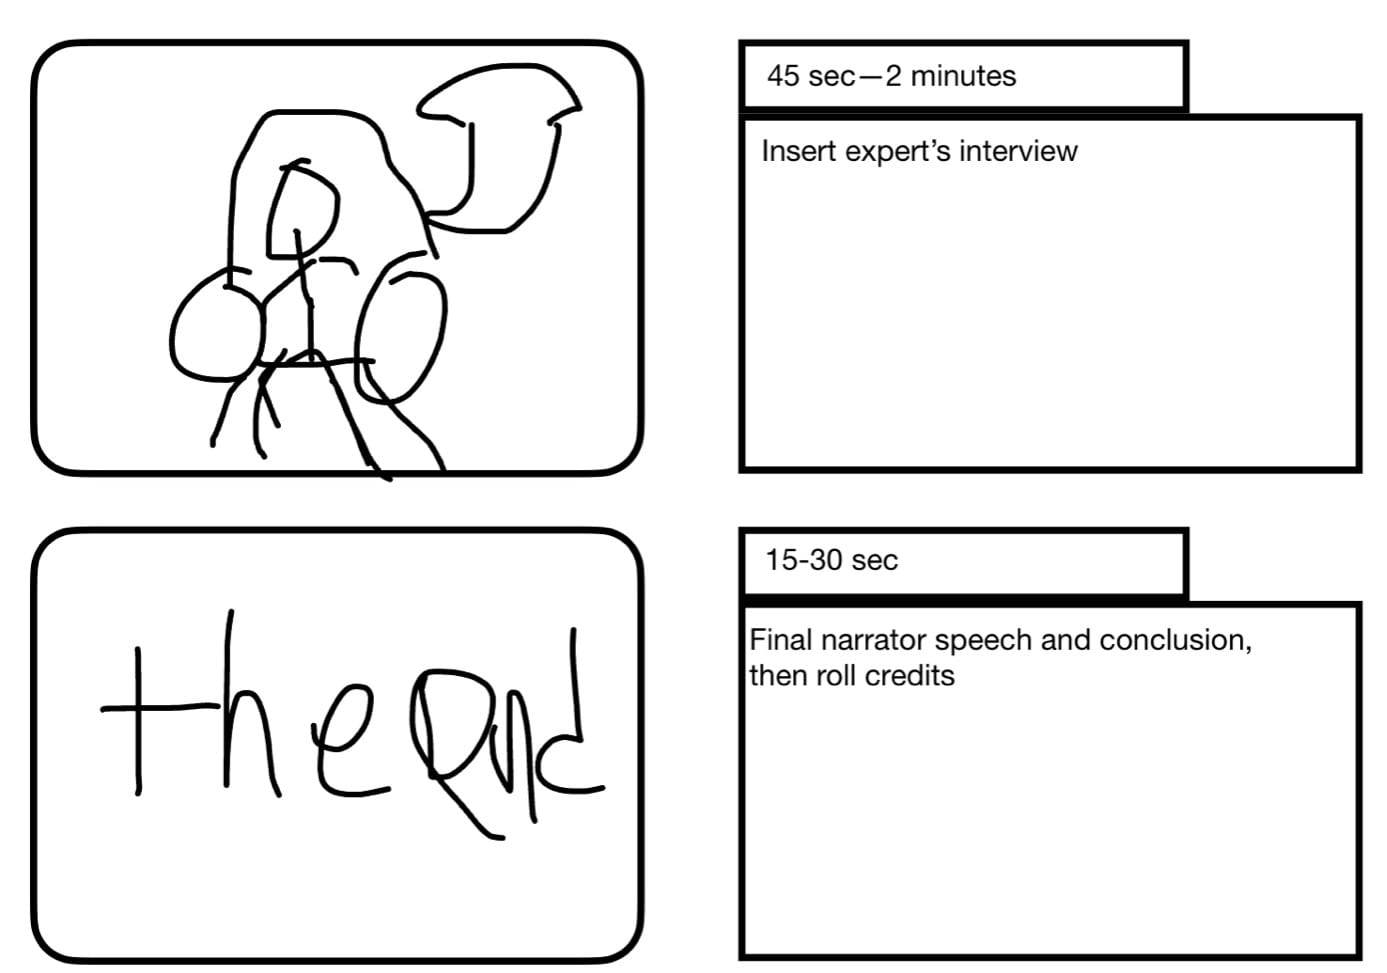
Now, it was time to create a storyboard. A storyboard is a plan that consists of images for each shot, a short description of each shot, and sometimes some other details. This is what I made:

Then, it was time to start filming. The first thing I did was create the collage of news articles at the start, then I contacted an expert on nuclear power, Robert Anderson, for an interview. I also needed two interviews from people who are less than experts, so I did those aswell.

Then, I edited my film. My film turned out to be longer than it was supposed to be (3-5 minutes), but I felt this was necessary to include all the interesting parts of the interview. The final documentary is below.,

Thanks for reading this post! This project was one of my favourites of the year, and I learned so many new filmmaking skills that I can use to engage and entertain my audience.

Sex Cells!

In the latest Scimatics project, I learned all about how cells reproduce through Meiosis and Mitosis, the intricacies of both, and how to show them, in order to answer the driving question: “How is the reproduction of cells essential to the survival of organisms?”. So, without further ado, here is the post.

At the start of this project, I created this mind map of what I know and what questions I have beginning the project.

Project Start Mind Map

The second milestone of this project was just completing three Tinkercad tutorials. Tinkercad is a free modeling software that we used to create 3D models of cells. Here are the final versions of my Models:

The fourth milestone was a khan academy quiz on what we learned, then it was time to create the final product, which was a narrated video that describes the process of mitosis and meiosis as well as some similarities and differences between them. Here is my final video:

Sex Cells

And, lastly, for the curricular competencies for this project.

Questioning and Predicting: Demonstrate a sustained intellectual curiosity about a scientific topic or problem of personal interest

All class time is used efficiently for learning without distractions

I think that for this project, I could’ve used my time better, because I usually worked on humanities work instead of the important scimatics work.

Planning and conducting: Collaboratively and individually plan, select, and use appropriate investigation methods, including field work and lab experiments, to collect reliable data (qualitative and quantitative)

Microscope slides of plant tissues from clones were prepared and used for photographic evidence of mitosis.

My microscope slides include all the mitosis stages clearly.

Scientific Communication: Formulate physical or mental theoretical models to describe a phenomenon

A recorded video with voice narration explains the reasons for and processes of mitosis and meiosis with accurate 3D models and Photographs. Similarities and differences are also described.

My narrated video shows accurate 3D models and the Mitosis slides, as well as clear voiceover that describes advantages and disadvantages of both types of reproduction.

Overall, I think that my final products fro this project were good, but I didn’t use my time to the fullest and some assignments were late because of it.

My Vibrant Videos!

Hello, Im Theryn Strobl, and I am excited to write to you about a recent maker project, and in my opinion, the best PLP project I have participated in. In this project, I learned lots of filmmaking history and techniques on my journey to learn more about the movies! So, without further ado, here is the post.

We began this project with some brainstorming, a small lecture n some history of filmmaking, and then we were assigned a video about a hobby or skill we have. Being an avid snowboarder, I chose to make my video about that. The video contained some posters, a beginning, middle, end, and music. It was edited in an app called Clips, which I personally think is a very bad software, especially in comparison to its free counterpart, iMovie. But nevertheless, here is my final video:

A Story About Me!

The next day, we moved onto skill #2: a silent movie. This movie was supposed to recreate an old black and white movie, with no sound (other than a soundtrack) and not to long, making use of a certain poster (it’s the old-timey looking one). I made mine about finding the last lego peice in my contraption, and I think I conveyed the story using the limited storytelling options quite well.

The Last Piece

The next product in our moviemaking journey was a tutorial video that teaches how to do something. In the end, most of them were goofy and taught a very basic skill, but they could still do their desired job, so thats a win. In my group were Dana and Brooke. So, for the first step, we got started on our storyboard, which went through many painful revisions until we got it approved.

Then, we filmed and edited our final video.

How To Tie Your Shoe

And then, for the last and most fun skill, we were put into groups of three, and givin around two hours to make a short “special effects sequence”. The goal of this was to use special effects to help tell our story. We had some preparation beforehand to figure out a story and plot, but everything else had to be finished in the allotted time. This was also in a small group, and I was with Fraser and Nolan. So, we set to work designing a quick storyboard, and then got to filming. We filmed many takes, and got quite the blooper reel, but in the end, this was our film:

The All Great Magical iPad Heist

Then the entire class shared their videos in a mini film festival. An honourable mention of mine is this video:

Overall, this was probably one of my favourite PLP projects ever, and I actually enjoyed learning how to communicate using the medium of film, and creating truly vibrant video.

Thanks for reading my post! Make sure to stay tuned for the next one, I’ll see you later. Bye.

WW1 Can Be More Comical Than You Think!

In the latest PLP Humanities project, we learned about WW1, and what happened in it, after it, and before it. The Driving Question for this project was: “How might we use graphic novels to understand Canada’s involvement in WWI?”, and throughout this project I tried to answer it. So, without further ado, here is the post.

Five weeks ago as of writing this, we started this project by learning the causes and consequences of WW1.

Cause and Consequence Sheet

For the part of the Building Knowledge stage of this project, we read an amazing graphic novel called “World War One: The War To End All Wars”. We read this book slowly over the span of around two weeks, discussing the themes and images throughout the book.

After we finished the book, I wrote a reflection paragraph on the book, which can be seen below.

Graphic Novel Reflection

The book contained many interesting facts and information, but there is so much more to this war that one project cannot really include. So, since we cannot learn everything abut WW1, we had to pick a topic that we would like to learn about, and, eventually, make a mini comic book about.

Then we did some more learning and worksheets, then I started my final comic. I worked on it a ton, and finally finished it. Here it is:

And my answer to the driving question: we can use graphic novels to understand WW1, and many other significant events, by reading them! (Or making them).

Thanks for reading my post! This project was really fun, even though I didn’t have much time to work on it, and I hope to see more projects like this in the future. Anyways, this concludes the post, and I’ll see you in the next one.

Seven Habits of Mine

In the latest maker project, we covered the “The Seven Habits of Highly Effective People” by Sean Covey, which is a book about self improvement. In this post, I will explain what these habit are, how they effect me, and how they can help me be my most effective self. So, without further ado, here is the post.

We started off this project by learning what the seven habits are. If you don’t know anything about the seven habits, here are two videos that hep describe them very well: Part 1 Part 2. For every section of the seven habits (the private victory, the public victory, and renewal), we completed a choice board. A choice board is basically an activity that shows our understanding of that section, and it could be note, drawing, video, podcast, or many others. For my first choice board, I made this drawing:

The Private Victory

It represents someone in somewhere private, obviously happy about accomplishing something, but with no one around to notice.

For the public victory, I made another drawing of some one giving a public speech.

The Public Victory

A speech represents the public victory because at it’s heart, the public victory is about “the art of influencing”, and what better way to influence many people than a public speech! Many of the largest events are told by speeches around the world every day.

For the next, and final choice board, I created an animation:

Sharpen The Saw

This is an animation I made of a saw blade being sharpened. It represents learning and growing, and always striving to be better.

And with that, I started working on the final 3 products, one to represent each of these three competencies:

Communicating

Thinking

Personal & Social

For the first one, communicating, I created an Apple Music playlist of songs that show communication (or the lack of it).

The playlist is HERE

For thinking, I created a container that represents my brain, and for peace of mind, I can put a little note, or random thought inside so that I remember it or can get it out of my brain.

For the personal and social competency, I created a drawing of things that help my personal life, and my social life:

The pencil and the things logo show what I use to stay on top of things and less stressed out. The arrows are a symbol of synergy, and working with others to be my best self, and the book represents me learning and improving myself, to keep the upward spiral going.

Thanks for reading my post, and I’ll see you in the next one. Bye.

Destination Imagination: In Person

The latest project in the PLP 9 classroom was DI (Destination Imagination). As you may recall from last year, DI is a worldwide competition that students can participate in, and PLP participates every year. This year, I was put onto the scientific team, where our challenge was to create a performance where our characters get stuck in a micro world and have to use the help of a mysterious object to get out. So, without further ado, here is the post.

To start this project, you need to know some things first: my group members were Teva, Ava, Ariane, and Julian. If you want to read them, the full rule book for this challenge is here, and the general rules for DI are here. We had around three months of time from when we first started DI, and the tournament was on April 2nd. The project did go over spring break though. So now, with that out of the way, I can continue.

Stage 1: Recognize

We started off the project by deciding roles and responsibilities, and learning about each others strengths and weaknesses going into the challenge. This can help up work better as a team to conquer any challenges along the way.

Stage 2: Imagine

Then, we did a around 3.4 metric tons of brainstorming; any idea, from story, technical execution, mechanisms, the visual effect, anything.

After lots and lots of ideas, it was time for a crucial step in making the final product: planning. This involves choosing which ideas will make their way onwards, as well as deciding how and when they will get used. Then, we created a first draft of the script, which was revised many times.

Stages 3-4: Collaborate, Initiate, an Assess

Now, it was time to start creating our final props and presentation. The rest of the project was honing in and improving our presentation until it was perfect. (Although it wasn’t perfect by the time we finished). The Final Script is here.

Stage 5: Evaluate and Celebrate

And finally, it was time to present. All our work has led up to this. Our team went to St. George’s Senior for the final tournament, but our struggles didn’t end there. We forgot to bring a tablecloth, and that may not sound big, but thee tablecloth was going to help obscure a prop, and without it, our set change might not be very clear. But, 30 minutes before our presentation, we taped pieces of paper together to create one large sheet, and with everything prepared, all we could do is present.

And our presentation went great! Below is our groups reflection on what went well, and what went… not as well.

+ / – chart

Again, so much thanks to my DI team of Teva, Ava, Ariane, and Julian. Overall, I learned so much this year in DI, and am surprised that I liked it. See you in the next one, and thanks for reading.

P.S. this year DI had a special challenge where you decorate your car. Here is that:

P.P.S. We won first in the team challenge!

Rube Goldberg was a cool guy.

in the latest Scimatics project we created Rube Goldberg machines to represent the scientific method. The scientific method consists of 6 steps: observation, question, hypothesis, analysis, conclusion. So, without further ado, here is the post.

I wasn’t here for the first couple days of this project, but as always, we started off with a mind map of what we knew already and questions we had. The next step was to perform some experiments on electricity.

After this we did some workbooks and a khan academy quiz that helped me understand how electricity works in a circuit. Then, we created individual diagrams of what our Rube Goldberg machine could look like. Here is mine:

First draft blueprint

Then, my group of Colton, Cale, and Max got to work on our final blueprint, which is a scale drawing of our machine, a digital drawing, and circuit diagrams and calculations. We also built our machine. Here is the final video:

And the final circuit and machine diagrams:

Final blueprint
Circuit Diagram

And for the revised mind map containing all my new knowledge:

Now, for the curricular competencies:

Questioning and Predicting: Demonstrate a sustained intellectual curiosity about a scientific topic or problem of personal interest

All class time is used efficiently for learning without distractions

I think that I used all my class time very well this project, seeing as I was away for most of it and still learned so much and got everything done

Reasoning and Analyzing: Estimate reasonably

Final blueprint is complete and accurate. Contains grid scale. All measurements are labeled with a high degree of accuracy. All lines are easily distinguished

My team’s final blueprint does contain a grid scale, measurements, and is very accurate

Planning and conducting: Select and use appropriate equipment, including digital technologies, to systematically and accurately collect and record data

Hand built series and parallel circuits are used to good effect with efficiency in your metaphor machine. Accurate circuit diagrams are included in the final blueprint. Diagrams use proper symbols. Diagrams are neat and easy to understand. Measurements of current, voltage and resistance are included

There is one series circuit in our machine, the one that lights up the question mark, and all the circuits combine make one large parallel circuit. Their are accurate diagrams of alt eh electronics in our machine in the final blueprint, accompanied by voltage, current, and resistance measurements

Scientific Communication: Formulate physical or mental models to describe a phenomenon

A video is recorded of the complete operation of the machine and voice overs are added which explain the sequence of the scientific method as the machine progresses.

I think that our final video is emerging, because the voiceovers do not sync up, and they do not explain what is happening very well. Also, the video only utilizes one of four videos of the machine working, it much less immersive.

Thanks for reading my post! Once again, thanks to my group for helping me in this project! This project was probably my favourite Scimatics project this year, so I hope to see more like it in the future. See you in the next one.

Lord Selkirk and the Battle of the Seven Oaks

For the last six weeks, The PLP 9 Humanities class has been working on a project about nationalism. In this project, I learned about nationalism, the founding of Canada, and much more. So, without further ado, here is the post.

To kick off this project, I don’t know what we did, because I wasn’t there. But, on the first day I was there for this project, we started the current events presentations, which are daily presentations from students to small groups explaining in depth one current event. My current event took place on the last day we had them, so I had lots of time to prepare it. Here is mine:

We each had about five minutes to present our current event, and I easily filled mine. I am quite proud of how well the conversation flowed, and think I picked a good topic.

In the middle of this project, we went to loon lake, and dint work much on this project. But, the next thing I did was pick my topic from this list:

I could also pick a topic of my own after it was approved.

As you probably know from the title, I chose Lord Selkirk and the Battle of the Seven Oaks. Then, after that, I had to research my topic

On the next day, we found our groups of others that chose the same topic. The final product of this project is an instagram post that takes and teaches others about historical perspectives. The instagram post consists of three images and one 50-100 word caption. Here is my caption:

Lord Selkirk was a powerful historical figure who was present in the Battle of the Seven Oaks, which was fought between the Hudsons Bay Company (or HBC) which Selkirk recently inherited, and their rival, the Northwest Company (NWC). This war took place on the 19th of June in 1816, caused by the escalating tensions of the two companies, and lord Selkirk pushing it over with his new attempt to establish a colony at red river. The Métis didn’t like the prospect of the new colony threatening their ways, so after negotiations failed, the battle started

And here are my three images:

Then the last and final piece of work was an piece about my opinion on this topic:

And that concludes this project. This was an awesome project and I learned a ton about historical perspectives and public speaking.

Thanks for reading my post. See you in the next one (Hopefully).

Instagram post link here

Loon Lake Learning Advance

This year in PLP, the grades 8-9 went on the first feild study since covid, and on it, we went to loon lake: a vacation/research area with lodging and fun activities. We spent a total of four awesome days at the facility, and did things like shelter building, laser tag, archery, and more. So, without further ado, here is the post.

On the first day of the advance, we packed out bags and left for loon lake. Once we got there, we did a photo walk to observe the new place and find out some cool landmarks around there. After the photo walk, we did a scavenger hunt where we looked for little sign that marked important places, which was a fun way to learn the lay of the land.

Scavenging!

After the scavenger hunt, the long awaited moment came: we found Our cabins and who is in them. I got paired with Zach, Luca, Ben T, and Julian.

I was pretty happy with who was in my cabin, but I unfortunately got a cabin that is up on top of a hill that only contains five people, and is far away from all the action. This is unfortunate because I generally missed out on some stuff and it was also a pain to drop off or get something from my cabin.

After an amazing dinner (the chefs there are great) I (tried to) wound down with some not at all calm card games. And then went back to my cabin to sleep.

On the second day, we did shelter building for part of the day. this was a great way to practice some survival skills with friends, and I thoroughly enjoyed it. Also, every morning and every night, we would participate in advisory, which is like a check in with all the students to gauge how we are feeling. Here is my advisory group:

A Troupe Of Monkeys

On the third and final full day on the advance, we did some really fun stuff, bow tag and laser tag. for me, the first half of the day was spent working on DI and the other half was bow tag and laser tag! These two activities were immensely fun and were my highlight of the trip.

And finally, on the last day of the trip, we packed up, loaded the buses and played a large game of capture the flag! This was also super fun, and lasted about 2 hours. Then we headed home, concluding the trip.

Also, this whole time, I was writing a book that documented my time at loon lake, so check that out too:

Thanks for reading my post about the loon lake learning advance! stay tuned for more, bye.

MPOL post 2022

This year, I learned quite a bit, from what an exponent is to how I can make change in a community. In this post I will be showing evidence of my learning this year, and tell the stories of how I learned it.

Thank you for coming to my presentation of learning. I am the expert on my own learning. I am also responsible and accountable for my own learning. You can expect me to give an honest evaluation of my progress. We will discuss my strengths and opportunities for growth. Thank you in advance for listening and for offering feedback that I can use to improve as a learner.

One of my favourite projects this years was called “Game of exponent laws” and in it, I learned about how chance makes game more replayable, what exponent laws are, and how they function. Me and my partner created a board game that uses exponents as a game mechanic to make gameplay interesting.

In this project I learned about exponent laws, how to make a board game, how to write instruction for a game (which is harder than you would think), and how math can make games more fun and replayable.

In this project I struggled with writing concise and clear rules that were easy to follow, especially when the game contained complex math elements. I also found learning some of the math concepts hard.

Another memorable project this year was the “Revolutions on Trail” project in humanities. In this project, I learned about the historical reasons for revolutions, what happened in them, and how effective they were. I also learned the crane brinton theory and how it can be applied to past and future events.

All I have learned from this project is represented in the quality of the final performance, which featured many skills that me and my peers learned.

I struggled writing the affidavit, because finding primary sources is pretty hard. but I also know that other revolutions had it harder because of how obscure knowledge about them can be.

This was probably the most interesting humanities project this year for me, and that is why it is in this post.

And that wraps up my first ever MPol post. Thanks for listening and/or reading it.

Blog posts for these projects:

Epidemic Exponents

Revolutions On Trail