My Never-Ending Group Project

It’s ba-ack. Destination Imagination. My never ending group project. You think your finished, but no. It keeps coming back. It wouldn’t be that much of an issue, but my biggest weakness is working in groups. Moving on.

Destination Imagination is a worldwide competition that inspires creativity in children and teens. There are six different challenges, that pull upon different interests and skills. Technical, scientific, fine arts, improv, engineering, and service. Each team competes in a regional tournament, and a provincial tournament. The top two teams from each category then move on to the global championship. Last year, our team could have gone to globals, along with several other PLP teams. None of the PLP teams went, though.

This year was different. We had only 4 teams, and had to compete against PLPs grade 10 students. Aaaaaagh.

I was- or am, not exactly sure- in the Fine Arts challenge, with Tamara, Melanie, Maggie, Lauren and Jessie. In our challenge, Change of Tune, we had to create a two act musical. We also had to have a spectacle, and a set change. A lot of criteria, I know.

We had three steps to the project, or Project Management Steps. This post will be outlining each one, and have a reflection of how I think we did.

Project Management Step 1

In this step we had to completely understand our criteria. It took a while, but eventually we had a complete understanding of our criteria, which I mentioned above.

We also had to create a Google Doc, so we could work together to outline all of our criteria. The Google Doc was also helpful in all of our other steps.

Project Management Step 2

This stage was the planning stage. We came up with ideas for our story, and each of the requirements. We also made a bunch of timelines, but wether we stuck with them or not is another story.

In this section we continued to add to the Google Doc. But this time, we were focused on what we were doing for each requirement, and who was doing it. It really helped keep us organized.

Project Management Step 3

For stage 3, we had to start building things. I was in charge of the puzzle board, one of our team choice elements, and the set.

The puzzle board wasn’t that hard to make, but the set was a mild disaster. It broke when I was transporting it to school, and we continued to work on it right up to the regional tournament.

On the day of the tournament, everything was hectic. We were the first PLP team to present, and third in our challenge. Everything kinda went south from there. You can see from the video.

We came in second though, and I’m very proud of how we worked through all the things that ended disastrously.

In reflection, I think I have come a long way from last year, but not project-wise. Our group worked really well together, and this got us very far. But because we were so afraid of getting into fights, that may have impacted our project. Anyways, this project was a huge turning point for my group work skills.

Because Waldorph.

At the start of this chemistry unit, we created a mind map. I didn’t know really anything about it.

By the end of the unit, I understood a bunch more.

To demonstrate our learning, we created a video. I made one with Kailey. Here’s ours.

I learned a bunch from this project. One thing I realized was how important it is to have a storyboard. I found this out after I had written the script and my partner was animating. She didn’t understand the script enough to do the video exactly like I had envisioned. But it worked out, with a bunch of revision, and I’m pretty proud of my work.

I also learned how to use the speed changer in iMovie to create different voices for the characters! Because if you hadn’t noticed, I voice all the characters, just at different speeds.

ROAD TRIP!!!

In math, we’ve been learning about graphing linear equations and such. So to demonstrate our learning in a project, we had to create a ‘road trip’. We used a package of worksheets, but a lot of the rules for that were changed.

Anyways, for the rest of this post, I will be talking about the road trip as if I actually went on it. Don’t get confused though. I did not actually do any of these things.

Planning
When I first got the letter from MTV, I was ecstatic. It’s a once in a lifetime chance to get to go on a road trip like this. $10000 is a lot of money. And harder to spend than you’d think. Especially when I won an extra $8000. So I started with the basics.

Food
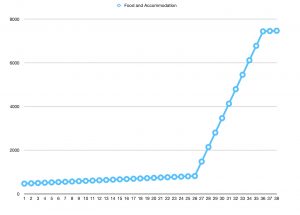
Food is tricky. Three meals a day. I decided to bring my friend Emma, so double all the food. I decided to make it simple. For breakfast, we’d have a cup of applesauce. Lunch is Mr. Noodles. Finally, for dinner, a pita with cheese. Water I can put in a water bottle. Per day, that’s $6.

Accommodation
Parking lots are fun. A lot of parking lots have overnight parking. That’s where I sleep. Only a few times I had to sleep on the side of the road.

Clothing
We had to cost out luggage. I chose duffle bags for us, so that was $150.

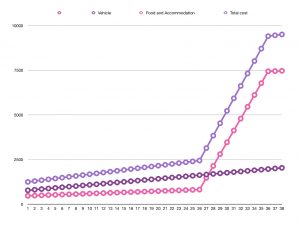
The linear equation for all that was- Y= 6x + 150

Vehicle
We had to rent cars for the trip. I decided to rent a Honda Prius. This was because it made sense with my amount of passengers and our ability to sleep in the car. To rent the vehicle was $34 a day.

Route
This was the most difficult part. I had to figure out where to go. So of course, I looked to one of my favourite book series, Heros of Olympus. I chose the route that Percy, Hazel and Frank took in ‘The Son of Neptune’. With a little twist that I’ll get to later.

Anyways, the places they ventured would be to far to travel in one day. So I decided to stretch it out a little bit, staying in places along the route. My final destinations were as follows.

New York City, Long Island, Leeds Point, Columbus, St. Louis, Kansas City, Denver, Cedar city, Las Vegas, Los Angeles, Santa Monica beach, Berkeley, Alameda, Mendocino, Canyonville, Portland, Seattle, Vancouver, Prince George, Kitwang, Terry lake, Destruction bay, Chickaloon, Anchorage, Seward, Chickaloon, Destruction bay, Lower post, Fort St. John, Edmonton, Stoughton, Collegeville, Rockford, Chattanooga, Orlando, Dunn, NYC

Most of these places were in the book, except after Seward. Then I had to venture back down to NYC. On the way though, I needed to spend money. Lots and lots of money. So I decided to stop in Disney World. And stay in a hotel. For 11 days. TO MUCH MONEY!!!!

So, yeah. Small rant. Moving on.

The total distance of this was 12730.95 Miles. Time, 245 hours. So the driving part of the trip took only 27 days, but because of my large spending spree, the entire trip took 38 days.

Gas
Ugh. This was a pain. MTV had a deal with gas stations along our trip that the gas would always cost $2.80/gallon. Then, taking into consideration the mileage, yada yada yada.

The liner equation for all that was- Y = 34x + 744

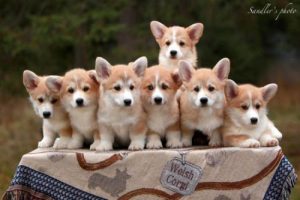
Once I did all that, I had several thousand dollars left. So I decided to do what any normal person would do. Buy 7 corgis. In honour of the trip, their names are Percy, Annabeth, Hazel, Frank, Leo, Piper and Jason.

Taking all that into consideration, I had to change a bit the first linear equation, because of dog accoutrements. It changed to- Y = 13.89x + 456. Also the equation changed when I was sleeping in a hotel. For those 11 days, that changed to Y = 662.49x + 456

My total trip cost ended up being $18182.12, which went over our limit.

So I had to turn to sponsorships.

Sponsorships
Coca Cola, Pepsi, and Snapple all were offered ‘product placement deals’ on these shows. Pretty much, if you show their product on your road trip, they’d pay you. Each one had different offers, that worked to people’s advantages.

Equations
Coca Cola- Y = 6x + 104

Pepsi- Y = 10x + 60

Snapple- Y = 22x – 228

For a shorter trip, Coca Cola would work to your advantage, while on a very long trip Snapple would. Pepsi is just in the middle. For my trip, I chose Snapple, earning myself $608.

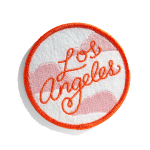
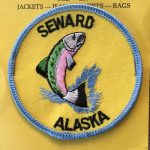
I still had $422.88, so I bought patches.

SCLs the 3rd: mPOLs

This presentation is based on the driving question, ‘How am I going to progress as a learner before the end of the school year?’. I think that’s a good question, and one I had to think long and hard about.

What is something you worked hard on and revised several times, but the end product turned out better than expected?
For my maker example, I chose the all about me blog post. This is because of the process in which it was created, and how I think there was a lot of PLP essence. My first draft was ok, but there weren’t a lot of pics. The video wasn’t the greatest either. So I got critique, and went at it again, this time making it a whole lot better.

What project did you struggle with? Why?
For my math example, I wanted to use the metaphor machine project. When we were doing the circuits side of things, I kinda got controlling. This was because I found the circuits very interesting, and I didn’t really want anyone else to do it. Because of that, some of our group didn’t have anything to do, so they were off task a lot. Group work is something I haven’t always been good at, and I need to work on it.

What skills did you use and what skills do you need to continue to develop?
I wanted to use the Frankenstuffie project, a project from science and humanities to answer this question. In this project, we learned a lot about film techniques, which is a key part of PLP 9. These skills will continue to help me throughout the year, so it is important to me to keep working on them, learning more and more all the time!

And finally, another example from humanities. In the metaphor machine project, we had two different parts to it. We had the book wok, learning about all the revolutions and such. We also had the actual building of the machine. I find it interesting to look back and see the contrast between them. The actual building was really fun, so I think the Easter Rising revolution will stay implanted in my brain a lot longer than the stuff we learned sitting in a desk taking notes.

In conclusion, I have three goals for the remainder of the school year. Firstly, I need to improve on my group work skills. Secondly, I would like to become more familiar with all the filming techniques we’ve learned about in class. And finally, I would like to be better on the first draft, rather than not trying as hard because it is the first draft. How do you think I can improve other than in these three areas?

Winter Exhibition

Every year in PLP, we have two exhibitions; the winter exhibition and the spring exhibition (which isn’t really in the spring but whatever). We just had our winter exhibition. And I’ll bet you’ll never guess the theme! Star Wars.

Yeah, it sounds a bit funny. But the actual project made sense. We had to come up with an inquiry question to do with Star Wars, and relate it to the real world. This was the first step in our inquiry star plan.

There are five points on the inquiry star; connect and wonder, investigate, construct, publish, and debug. So guess what? That’s how this blog post is gonna go!

Connect and wonder

We started the journey by talking about what makes a good inquiry question. We talked about how open ended questions and closed questions are good, and bad. Then we had to come up with some of our own questions, to do with a picture of a red robot.

Then, we labeled the questions, and explained them. Our assignment after that was to come up with questions on Star Wars that we’d be interested in doing a project on. I made a document using Pages, and got a bunch of ideas. I ended up using the question ‘What is the way of life for gungans?’, but I adapted it to fit with the real world. My final question was ‘How can we learn from Gungans how to better balance our environment?’. I chose this question because through a little research, I found out that Gungans are very environmentally conscious.

After we got our questions approved, we had to complete a project pitch form. This was just a summary of what we project was going to be about, and so forth. That also had to be approved. There were a whole bunch of forms in the process, but they were in later parts of the project.

Investigate

At this point we had are questions, bu no answers. That’s what we had to find out next. So using our ever-useful resources, our iPads, we got to doing just that! I found out lots of information about my topic, tons of which I didn’t end up needing. Wookiepedia was a huge help to most everyone’s project. I found out so much about gungans on there, is crazy.

But then we had to relate it to the real world. I had to research humans effect on our environment. So I headed on over to Green Peace’s website! I got tons of information from that, but then dug a little deeper. I emailed Green Peace to ask them a few questions. They answered, and redirected me to an article they had just published. It was very interesting.

Construct

At this point, the exhibition was only a week away. And, as the name explains, we had to exhibit something. We took all our research, and made it into something. I wanted to show how gungans use their environment to their advantage, while still protecting it. For example, going back to the ‘Phantom Menace’, you can see the gungans city, and some of their vehicles.

I chose to build a model of the ship that Qui-Gon Jinn, Obi Wan Kenobi and Jar Jar Binks took into the city of Naboo. I chose this because gungans based most of their technology off of things seen in nature. You can see that the ship kind of resembles a stingray.

I used cardboard, paint, and hot glue to make it. I also created a diorama-type thing for the ship to sit in.

But as much as that explained my question, it didn’t relate to the human side of things. So I decided to make a car. This is because cars resemble nothing in our natural environment. Except maybe a rock. Anyways, I made a car. The car is very boxy, but the wheels moved and it was great. I also had a diorama road thing for the car.

Publish

Now we get to the nitty-gritty stuff, the actual exhibition. Our teachers divided our classes into two groups: the Dark side and the light side. I was on the light side. So, we decided to make our classroom into the rebel base on Hoth. This took a lot of work, before school, during school, and after school. We had a bunch of trial and error, but it turned out pretty great.

With all this, we wanted to have costumes. So everybody dressed up. It was actually super cool. We had Jedi, an Ewok, BB-8, a Wampa, and a bunch of other awesome characters!

So of course, we wanted to act out some scenes. Then, we had this idea to do improv. No. Improv bad. We did it once, and cancelled the rest of it. But the scenes were pretty decent.

The night went great! Everyone was in costume, people ate food, it was awesome. I’m very proud of how it turned out.

In conclusion, this was an awesome project. There were some aspects of the group-ness that I need to work on, though. If I were to do it again, I think we should have appointed DRIs (directly responsible individuals) to different aspects. I also would have created more of a display that could run itself. I’ll know better for next time!

This project made the room smell weird

In the grade nine curriculum, it is necessary to learn about revolutions. But of course, PLP students are special, so we do things a bit differently. We made machines.

The unit started off with an introduction into the time before revolutions. We learned about farmers and town life, touching on what we learned last year in our Change Creates Tension Unit. We talked about how the industrial revolution changed everyday life.

During that time, we were split into different groups. Each group had to study a different revolution, and later make their machine (which I will get to later) on. I was studying the Easter rising revolution with Tamara, Lauren and Kailey. I wanted to do this revolution because recently I was accepted into a trip to Europe with girl guides. We will be visiting Dublin, where the revolution took place, so I thought it would be a good idea to learn more about it.

The Easter rising was a revolution in 1916 in Ireland. The fighting only lasted 6 days, and the British won. But it set in motion a plan for Ireland to become independent.

Meanwhile in scimathics, we were learning about circuits. Each machine was required to have at least two hand-built circuits, so we learned how to make them before starting on the machines. I thought it was pretty cool. My dad was an electrician, so learning the basics of what he did was pretty cool.

To learn about our revolutions, we first had to learn about what a revolution was, and how it worked. We studied a theory that was created by Crane Brinton. He compared revolutions to a sickness, with several stages. If you want to learn more about Brinton and his theory, check out my blog post on it, How long really was the wait?.

While learning and doing all this, we were reading a book. The book is called Leviathan. It is about a young boy who gets thrown into a war. It is a really good read. Now, you might be thinking, ‘how does Leviathan fit in with revolutions?’. Well, I’ll tell you. It doesn’t. We read the book because of the genre, Steampunk. Steampunk is a combination of futuristic technologies based in the Victorian era, and powered by steam. Again, you’re probably thinking ‘what does steampunk have to do with revolutions?’. And again, nothing. We learned about steampunk for the aesthetic. We incorporated steampunk into our machines. I found this part of the project really cool. This is because I know some steampunk enthusiasts in Kaslo, where I am from, and it was neat to see what all the fuss was about! I have more information on steampunk in my post, Steampunk, and how….

Now’s when we get into the nitty gritty stuff, the building of the machine. See, the thing is, by this point, we were down to three group members. One of us was in Australia, and couldn’t do much from there. So we had to make our small number feel great. And we did. We were very on the ball, and came out ahead of most groups. It was a difficult process. At the beginning, we had big plans, but the number of them that actually worked out was small. Especially when it came to circuits. It took me three days to get this one thing working, and finally we had to change our entire idea for it. But we persevered, and came out with an amazing product.

For the math portion, we had to do blueprints. The one of our first idea

Looks nothing like our final one

And for our full sized sketch

We had to completely redo. This part was very trial and error, but turned out fantastic.

But the biggest part, was the video. This was where we would explain what each thing meant, and how it related to the events of the Easter rising. We worked really hard on it, doing voice overs, making music, and dragging the machine all over the school. It didn’t turn out the greatest. We got tons of critique, but really took it to heart and got working again.


The second and final draft turned out way better. We redid lots, but still used some from our original.

https://youtu.be/kgOkGXtjBFU

This project was really strong in the fundamentals of PLP. We had group work, trial and error, critique, hands on, and electronic based stuff. It was a fun project. I definitely couldn’t have done it without the help of my peers. Although there were some things I wish I had done differently to start with. For example, I should have figured out that one of the circuits would have to be on its own before I spent 3 days on it. I definitely could have procrastinated less on some of the assignments. I need to work on balancing my projects. Because while all of this was going on, we also had the PLP winter exhibition. I really think I learned a lot from this project, not just from the work, but also how to work in a group better.

Steampunk, and how…

In this blog post, I’m going to be explaining an inquiry question about steampunk. My question is ‘what started the steampunk craze?’. It was invented by K. W. Jeter, who first coined the term ‘steampunk’ in 1987. Since then, it has grown in fascination. But what was the first steampunk element? To find this, I must delve deep into the past…

There are several different genres within steampunk. There’s music, books, clothing, machines, and an assortment of others. But what was the original?

Theoretically, as I mentioned before, steampunk the word was first created in 1987. Before that though, the genre was there. It was mostly a book theme, and developed many facets later.

Steampunk was first inspired by the 19th century scientific works, and went from there. The first work that was considered genre proper was Titus Alone by Mervyn Peake, 1959, although some believe Michael Moorcock’s The Warlord of the Air, 1971, to be it. The Warlord of the Air was heavily influenced by Peake’s work, so comme-ci comme-ça.

Since then, steampunk has developed. There have been many festivals and events, including the Watch City Steampunk Festival, a day at the San Diego Comic-Con, and even at the Kaslo May Days!

So the answer to my original question would be books. A sub-genre leading to many great things. All the way to today, where we’re learning about it in class!

This was an interesting part of our learning. Steampunk is very interesting to me, and it was cool we got to learn about it in class. I can see how the steampunk genre relates to the industrial revolution, and is in a similar time period to most of the revolution. The steam powered machines were just being created, and it changed society. It also adds more to our metaphor machine, making them more aesthetically pleasing.

How long really was the wait??

We have started a new unit, metaphor machines. It bands together science, math, english and social studies in a project we will be working on till Christmas. Our first assignment was to learn about Crane Brinton, and his theory on revolutions. We also had to come up with an inquiry question to research. Mine is how long was the incubation period of the American Revolution.

Brinton’s theory was based upon 4 stages. He compared revolutions to sickness, with the beginning symptoms, the cold appearing, the fight against, and the resolution. In his theory, every revolution started with the incubation stage. Here, there was economic crisis, intellectual opposition, a sense of govt. injustice, and a few other things. This stage could last for quite a while. Next came the moderate stage. In this stage, protests start to occur, and sometimes violence, but on a small scale. Third, there was the crisis stage. This is when the radicalization begins, with the radicals taking power. Usually there is a strongman at the head of it. And finally, the recovery stage. The violence and radicalization is over. Government is altered, but is still similar to the original.

The American Revolution was started in 1765, but had been boiling for quite a while. For starters, some of the colonies in the 1750s felt like they were not being represented in the British Parliament. But it started way further back. Since the 1660s, English Parliament had controlled colonial trade and taxed imports. So by the time of the Revolution, the Americans were being deprived historical rights. No one was on their side. The big guys were making all the money. Then, the protests started.

So really, the incubation period for the American Revolution started over a century before the Revolution actually began. It’s kinda crazy to thing about.

Crane Brinton made some really good points in his theory. He really broke down the process, and made it easier to understand. But it didn’t really connect to the revolution I am working on, the Easter Rising. So while it was insightful and helped some groups, it didn’t especially help me understand my revolution. I would’ve liked to have my inquiry question more focused on The Easter Rising.


Math Game Project

In math, we have been learning about    BEDMAS. To demonstrate our knowledge of this, we had to make a math card game. All our own design, with a rule sheet and everything! It was pretty cool.

To start with, I figured out the basics of the game. What it was about, instructions, etc.

Blank 19-1bfe48d

Then, I started working on the cards. I decided to make number cards as well as operation cards. With that, you needed an art style, for your cards. I decided to go with a Greek theme. Each card had either a Greek god, or an evil character from Greek Mythology. It took me a very long time to make.

Using Sketches Pro, I found a grid pattern to make the outline of my cards. Next, I got the outline of a circle and placed one in each box, save for the Cerberus one, where there were three. Then, I chose symbols for each of the gods, and traced them next to the circles. Once that was finished, I put numbers and operations in the top corners of each cards. Then, each card was personalized, with hair, eyes, and their name in the top right corners. No colour yet, because I was printing in black and white.

Next, I printed off three sets of the cards. But the paper wasn’t the thickest, and you could see through it. So after colouring in the cards, because I printed them in black and white, I got pieces of construction paper and glued it to the back. This made it a lot sturdier.

Finally, cutting. I got to use a paper cutter, so my lines were nice and strait. It definitely took a while though. Then I played my game, and I was finished! Here’s my game in action.