THE MACHINE

Salut mes amis! Welcome to another scimatics post on this bland blog of mine. I have a few blog posts I have to write at the moment so I’m not going to drone on and on with this intro so lets just hop right on into the project.

Project Overview

This project was called “Metaphor Machines” and in this project we were to create a Rube Goldberg machine that represented the steps of the scientific method. We would be using big wooden boards as the base and then we could use any materials to build the pathways. We then recorded the machine working and added voiceovers to explain the scientific method and our representations of it in the machine. Then the final video would be presented to the class.

Project Start Mind Map

As per usual we started the scimatics project off with a project start mind map. I put in any questions I had for the project, what I already knew about electricity and the project, and all of the questions from the QFTs.

At the end of this project we also added to the mind map a section about what we learned from this project and I also answered as many questions as possible that I came up with at the beginning of the project. 

The Project

We did a fun little experiment where we got to test out making and measuring different types of electric circuits up close and personal and in a simulator online. We worked with making a lot of electric circuits in  this project and it is something that I would say I can do confidently now.


We also did quite the bulk of workbook pages to further learn about electricity in all of its wonderful ways. We also learned about the math that can help you find out the current, voltage, and resistance of a circuit. 

We built our first Rube Goldberg machine in the very first class. We used things from around the class to crate a machine that has as many interactions as possible. And I think it was a bit rough but good for our first try.

And a lot of class time went into building our final machine. We each created blueprints individually and then got together in our groups to create one awesome blueprint that our machine will look like. The final machine had to have both parallel and series circuits and we even created switches to turn those circuits on and off independently but only one switch actually ended up working in the end. Ok so here is our final video that was shown to the class

Driving Question

How can we represent the scientific method? 

I have to say that the best answer to this question would be the machine video itself as it shows the representation and definition for the scientific method.

What factors affect the function and efficiency of electric circuits?

Resistance diminishes the current of the circuit. Examples of resistance would be loads (lightbulbs, appliances, etc.) and wires. The voltage also affects how much power is going through the circuit at a time. This can overload loads and cause failure or burnout of the circuit. To much voltage is also dangerous.

Curricular Competencies

Reasoning and Analyzing: Estimate reasonably

Our final blueprint was complete and accurate. It also contained a grid scale. All of measurements are labeled and relatively accurate. It was clean and organized with all lines easily distinguishable.

Questioning and Predicting: Demonstrate a sustained intellectual curiosity about a scientific topic or problem of personal interest

 I used all of my class time efficiently for learning without distractions. I was a team player and always able to help out my group members.

Planning and conducting: Select and use appropriate equipment, including digital technologies, to systematically and accurately collect and record data

Hand built series and parallel circuits are used to good effect with efficiency in your metaphor machine. Accurate circuit diagrams are included in the final blueprint. Our diagrams use proper symbols and are neat and easy to understand. Measurements of current, voltage and resistance are included.

Scientific Communication: Formulate physical or mental models to describe a phenomenon

A video is recorded of the complete operation of the machine and voice overs are added which explain the sequence of the scientific method as the machine progresses.

Conclusion

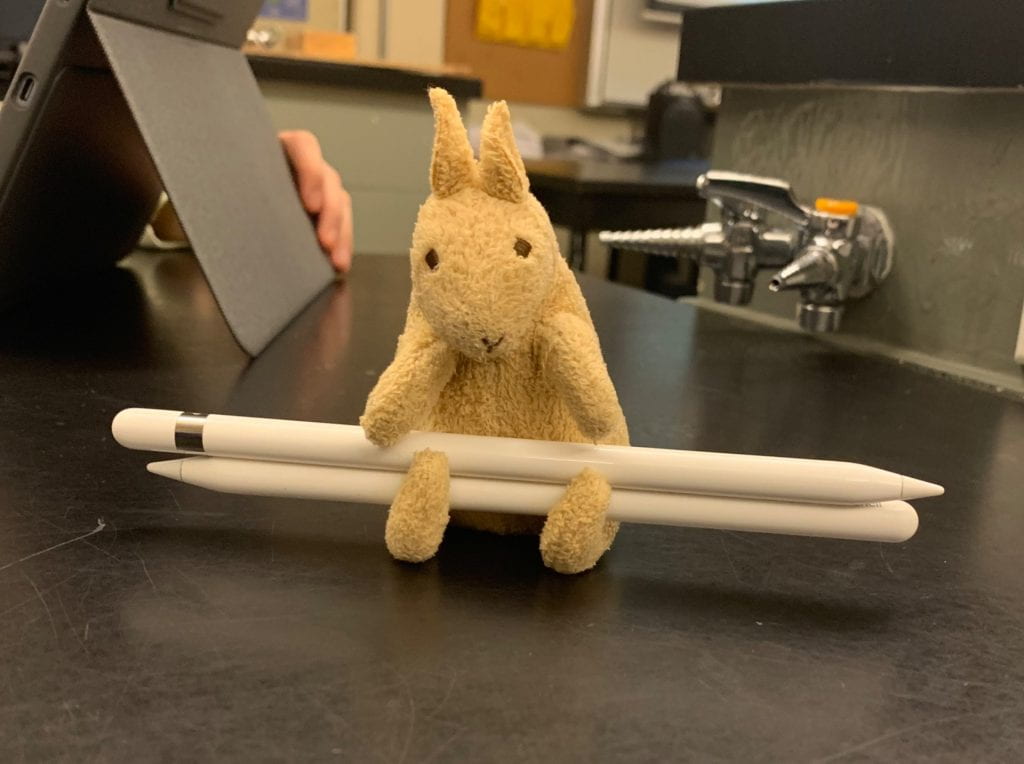
So this project definitely expanded my knowledge of electricity and the different things that can affect it. In conclusion this project was quite cool and I think that I did a pretty good job overall. Also shout out to Walter the emotional support kangaroo-

Thanks for reading!

As always, Brooke.

Loooook It’s Sodium Hydroxide!

Hola mi amigos 👋🏼. Welcome to another scimatics post on this lovely blog of mine.  I have quite a few blog posts I have to write at the moment so im not going to drone on and on with this intro so lets just hop right on into the project.

Project Overview

This project was called “Chemistry stories” and in this project we were to create an animated video about chemical bonding. We would be using keynote to create the animation and then voiceovers would be added in a separate app like iMovie (but i used a great app called InShot). Then the final video would be presented to the class.

Project Start Mind Map

As per usual we started the scimatics project off with a project start mind map. I put in any questions I had for the project, what I already knew about atoms and matter, and all of the questions from the QFTs.

At the end of this project we also added to the mind map a section about what we learned from this project and I also answered as many questions as possible that I came up with at the beginning of the project. 

The Project

We did a fun little experiment called “Investigation 2A” in this project where we got to see some chemical reactions up close and personal. But before we did the experiment, we practised creating an animation by showing the steps that we would be doing. We used keynote to create the short animation and I used the instant alpha feature to take stock images and turn them into moving pieces for the animation.

Lab animation


We also did quite the bulk of workbook pages to further learn about this new thing called ionic and covalent bonds and how they are formed. We also learned about writing chemical formulas and learning how to say the names of different covalent compounds.

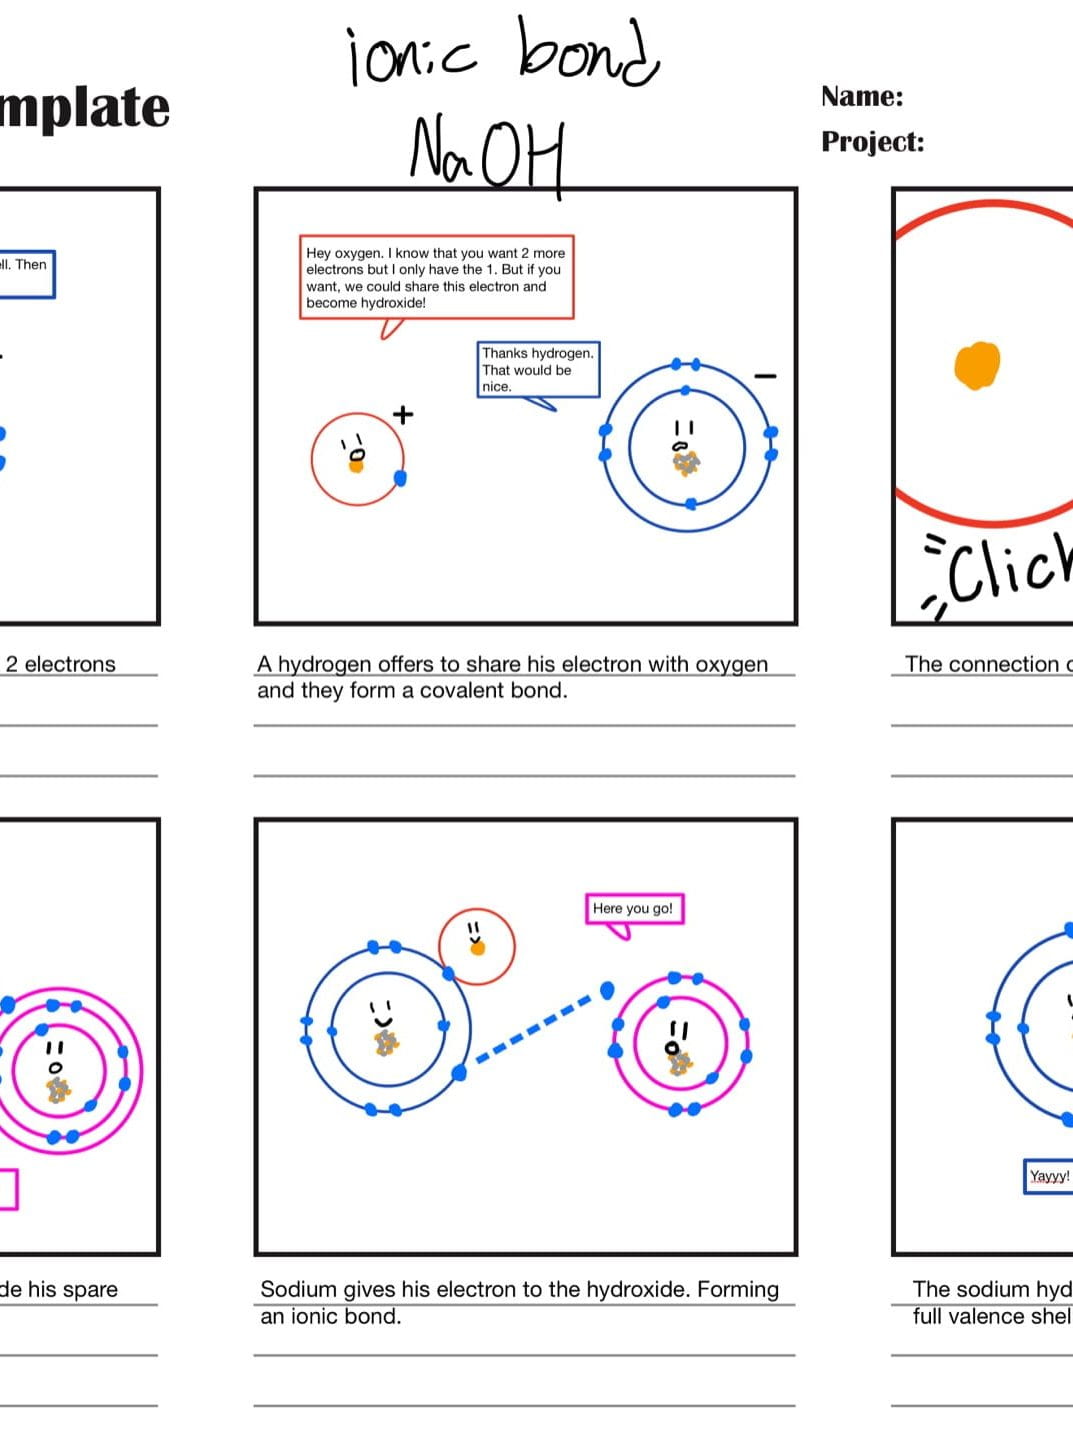
And as per proper video composition, we created storyboards to help us plan out what we would be putting into the animation;

Driving Question

How do the electron arrangements of atoms determine the chemical and physical properties of elements and compounds?

I have to say that the best answer to this question would be the animation video itself as it talks about the attraction of the atoms based on their electron arrangements. So without further ado, here is the final product;

Curricular Competencies

Processing and Analyzing: Construct, analyze and interpret models and/or diagrams

My story boards had accurate Bohr diagrams and clearly showed the processes of both ionic and covalent bonding. I think I demonstrated a sophisticated level of understanding because I added a lot of different components and prior knowledge along with questions that we had for the project. I was able to articulate my ideas cleanly into my mind map layout.

Questioning and Predicting: Demonstrate a sustained intellectual curiosity about a scientific topic or problem of personal interest

My Project Start Mind Map shows how I can display my prior knowledge and prepare for new evidence. The Investigation 2A Lab Report showed that I can form a reasonable hypothesis using what I already know. I demonstrated an accomplished level of understanding with this milestone. My storyboard was well thought out and accurately showed snapshots of what would take place in the animation.

Communicating: Formulate physical or mental theoretical models to describe a phenomenon

My voiceovers are mostly clear and synced with my animation. I find that my video has a solid amount of humour in the voiceovers mixed with scientific language and motion in the animation. I feel I demonstrated an accomplished level of understanding with my animated video because I meet the expectations in the evaluation rubric. Plus I think that my video is quite entertaining.

Conclusion

So this project definitely expanded my knowledge of atoms and the different things that they can do. In conclusion this project was quite cool and I think that I did a pretty good job overall. Also shout out to Walter the emotional support kangaroo-

Thanks for reading!

As always, Brooke.

A game about tectonic plates? How boring…

Ever heard of a tectonic plate? I bet most of you have. But do you know the science behind it? 

As you may have guessed, we learned about tectonic plates for the new project we were doing. The end product of this project is a game about plate tectonics that uses probability to determine outcomes.

We made a list of every question we could imagine on the topic of “How does the movements of Earths tectonic plates cause observable changes and effects?” Here are the questions my amazing partner Cooper and I came up with. You may notice some C’s and O’s and those mark closed ended and open ended questions. 

You also may have noticed that there are questions marked 1,2, and 3. Those are were our top three questions that we came up with and wanted answers to. 

We then started our project start mind map using an app called MindNode. I added the mind map categories of QFT top 3 questions, random questions, key concepts, plate tectonics, game ideas, and tectonic game vocabulary . 

 We did a lot of exercises that built our knowledge of plate tectonics so that we could include the key concepts in our game. We learnt about plate boundaries and faults, the layers of earth and mantle convection, and tectonic disasters. Many workbook sheets were completed to ingrain in us the science behind the movement of tectonic plates. That part of the project was a science curricular competency called; Evaluating: Demonstrate an understanding and appreciation of evidence. I really like learning about cool science concepts so that competency was really enjoyable for me.

We also did work on game probability so that we could calculate the odds of certain events occurring in our games. The use of probability falls under the curricular competency of; Understanding and solving: Develop, demonstrate, and apply mathematical understanding through play, inquiry, and problem solving

Meanwhile all of this time my partner Cooper & I were thinking of ideas and rules for our game. After many ideas and lots of refinement we finally got our game rules written down. We started a cycle of testing certain aspects of our game then refining the rules, testing and refining, testing and refining. 

Questioning and predicting: Demonstrate a sustained intellectual curiosity about a scientific topic or problem of personal interest. – Using our newfound knowledge of tectonic plates, we had to prepare for game day, the big end to this project. Game boards were made and pieces were gathered. Dice, cards, and spinners, Oh my! We printed out our final game rules and laminated a ton of cards. And after all of that preparation we were ready for the final test of our game.

Did we do it? Did we make a fully functional game about plate tectonics? I’ll let you decide for yourself. Here is a link to the final game rules: Nothing Left Rules

I usually would have put the driving question at the start of this post but I felt that it fit better here. The driving question was “How are thematic and mathematical elements used in game design?”. I think you can figure this one out by now but just in case you can’t; Our games had to use probability. Dice, cards, spinners, etc. Probability is a mathematical element. If you think about commercial games that are for sale, how many of them use some sort of probability? Probably 90%. Same with thematic elements of games. Our games were based on tectonic plates. Some games have sciencey themes like aliens or viruses, others are murder mystery’s or worlds made of candy. You might think that making a game is just using dice or cards to get a piece from one side of a board to the other, but now I know that there is a lot more that goes into the science and planning behind games.

This was a fun project. It was really cool to be able to learn about something new (tectonic plates) and be able to apply that knowledge into something bigger (a game). I learn best when I am interested in the topic and this project definitely made me interested in tectonic plates and the mystical planet called earth. I grew as a learner in this project when I asked questions, found the answers, and was able to use the answers to aid my game. However I did not do this project alone. I would like to give a big thanks to my amazing partner Cooper, we worked extremely well together and I couldn’t have done any of this project without him.

As always, Brooke.