Tag Archives: #blogpost

by

Run Short Scary Film!đŸ‘»

No comments yet

Categories: Maker, Tags: , , ,


Intro

For this project we were given access to a short film video that we needed to replicate. The film depicted a guy going on a jog when suddenly someone started following him! Keep on reading if you want to know more!


Planning

There were many steps to completing this project. First we rewatched our reference film about a dozen times to get a good understanding of what was going on and the different shots we needed to know. Since a large part of this project was learning how film and captivate an audience, a story board was necessary to know each exact scene, and how the video would play out. However even though to story board was only around 25 clips, (much less than many official movies) its a SILENT film, so the story board was only working off of angle shots, not what people were saying. Anyways, this is what I made! (It’s just a sketch to get a general idea, which is why it’s not perfect.)

 Story board: 


1st Draft Errors

Since everything were doing here is a group project it made things a bit easier. However, a big problem on the first draft was the scenery. Since my group chose a filming area too late, we got a bad location, making the scenery not match up with the original reference. Aside from this, the filming wasn’t as good as it good have been, and it was all very rushed since we were on a time limit. It’s good to note that this was the first time we did this though, (with not much notice) and overall we didn’t do too bad!


Final Draft & Problem Solving

Let me just say that the second, and final draft turned out much much better! Not only did the filming line up very well with the original reference, but the scenery was great! This is not to say that it went perfect though
 

Problem Solving 

Group members:

My group consists of four people, but only two of us were present for the final draft. This meant my friend and I had to problem-solve on our own. In our “Run” film, there are three different characters, not including the cameraman. To make it work, we took on all the roles ourselves. However, things got tricky when a scene required both of us to be in the same shot—there was no one to operate the camera! Luckily, since we had helped out another group earlier, they returned the favour by stepping in as our cameraman, saving the day!đŸ€ł


Audio:

The only significant challenge we encountered was the audio. I assumed we could use the sound from our reference video, so I didn’t put much effort into making our clips sound clean, thinking I could just overlay the other audio later. That assumption turned out to be wrong
😬 Since I misinterpreted the criteria, we had to fix the audio. Fortunately, my teacher was understanding and gave us time to make adjustments. Instead of redoing everything, we created external audio, like running noises, to match the scenes.


Final product

Why would I tell you this if you can’t even see the video you might ask? Well you can! If your interested in seeing my video, click this link to my YouTube channel!

 https://youtu.be/NeAOnONEWD4?si=CYPe1n0LmIr5H8dN


Answer to the driving question

The driving question for this project was, “how might we learn video skills by recreating a short film?

When we recreating the short film it taught us many things! For example, it gave us a good opportunity to improve our video skills by giving hands-on experience with every step of the filmmaking process.  From analyzing the original film to breaking down its shots, (like the storyboard) you learn about camera angles, and storytelling techniques. Depending on how  “professional” your film is, (if it’s for a school project like us, or your aiming to make money off of it) filming scenes helps you practice using equipment like cameras, tripods, and lighting. while editing teaches you how to piece everything together to match the original. Working in a group also builds teamwork and problem-solving skills, making the process both educational and collaborative.


Group members blogs:

Carmynk@seycove.ca

 finnleyl@seycove.ca

Keiral@seycove.ca

Conclusion 

After all the challenges and fixes, I’m really happy with how our short film turned out! From handling missing group members to fixing unexpected audio issues, it was a great learning experience. It wasn’t perfect, but we made it work and learned so much along the way. Thank you for listening, and stay tuned for more blog posts!

by

🌊My “Take Your Kid to Work Day” Experience!🌊

No comments yet

Categories: Uncategorized, Tags: , , ,


Intro

Everyone in my grade had the day off to visit and learn about their parents work, for “Take Your Kid to Work Day” or TYKTWD! However, my two friends and I aren’t interested in what our parents do (they work from home) so we decided to do something else! Read more to find out


Where I Went

Like I mentioned before, I didn’t watch my mom work from home because that’s low key boring.. I went to the Seymour Salmon Hatchery, and worked as a volunteer, shadowing one of the workers! This was especially interesting for me, since I love marine biology. Therefore, this experience gave me an opportunity to see AND try a different areas of marine biology, that I haven’t thought about before! 🐟

My Favourite Parts

Honestly, every part of my day was interesting, new, and fun! I really enjoyed population counting which was when we put on waiters and did a salmon check throughout the creeks and rivers. I was in change of note taking, and checking off the different sections. For example, I would take certain notes if the salmon was wild or hatchery, (we could tell by the clipped fins) or the gender. In addition to this, I LOVED getting the salmon from out of the tubs with nets, to see if they were ready to spawn. I was pretty bomb at this. 


Something I learned!

I’m passionate about fish and marine biology, but I knew almost nothing about salmon hatcheries before this experience
 so everything was a learning experience! I got to see the entire process of fertilizing salmon eggs firsthand. We began by selecting adult salmon ready to spawn, then gave them a hard knock on the head to stun them. One of the workers the cut the main artery and we let it sit in a bin too bleed out. Later, I had the role of holding them head-up over a clean bin, while my friend Emilia carefully made a large cut to release the eggs. After that, we mixed in the male’s milt for fertilization, soaked the eggs in a safe cleaning solution, and finally placed them into incubation. Working and learning at this salmon hatchery had so many fascinating aspects that made it very unique and engaging. My day was packed with new interesting things, hands-on learning, and overall I thoroughly enjoyed every moment!

  Retrieving the Salmon From the Bleeding Process:


Extracting the Eggs:


Mixing the Milt with the Eggs:


Using the Cleaning Solution:

How This Helped

The purpose of “Take Your Kid to Work Day” (TYKTWD) was to help us see if a certain workplace matched our interests and to get a sense of how different work environments operate. Visiting the salmon hatchery did exactly that! I was already excited about it because I’m interested in exploring various areas of marine biology. Having several fish at home, I’ve always been fascinated by aquatic life, and this experience deepened that interest even more.🌊 


Youtube Video:

By the end of my experience I made a short video sharing my experience with the public! If your interested in checking it out, click on the link below.

Link: https://youtu.be/9eoiar9mKKQ


Email

Later on, I sent a thank you email to Megan, the person I was shadowing on TYKTWD. This is the Email I sent.


Conclusion 

Overall, my “Take Your Kid to Work Day” at the salmon hatchery was an unforgettable experience! Not only did I get to learn more about marine biology and see a different side of it, but I also got to experience hands-on work. Each part of the day was exciting, and gave me a real glimpse into the world of marine biology and the important work done at hatcheries. Thank you for reading about my experience, and stay tuned for future posts!


by

Unlocking My Peak Potential!⛰

No comments yet

Categories: Humanities, Maker, Tags: , , , ,


Intro:

It’s been quite some time since I’ve posted and a lot has happened! I am now in grade 9 and my class and I have just recently travled to Alberta! There were ups and downs throughout this trip and I’m here to tell you all about it! 

For every field study we do (this is the second one I’ve done, the first being our trip to Oregon) there is a driving question. This trips driving question was, “how can we become the best version of ourself?” Let’s dive right in!


Driving question:💯

The driving question of this project was “how can we become the best version of ourself?” Since these blog post are different for everyone, how I become the best version of myself is unique to me. 

Throughout the Alberta trip there were many long hikes where I wanted to quit, I was tired at times and just wasn’t up to it. However, I learned to preserveir through these hikes, sometimes with the help of my peers, and other times I was able to help others preservere as well.

 I learned becoming “the best version of myself” doesn’t happen overnight, and still, even after this trip, im not the best version of myself. Because become the best version of yourself is lifelong process and you don’t always have to do it alone.


Banner in the Sky đŸ§—â€â™€ïž


This brings me to Banner in the Sky. Now, you may be wondering, what is Banner in the Sky? Banner in the Sky is a book, (a very old one I might add) by James Ramsey Ullman. This is a project we did leading up to the Alberta trip. Banner in the Sky is about Rudi Matt, a young boy in the Swiss Alps, as he dreams of climbing a peak no one dared to climb but his father, who lost his life in the process. Rudi’s courage and determination drives him to chase his dream and prove himself as a climber. Since this IS a blog post I’m going to be completely honest. For me, this book was too slow paced which I dont do well with, so it wasn’t the most entertaining read to me (there were some pretty interesting parts though.) However,  it definitely ending up relating to our Alberta trip! I remeber looking back on Rudi’s preserverence and strong mindset while climbing, and pushing myself to do the same. ⛰


My book note taking!

https://s.craft.me/XwqAmTC3OQu127

Here are some photos from the hikes we did!: ( I apologize it’s not the clearest photos)


Interviews

Interviewing was a large part of the Alberta trip and something I can tell you I was not looking forward to!!!! Now, my dislike for this really had nothing to do with the project. I’m the type of person that isn’t naturally comfortable talking to people I dont know, let alone interviewing them!😬 This field study pushed me to step outside my comfort zone, and learn how to become more comfortable talking to people I dont know. Our task throughout and after the trip was to combine the interviews we made into one big clip about the “Ten Essentials of Life.” These Ten Essentials of Life questions were originally based off of the Ten Essentials of Hiking. For example, one of our interview questions was “have you ever been stuck in someone else’s shadow?  This was (loosely) based off sun protection (an essential when hiking.) These interviews were quite freindly and conversation-like, starting off exchanging names and asking if we could interview them for a school project. A big part of the interviewing helped me grow on my core competencies, for example, in the “questioning section” I gained a better understanding of asking questions and researching information! Once my final video was made, I loved how I could see all my hard work coming together! I’ll put it down below if you are interested in watching what I made when it was all put together?


My group members blogs:

Siena: https://www.blog44.ca/sienaj/

Ian: http://www.blog44.ca/ianw/

Marcus: http://www.blog44.ca/marcusr/


The Ten Essentials of Life Video:


Silent Video

Along with the viral video (which I’ll talk about in a second) the silent video was my favourite to make! Siena, Cloe, and Maya were my group members and we did a pretty rad job if I do say so myself! The goal of this silent film was for it to be, 1. Black and white, and 2. Without any words! This video was filmed in the ghost town, at three valley gap and it turned out amazing! Unfortunately we made this after a VERYY long drive, so we were all pretty tired, however the comedy in our film kept us going! Throughout this video I learned how vital it is to exaggerated facial expressions when you don’t have any words to show your feelings!


My lovely group members blogs:


Maya: N/A 

Siena: https://www.blog44.ca/sienaj/

Chloe: http://www.blog44.ca/chloer/


The Silent Film:


Viral video

For the viral video or “TikTok trend” our goal was to create a viral travel video of places we saw throughout our trip! Even though this was an individual video, you could choose if you wanted someone to be in it. I chose the love of my life, Elsa😍

copy_825F4E75-873A-49DA-B82D-2EFE991976F9


Reflection throughout the trip/everyday activities


Throughout the trip we made reflections every day, about how we felt. It was a good way to reflect on our mood and learning throughout!  To get ready for the longs days we need  to get up early, to get ready obviously but also. To have breakfast. Every day a new group was on breakfast duty, and this said group needed to get up even earlier! I am NOT a morning person so this definitely tested my ability to adapt to new situations!đŸ’€ I adapted to this by setting up MULTIPLE alarms! ( my favourite was the Brooklyn99 intro)


Conclusion

In conclusion, this field study was a great learning experience and I had lots of fun along the way, learning (or improving) many new skills, like interviewing strangers, or simply getting up early! I hope you enjoyed reading my journey in Alberta and stay tuned for more posts!đŸ«¶

by

Small But Mighty!

No comments yet

Categories: Science, Tags: , , , , , , ,

Small But Mighty!

Intro

I know I haven’t posted on my blog for a while so I can’t wait to share what I did! 😙 (for all I know no one’s reading my blog and no one will see this but thats okayđŸ’€đŸ«¶) For this “small but mighty” project there were three main assignments. However, we weren’t just assigned 3 things and told to get it done, which I like. Instead, before assignments were introduced we learned some background knowledge surrounding the project or assignments as a whole. For example, getting a better understanding of germs before we dived into one of the assignments that surrounded that! This is something that I find quite helpful, and it contributes in making me succeed. the first assignment Im going to talk about surrounds the germs I mentioned earlier so let’s get started! (Before I ramble on to much)

The Three Assignments 

 1. Field Journal


I quite enjoyed making my field journal, it wasn’t my favourite though!(I’ll talk more about that later!) The first step of this assignment was to ask ourselves a scientific question about bacteria, involving a comparison between things in the school. I wondered if the water fountain on the main level of the school had more bacteria in comparison to the one upstairs, which is in a more secluded area! Throughout this assignment I learned how to conduct a well organized slide show of my progress observing the bacteria as well as learning how swab bacteria on a petri dish which is something i had never done before so it was pretty interesting!  

 
2. Character Cards

Now onto my FAVOURITE part!😏 

Below is the criteria for the character cards. 

This was a really fun assignment because for one, I could do lots of drawings AND make cute descriptions for them! I’ll show an example and time lapse of me drawing one as well as a picture of one of the other drawings! đŸ±đŸ§šđŸŒâ€â™€ïž

RPReplay_Final1717613785

3. Vaccine media campaign 

Lastly, the vaccine media campaign. The goal for this assignment was, with a partner, create 3 social media posts educating the public on the reality of vaccines! (These didn’t need to be posted on a real social media account though!) Eloise and I chose the talk about the myth of vaccines, specifically the covid vaccine, giving women infertility, which isn’t true! Here are our posts about that.  

The Driving Question

How does our Knowledge of Cell Biology Contribute to Public Health?

Our knowledge of cell biology is essential for public health because it helps us understand how diseases affect our bodies at the microscopic level. This understanding enables the development of effective treatments, vaccines, and diagnostic tools. For example, by studying how viruses like COVID-19 infect cells, scientists can create vaccines to prevent the disease. In addition to this, cell biology research can lead to new technologies for detecting diseases early, improving overall health outcomes.

Conclusion & What I Learned From This Project

The “Small But Mighty” project was a fascinating journey into the world of cell biology and its importance to public health. Through the field journal, I learned hands-on lab techniques and how to analyze bacterial samples. Creating the character cards allowed me to blend creativity with science, making the learning process enjoyable. The vaccine media campaign emphasized the power of accurate information in addressing health myths. This project showed me how a solid understanding of cell biology can lead to better health outcomes. I’m excited to apply these lessons in future projects and everyday life!

by

Mind Over Matter!

No comments yet

Categories: Science, Tags: , , ,

Mind Over Matter


Intro

For this blog post I’ll be talking about my most recent science project, “Mind Over Matter.” I’ll be going into depth on how I built and learned how to make my video game about atoms, as well as some of the challenges I faced making it. Now that that’s out of the way, let’s get started!


About the Scratch Website 

To make this video game we used this app called Scratch. The fun thing about Scratch is that you can learn and make so many new and different things! Scratch is a free website that anyone can access. Another interesting fact about this game is that people all around the world can publicly post games they’ve made and you can try them out! 


My First Impression 

If I’m being completely honest when I first tried out Scratch, I didn’t like it one bit! It was glitchy, confusing and a completely new experience. There were so many options and codes to make a video game, it was pretty overwhelming. I found ways to overcome this though! 


Learning About Scratch  

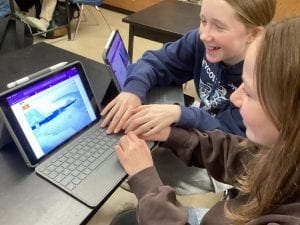
Learning about Scratch was a bit of a process, but once I got the hang of it, everything became so much easier. Since there were so many things you could make on Scratch, they couldn’t possibly create a tutorial for everything, now could they? So I had to resort to YouTube! (It is very helpful, you should try it sometime.) YouTube wasn’t my ONLY helpful source though, I could always rely on my friends, classmates and teachers, too!  


Project Criteria

Now, for this project, yes, there was obviously a criteria but it was pretty wide ranged. What I mean is that we needed to make a video game that showed our knowledge of atoms but we  could choose what we wanted to do from there! For example, a friend of mine made a game where your goal was to catch an atom. Throughout their video game, my friend demonstrated their knowledge about atoms and a few other science related topics that surrounded this project.


My Video Game Proposal + What My Video Game is About 

My Video Game Proposal

Below is the criteria for making MY video game proposal


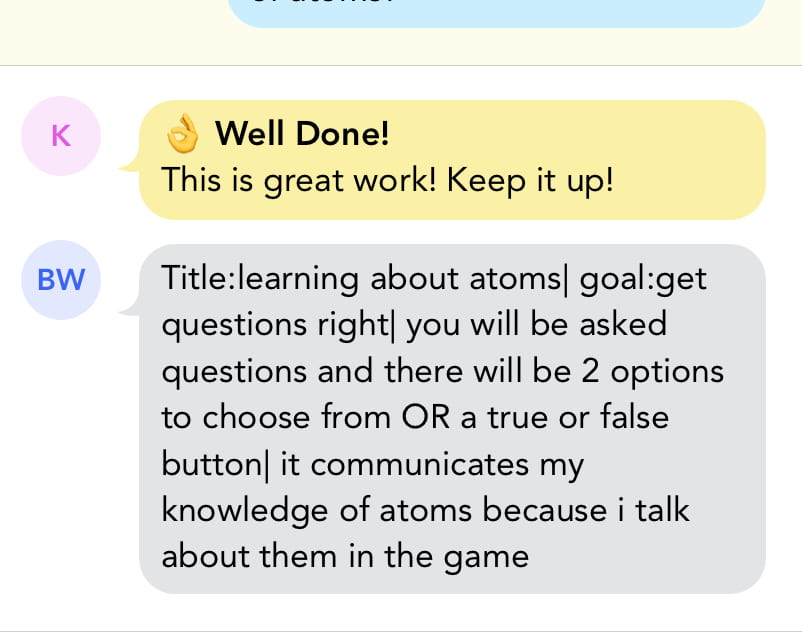
Here is the proposal I submitted for my video game. (note that SOME things in this proposal may have changed since I made the proposal a while before I finished my video game)


My Video Game

 My game is called “Atoms Trivia” which is pretty self explanatory so you may have already guessed what it’s about.  


This single player game starts off with a character introducing the rules. In my game, you’re asked 10  yes or no questions, all relating to atoms.  

If you’re interested, this is your “teacher” in my video game. 


Your goal is to get as many points as possible by the time you’ve reached the end of the game. I tried to incorporate some humour into this game, so if you do play it and get some answers wrong, don’t be offended by the teacher’s negative responses. Something to note is that some of the questions you’re given are very easy, while others are a bit tricky.  Overall, this game is a great way to test your knowledge about atoms, and if you don’t do well the first time, you’re always able to try again!


How I Answered The Driving Question 

There were many ways I showed my knowledge of an atoms in my video game. For example, Since it was a trivia game, I demonstrated my understanding of atoms by having the correct responses when the player answered “yes” or “no.” In addition to this some of my questions were quite in depth and specific, which showed I knew what I was talking  about.  


How I Showcased My Creativity In My Scratch Game!

 I showcased my creativity in my video game in a few ways. For example, I would say I had a creative video game idea (my trivia) and I really enjoyed the answers I coded into the teacher. For example, when you got a question right sometimes she would say “awesome sauce” or “splendid”, which I found pretty funny!  


Conclusion

In conclusion, even though at first Scratch was challenging to learn, I used the resources available to help me along the way! My hard work paid off though because I am very happy with my video game result! If you would like to check out my game, I’ll put the link below.

Link:https://scratch.mit.edu/projects/970985741/


by

My Showcased Work

No comments yet

Categories: Humanities, Uncategorized, Tags: , ,

                My Showcased Work

By:Brooklyn


Intro:

For the past few weeks my classmates and I have worked on making a triptych. Now, you may be thinking, what the heck is that, and how did you do it? Well, read more and you’ll find out!


What’s a Triptych?

Before I explain what we did, you’ll need to understand what a triptych actually is! Triptychs are three pictures or carvings on three separate panels, typically hinged together side by side and used as an altarpiece. Now that you know what a triptych is, let’s actually get started!


My Groups Triptych 

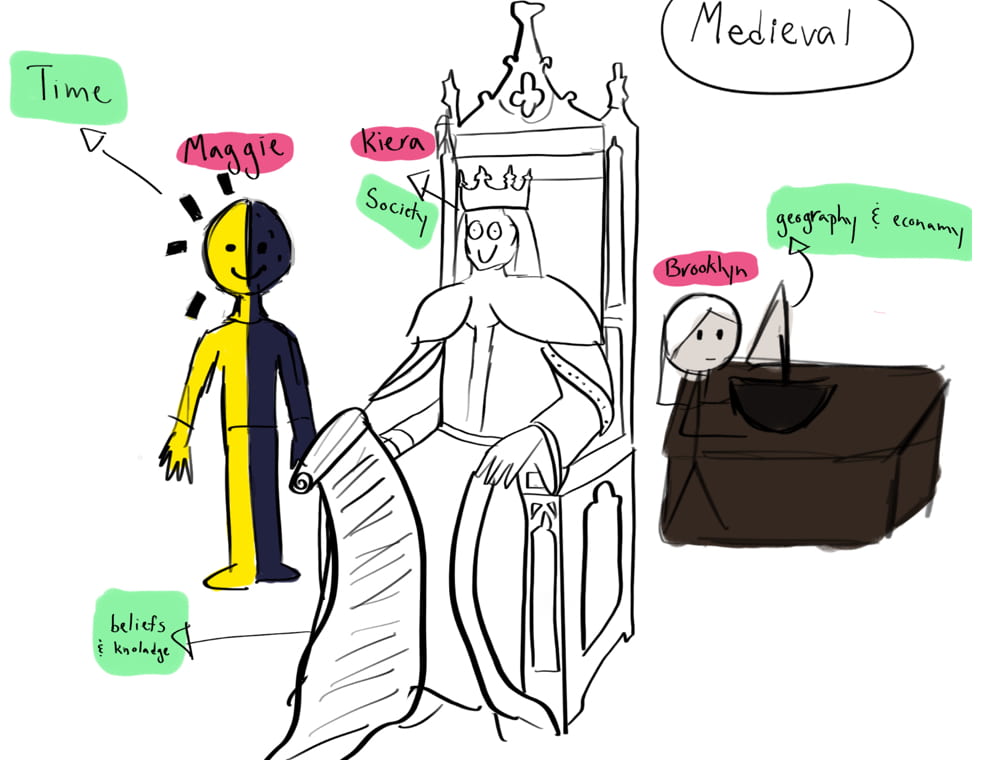
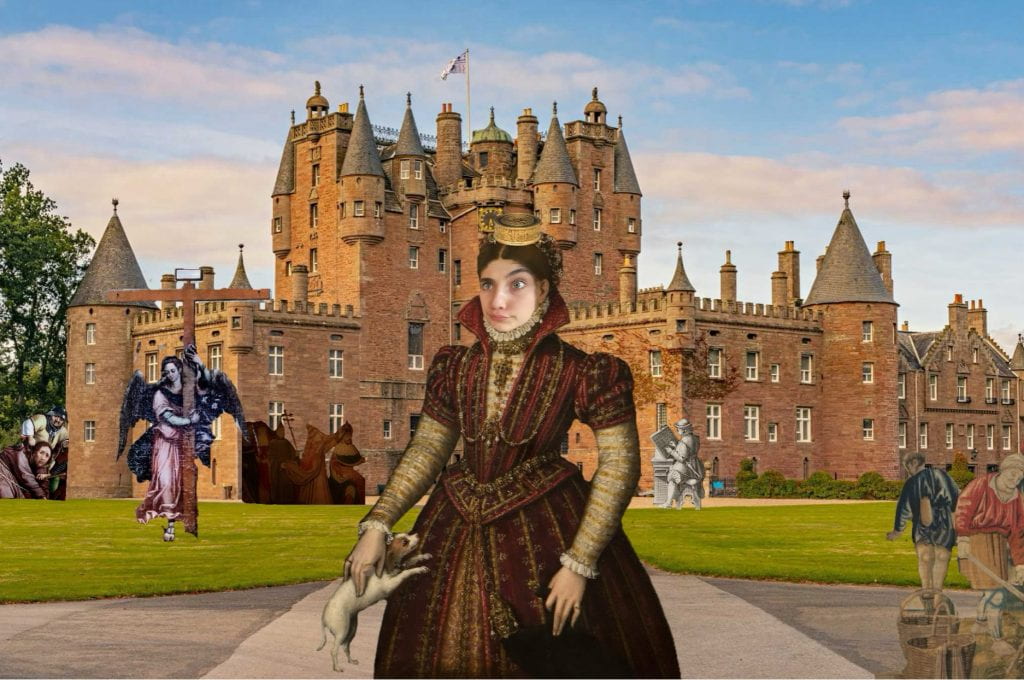
To get a better understanding of how our triptych was going to play out every group needed to make a digital version of what it was going to look like. Below is my groups digital version. 

This was our final digital version. We sketched drafts before hand. I will show these below. 


The Process We Went Through


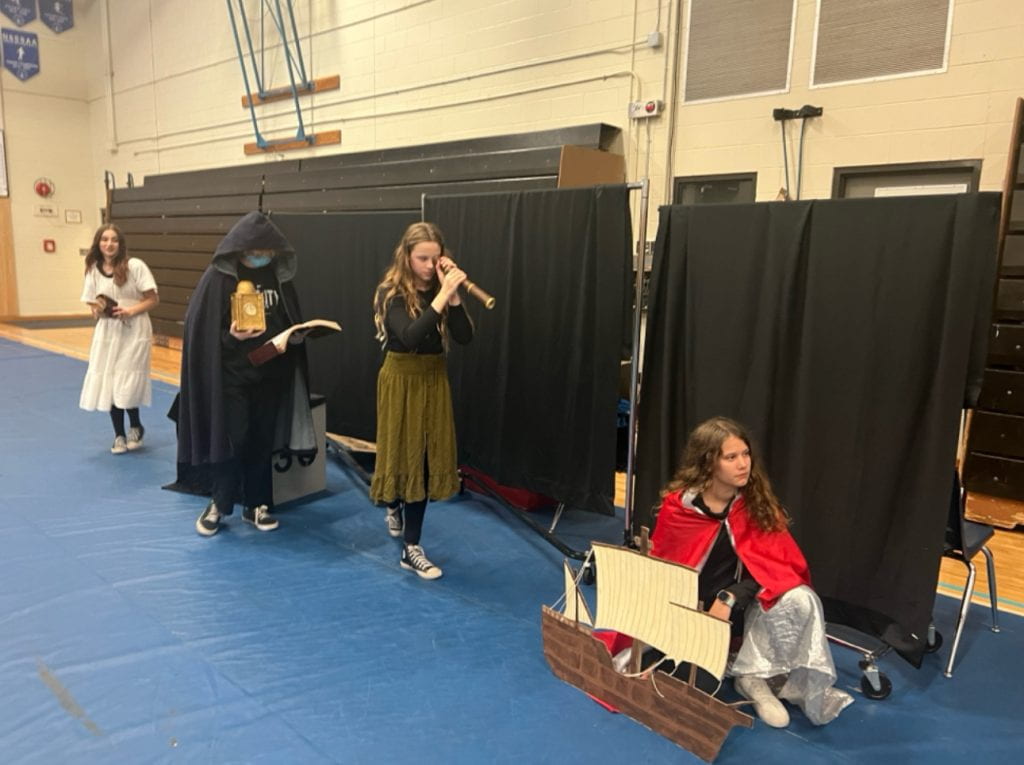
The triptych we strived to make was of the medieval times, Renaissance era and contemporary, or modern. At the start of this project all we were doing was learning about Medieval Times as well as the Renaissance and contemporary eras, which was actually a lot of work. I should probably tell you before we continue though, the triptych we made was not the ordinary triptych you may see. Instead of a painting or carving, WE were in the triptych. Pretty cool, huh? 


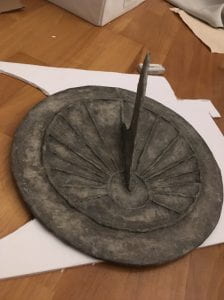
As an audience member it may have seemed like a simple task to do this, but let me tell you, it was not! This is one of the reasons everyone was put into groups. Below are some of the photos of props we made.    


Here is a small video o

IMG_3983


Of course, like anyone else we ran through some problems but as a group we worked through them! There was a speaker for each scene and while the speaker was explaining what the said scene was about, for example the Medieval Times, the rest of the group members would be behind a certain changing into clothes that represent Medieval Times as well as incorporating props that we made into the triptych.


Photos and Videos of How the Exhibition Went! 


At the exhibition all of our hard worked finally payed off. If you didn’t already know, as a grade 8 PLP student, this is our first exhibition so everything about this is new to me and my classmates. Although as this school year progresses I will continue to learn new things and grow not just as a PLP, student but as a person.


My Power Play Post & How This Project Built on 

If you would like to check out my power play post, click on the link below.

https://www.blog44.ca/brooklynw/2023/11/26/the-story-behind-my-artwork/


Radical Innovation and How it’s Going has build on our previous power play project in many ways. For instance, learning about history and its societal impact throughout time allows me to gain a broader perspective on my current worldview. I gained a greater understanding on how the people in the Renaissance and Medieval times functioned in their everyday lives. For example, a lot of decisions were made off of their economical status. In addition, it was a time of patriarchy, where men were always or often the leaders and felt their opinions outweighed that of a woman. Lastly, The Medieval part of the triptych became part of the overall triptych, which I showed earlier in this post.

The Driving Question

The Driving question for project is “What can we learn from the past and why does that matter to us today?” Within this project I have gained a greater understanding of how learning from the past applies to us today. For example I’ve learned the importance of art, science and literature which has made a lasting impact on our society today. In addition to this, throughout this assessment I have become more aware of how lucky I am to live in this society and be surrounded by all these wonderful people.


My Renaissance Photos and Paragraphs + Improvements From my Drafts 

The first Renaissance photo is not revised, while the second is.


Not Revised 


Revised


Original Renaissance Photo 


Improved Renaissance Photo


Group Members Blogs

I will link my group members blogs below if you’d like to check them out!

https://www.blog44.ca/milainac/

https://www.blog44.ca/kieral/

https://www.blog44.ca/maggiet/

https://www.blog44.ca/oliverf/

Conclusion 

In  conclusion, this project was a LOT of work, but it was worth it! I learned so much about the Medieval, Renaissance and contemporary eras as well as how to get better at working in groups. It was an amazing experience and opportunity, I look forward to doing similar projects.


by

Drawings and Doodles!

No comments yet

Categories: Maker, Tags: , , , ,

Drawings and Doodles!

By: Brooklyn

Introduction

For this project we focused on learning how to draw in Sketches Pro. We learned about all the features it had to offer, and the different tools we could use. In this blog post I’ll be showing you my favourite drawings that I made and take you through how I did it. Let’s get started!

Learning The Basics

Before I made any actual drawings, I  learned about the app “Sketches Pro” and how to work it. In the picture below I’m drawing a rough sketch of all the tools and brushes I could use.


Shapes


As a good starting point, the first drawing we made was just focusing on shading and drawing 2 and 3D shapes. That was the only criteria for this since is was more for us to learn. Keeping this in mind, I chose a shapes and colours of my choice.


The Emoji


This is one of the drawings I’m particularly proud of. For this drawing the criteria was pretty simple. We needed to draw a emoji. This could be an image you made up or something that already exists. I used my knowledge from the shapes to create my final product. Personally, I made something up for my emoji but I was inspired by a meme and a facial expression I’m able to do. 


The Robot


At this point we were progressing into bigger drawings. For this assignment I needed to make a robot out of shapes, but the idea could be as crazy as you wanted it to! This being said, mine is pretty out of the ordinary. When I was making this I didn’t have a set idea of what this was going to look like so I just went with the flow. I’m going to be completely honest here, the robot is cool but it looks  like it just experienced World War 2.


  Business Cover


Over all the drawings and doodles I’v done, this is by far my favourite.  My job was to create a business cover for a store I made up. I definitely struggled trying to find ideas for a business, but it ended up working out great! My business is pretty much what it sounds like, a cafĂ© with ferrets! Don’t worry though, they don’t bite!


Conclusion 


I had a lot of fun with this project, and I hope you enjoyed reading all about it! As the project progressed I believe the improvement of my skills and techniques was evident. I look forward to doing more projects where I can use these skills again!


Skip to toolbar