Bedrock and java pvp

The first major difference that i am going to talk about it the difference between p.v.p. an p.v.e.

So what is different about the p.v.p. you must be thinking? Because it is the same game of course. But there is actually a big difference between the p.v.p. Please keep in mind that when i am talking about the java p.v.p. I am talking about the modern p.v.p. And not 1.8 and earlier, But in java the combat it heavily based on critical hits and timing your blows, but in bedrock it is more about spamming and sprinting at you opponents so you can get the most hits. An other main difference between the two versions is the best melee weapon to use. In bedrock the main weapon that you would use is the sword end or story, but in java you have the choice of using the axe or the sword. Now most people would say that the axe is better and while it is more versatile i will not say that it is better. So the axe is good for doing a lot of damage in one hit, but the sword is better for doing more hits. Now in the early game for most players the preferred weapon is the axe, later gameplay when most player have optimized items with enchantments the sword can have more enchantments and is therefor considered the better item to have. Please note that the axe can disable shields and that will be mentioned furtherer. An other difference between java and bedrock is the fact that there is armour toughness in the java version of Minecraft. What armour toughness does is it reduces additional damage that the armour would normally not (please not that only diamond armour and netherite armour are the only armour that have armour toughness) and finally the finally main difference in the combat systems are shields. So shields in bedrock have not recharge and can not be disable for a period in time and can only be broken. In java on the other hand a shield can be disabled on an axe crit for 6 second leading to much more balanced p.v.p.


Here are some photos of attacks in te different versions of minecraft

here is a photo of the attack indicator in java

Here is a photo of the attack indicator look at where the arrow is pointing

now here is a photo of the attack indicator on pocket edition of bedrock minecraft (phone, ipad and tablet) :
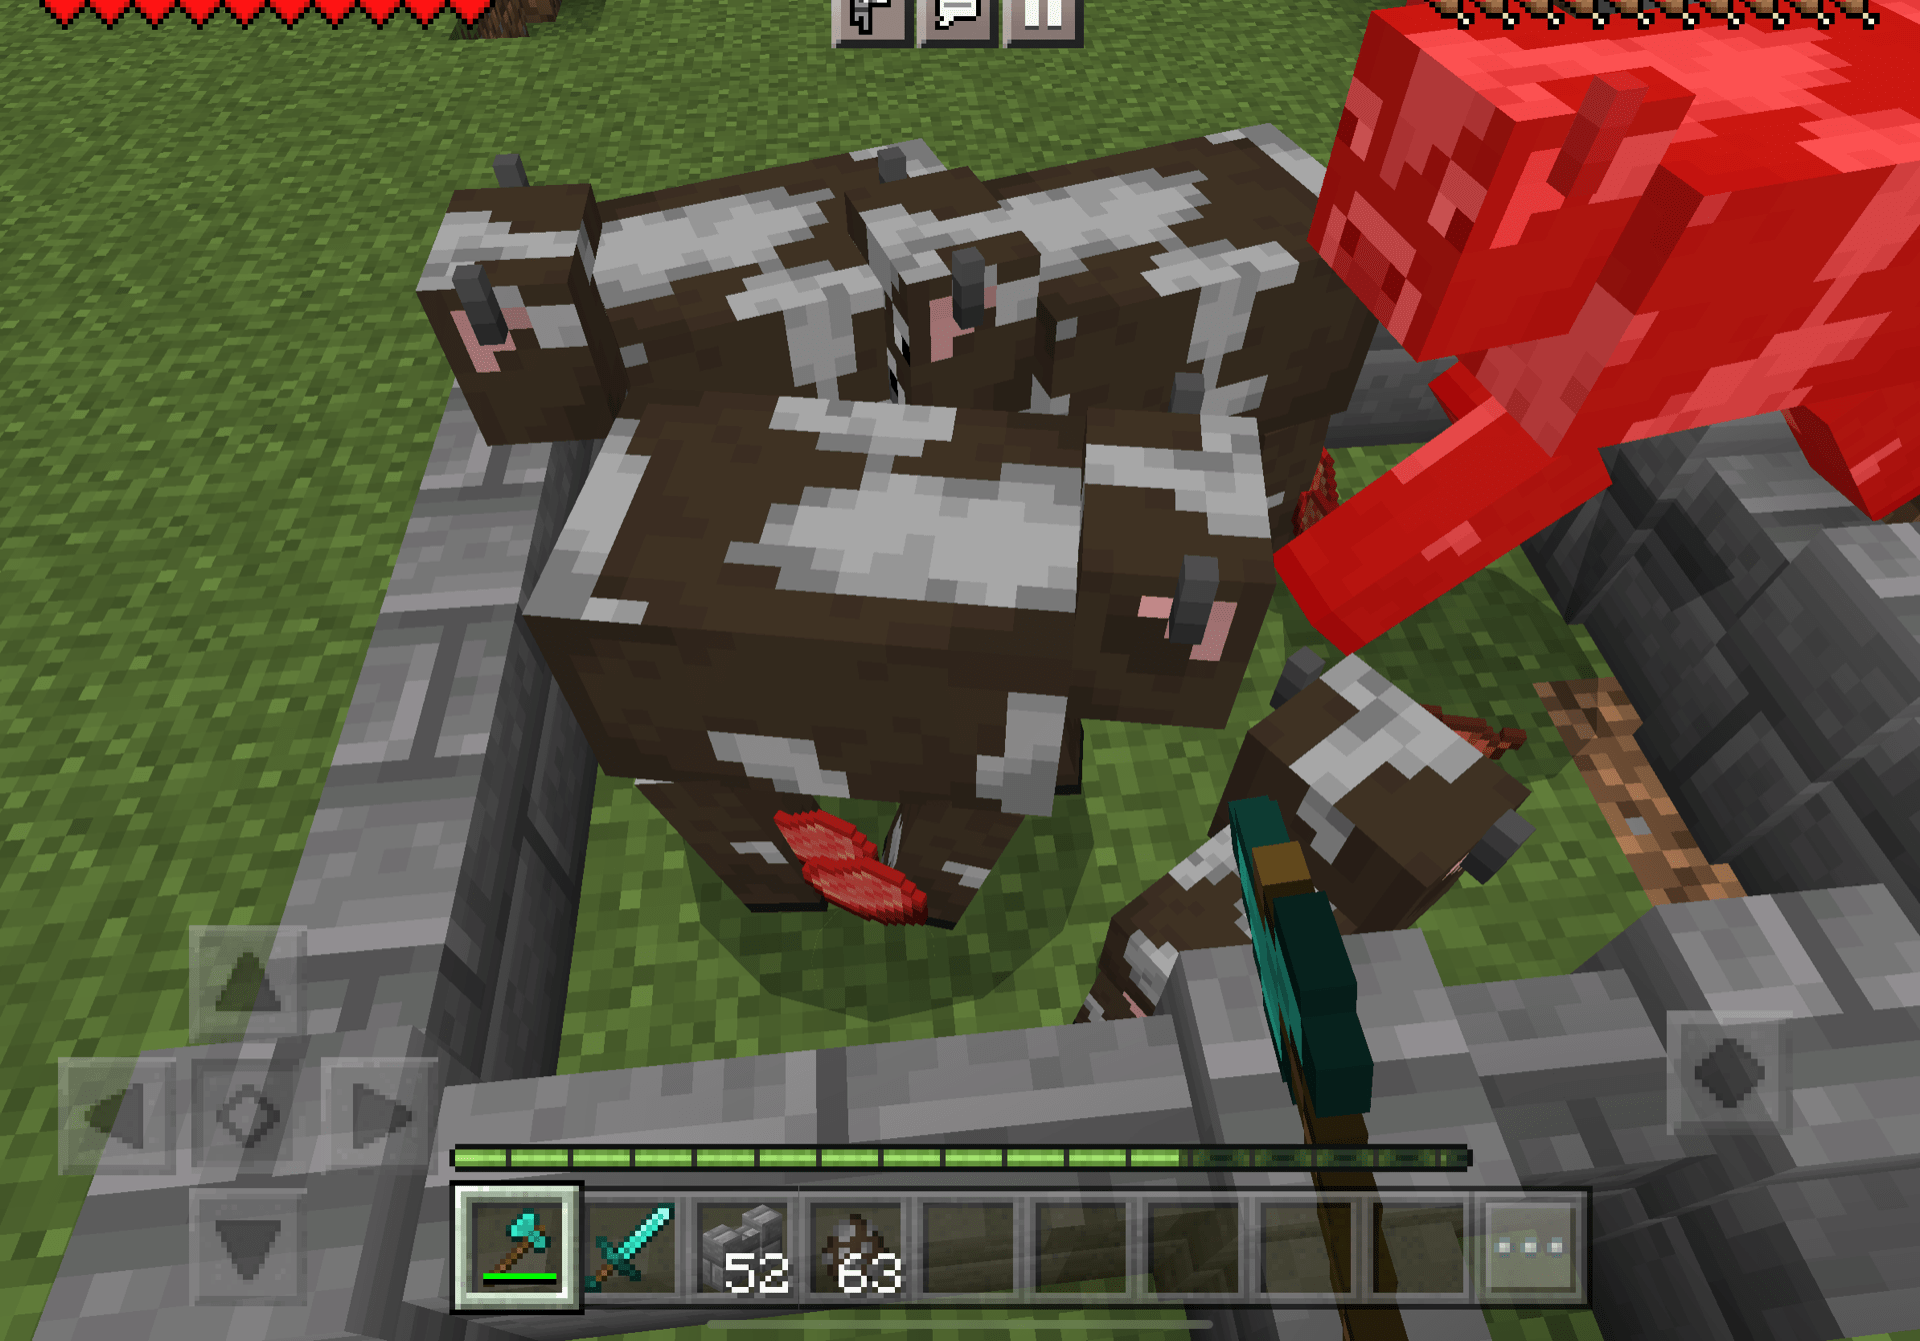
This is a photo of how an attack swing looks on pocket edition
This is a photo of how an attack swing looks on pocket edition.

The outsiders.

So here ima talk about the humanities project that we have been doing. We have read the book the outsiders by S.E. Hinton. As we were learning about the book we learned about the different parts of a story including: the exposition, the rising action, the climax, the falling action and the conclusion. We also did activity’s on looking what the outsiders would look like now and we also compared ourselves to outsiders character in the you vs who character analysis. I think my favourite character from the book was Ponyboy’s older brother and legal guardian, Darryl “Darry” Curtis. That reminds me i did not talk about the other characters in the book. These are the main character from the book: Johnny, Darry, Sodapop, Dally, Two-Bit, Cherry and Randy. The first 5 of those character are greasers, and the last two are social. Greaser means poor person or hood, and social is a rich person who might have a mustang. My take on the point of this was to increase our world view and so we could think about the different aspects of world view which takes me to a different part of this project.

 So the different aspects of world view are: society, time, economy, values, beliefs, geography and knowledge. So learned about how their values are different then what they would be now and how which values mean more to us then others. The values that are important to the characters in the outsiders and shaped most of their characters and economy, geography and society. These values are important to theme because they are poor so they rely on each other, hence the society and economy. The geography shapes how they act at times because they are in the U.S. south and they can sleep outside if there parents have kicked them out of their houses.

Once we had done all of our learning we did and exhibition to show to our parents what we have been learning in school. Each group was given an important scene from the book enact. My group got the judge scene (so the main character Ponyboy Curtis has to go to a court trial to see if he can stay with his older brother Darryl Curtis). In the exhibition we had to perform the scene with props and then perform the scene again but modernize it they we think it would play out in twenty-twenty-one. At the exhibition we also had our scimatics tectonic chances board game. (At the end of the blog post i will put some clips and photos of the exhibition). 

The point of this project was to increase world view by reading a book, but not just any book: an important book, a good book and referenced book.

Constructing creative communacation-Carr

So this is the second part of two blog posts about what we have done and learned about in this maker class. Carr was about learning about the Apple Pencil and Sketches Pro. We also learned about different ways to draw the different tools that sketches pro has. Some of the different strategies that we learned about were using pressure, doodling (yes this can be a skill), shading, perspective and using colour (yes also a skill).

Now because i want this blog post to be like my other blog post for this project i will talk about the artist that this is named after, and that is Emily Carr (wow you guessed it good for you). So Emily Carr was born in Victoria British Colombia in 1871 she was a Canadian artist and writer inspired by the indigenous people of the Canadian north west. Emily Carr did not get recognition for most of her life. She died in 1945. Now one of her paintings could sell for more than 2 million dollars. She is known for her use of colour and how some of her art looked surreal.

So some of the art that i did in this subclass were: creating block letters, creating a doodle library, and drawing our own emojis, drawing a robot and creating a design brief to name a few. I think that the best skill that we learned was sketch noting. So you use visual art to take notes on what you are doing. You use arrows and other thing to point where to look and to tell the story of what you are taking notes on. I do not find this useful but. Know some artistic people like it.

When we’re doing these thing we learned how we could use the different skills. Some of the tools in sketches pro that i used the most were the pen marker ruler and the water Colour. I think that my favourite tool is the pen because the colour does not get darker when it overlapped. I will include most of the drawings at the bottom of the blog post. One cool thing that we got to do in this project was talking to a graphic designer. I won’t say her name because idk if i can but it was interesting to hear her point of view and how you can use art in a practical way to make a living. In conclusion i think this project was about learning how we can use the Apple Pencil to make art and how we can use the different tools that we have at our access in the plp program.

For this drawing i had to take a photo of a location and then try to make it 3d
In this drawing we were practising adding more than one dimensions to drawing, note the aqua on the side of the robot
In this drawing we were practising adding more than one dimensions to drawing, note the aqua on the side of the robot.
This is my favourite out of all of the drawings that i did because it is so uniquely me, anyways what we were doing here was sketches notes so drawing instead of writing things down
Here we had to try to emulate an emoji as you can see from the drawing and the emoji on top
Here we were supposed to make a unique drawing with our name in it.

Constructing creative communication-Herzog

So this is the first blog post out of two blog post that i will be doing for this project, one for the Herzog and one for Carr. This is the first blog post, this one is for Herzog. So the first thing that i want to talk about is the Fred Herzog, because he was what this small project was about, but also how he pioneered the art of street photography, so the first thing that i want to talk about is Fred Herzog.

Fred Herzog was born is Germany in 1930. He imagrated to Vancouver in 1953. As a photographer his use of colour was a unusual at the time because artistic photography at the time was black and white so he was a different photographer in that regard. An other thing that he was unique in was the fact that he did artistic street photography. Street photography is supposed to mean that the photo is just captured it is not modeled and is is not formed, it is just taken.

the goal of this sub project was to become our own fred Herzog and take pictures, think how they tell a story and learn how we can take better photos.

What we learned in school about taking the photos was taught to us in 5 skill.

Skill one: composing composition. What we learned with this skill was how to focus a photo, and how to take a nice looking basic photo with our iPads. We also took a photo walk and made a personified picture.

Skill number two: adjusting angles. In the adjusting angles skill we learned how use photo booth with the timer, use preset filers in the camera and photos app and experimented with lighting and basic camera angles. What we learned was how to shoot self portraits how to make a portrait and how to create a silhouette portrait. A final thing that we learned was how we can use lighting to tell a story.

Skill number three: manufacturing mood. What we did to build the skill: composed our shot using the rule of thirds and the rule of backgrounds and foregrounds, we varied our basic camera angles, tried panorama, used scale and contrast and applied a filter with a third party app. The first thing that we did to practice the skill snapping a landscape. The second was taking a panorama and finally we captured people places and things.

Skill number four: creating collages. How we built the skill: we used basic keynote with photos: we rotated, resized, arranged, drawed masked and remixed, we used advanced keynote with photos and created storyboards for our images. The first skill that we practiced was pictorializing our names. The second was creating a personalized collage, mine is one my personalized collage about me page.

Skill number five: moulding movement. The things that we did for building the skill were trying burst mode, taking and editing Live Photos, changing the appearance of a photo over time using keynote and finally adding motion to a photo. The skill that we used to practised to improve were creating a moment in motion. What we did was take a ton of photos with burst and we froze one part of the moment in time. And other thing that we did to practice was morphing a photo using keynote and finally we created a photo animation, or a gif.

But what did all of this serve to do? It taught us how to take better photos and how to tell a story in a picture and how to capture and freeze a moment in a picture. That is what this Herzog project was about.

Escape the plates.

For the last month and a half we have been working on our tectonic chances project in class. BUT what was the point of this project? It was to make a science themed board game that was based on tectonic plates. So me and my group made a game called escape the plates (although full credit goes to my group mates as i joined there group half way through as my original partner was M.I.A the entire time). You can check out my partners here Daniel and Dylan you can check out a copy of the game rules a bit lower down in the article

So here i will go over what i learned. But that is mainly summed up by my MindNode which is below, but i will also sum it up in words for those who are too lazy. So we learned about the different plate boundary’s we learned, learned about the different layers of earth we learned about convection currents and we finally learned about continental drift and all about the key concepts of the tectonic plates and the such.


Now i will talk about the three different curriclur competencies that we were graded  on in scimatics. The different grades/ feedback levels that we could receive are emerging devolving accomplished and extending. We also sometimes receive these grades with emoji like the rainbow emoji, the sunshine emoji, the sun/cloud emoji and the cloud emoji.

So the first curriclur competency that i will talk about is: Evaluating: Demonstrate an understanding and appreciation of evidence. So here i got acomplished on how The theory of plate tectonics and supporting evidence is a central theme of the game. 10 key science concepts are described. Game pieces visually represent tectonics concepts.

The second curriclur competency is: All class time is used efficiently for learning and project work without distractions. I also got accomplished on this one as well.

And the finale one is: The tectonics game uses probability in each turn to determine outcomes. The probability of several example combinations of events is clearly calculated in the game instructions. And i got accomplished again here so not much too put down here.

Here is a copy of the game rules. Click on the link right beside me. Escape the plates

So that is my horrible blog post, about the story of the tectonic chances project that we did in scimatics. If you want to have a better explanation of what we did, then check out my partners. I liked their blogs higher up in the article/blog?.


becoming a PLP learner

What is being a PLP learner?

 Well I just recently learned this myself in school in my maker class.

What being a PLP is is just learning a bit differently then most people by making a lot of drafts and not just throwing something away after the first draft. I’m about to go over what i learned by giving some examples and going through what i have been learning this maker class.

So step one is listing what we have been doing in this class and and then explaining what we did and how i increased my knowledge and learning. The thing that we have done in this project are the big life journal, the Memoji, the different team challenges, the teamwork contract and the, the user Manuel, the physical representation design plan, the Memoji speech bubble, the i am statements and the digital selfie and the who am i WordPack image. Each of these increased my learning in different ways and i will list a few. The first example her is the digital selfie which helped us get a better understanding of how to use the camera on our iPad in different way as well as edit the photo with different shades and filters and how to draw on on the photo to make it to our expectations. An other example of this is the user manual which helped tach us how to use the app page s which is simpler to the app word by Microsoft and they taught us how to use the different fonts, colours and bullet points that made all of our user manuals to grade, but the most important thing was that they taught us how to use these apps in different ways and that Is the important thing that i’m trying to convey here. 

You might be wondering why i have put all of this in a my blog and that is what i plan to answer here. The reason I’m putting all of these things in here is to convey the fact that all of these things that we had to learn all had a reason behind them and that was to teach us how to use these apps to become and improve being a PLP learner. That is why we had to do all of these things in class. In reflection i see that every thing that we have done in class has been to make sure that we can be the best PLP learner that we can. That is what being a PLP learner is about.


here is video guided tour of what we did in my becoming a PLP learner class:

Medium is the Message

  • This was my first ad draft for humanities

So this post is about what I did in my humanities class, and what I did in this class was medium is the message which was a project about advertising and how what we did kind of gave us different takes on what an ad is and how hard they are to make, but enough of my yappin, time to start this post.

So what we have been doing for these past 5 weeks in humanities was medium is the message. So we learned about advertising and some of the technics used to persuade us and appeal to us and try to get us to buy or use their product and/or service.

What we have worked on in class are the advertising photo journal, the historical media analysis and the single and group ads for our business and all of this was to give us a better perspective on what advertising is about and how they use multiple different strategies to intrigue us, draw us in and then try to make the sale.

Some of those strategy’s are weasel words, targeted advertising, using celebrity’s that they think that we like and look up to and finally things that look different and pop out to us. We learned about all of these stratagys in class and used some of them to make our own ads in our groups. Then we voted the one that we like the most and touched it up, made it pop out more and then sent it to our client.

So in humanities we worked on making as for our businesses and the business that my group got was Patrica Houlihan, personal real estate corporation who you can check out here. So we did a small 10 minute interview with our client Patricia to see what she wanted in her ad. What she said she wanted was an ad that is fun and pops out but stays professional and appeals to the right audience. So we came up with our individual ad drafts.

Once we finalized our ads we voted on which one that we though was the best (the one that we chose was Ruby’s) and then made changes and improvements on it  (and I give full credit to my group mates they did most of the work, i have no artistic talent) and then we sent it to Patricia for approval made and couple of minor improvements and then we were mostly done the project. You can see the final group ad below.

You can check out my group mates here. Makai, Ruby, Frankie, Cameron and Keaton out by clicking on their names.