TPOLS! My growth over the year.

Hello!  Welcome to my Transitional Presentations Of Learning which will show my growth through the year!

Driving question: Why do you feel you are ready to advance to the next grade level?

“Thank you for coming to my presentation of learning. I am the expert on my own learning. I am also responsible and accountable for my own learning. You can expect me to give an honest evaluation of my progress. We will discuss my strengths and opportunities for growth. Thank you in advance for listening and for offering feedback that I can use to improve as a learner.”

“You don’t learn from experience, you learn from reflecting on experience.” – John Dewey.


Goals for the year:

I had goals for each subject that are shown in my learning plan.

For Humanities, I aimed to put out the best work that I could.  I sometimes would rush to hand in my work on time and not check the rubric to see if I could have done better.  Nowadays,  I feel like I always revise my work whenever the teacher asks.

In Scimatics, my work was mostly bland and was very boring to look at.  Most of the time, I finish most of my work in class so that I could work on other subjects.  I think that I accomplished this goal when I was doing my comic.  It took me a lot of time to illustrate each drawing so that I could create more colourful and brighter projects.

Humanities:

Things we have done over the year: Medium is the Message, The Outsiders, Working With Words, The Renaissance, Argh Matey and finally New Beginnings.

How have I grown through Humanities?

At the beginning of my year, I feel like I didn’t check back on my work and aim for rainbows.  This can be seen when I did my You vs Who character analysis.  Even though I got feedback, it took me a week to fully revise my work even though I could have revised my work earlier.

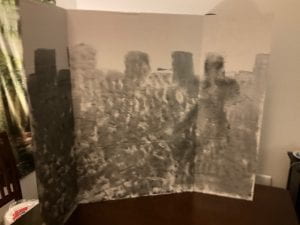
Nowadays, I think I usually check and revise my work.  I demonstrated this when I created my final images in the project New Beginnings.  I kept revising more visuals so that I could create the best possible one with my abilities.  In the end, I think I succeeded in doing a decent photo.

Scimatics:
Things we have done inside Scimatics: Fractions of Time, Tectonic Chances, Laser Laws, Chemistry Coding, Ultimate Design Challenge and Comic Cells.
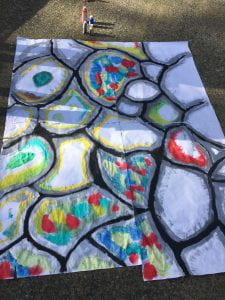
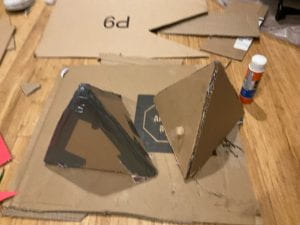
When I started Scimatics my work felt unrefined and was very bland.  This was shown when I did my tectonic plate game.  It was a blank piece of paper with a sharpie showing the different plates.  I could have added the countries using a different colour.
I think that the last project I have done was a lot more pleasing to the eye.  This time, I used different colours to make the image look better.  I showed my growth when I did the project Comic Cells.  I created a comic with cool illustrations and drawings that I am quite proud of.  I also learned how to use a new app while creating the comic.
Some of the things that I have grown in because of PLP:
Collaboration and Communication
Most of the projects in PLP were with other people.  This made me meet new people and collaborate together to meet our project goal.  I think this is shown when I did Destination Imagination.  I didn’t really know who most of my team members were causing me to make new friends.  I also had to communicate online to set up meetings so that we could plan, build and rehearse our performance.
Technology
Before joining PLP, I think that I knew how to use the iPad decently.  Nowadays, I now know a lot more than before.  I have to create and edit videos, draw decent visuals, use the camera to create better photos and much more.  I learned most of my skills during Herzog and Carr.   If you check my earlier work, they were a lot more basic than what they are now.
Why do I think I should move to grade 9?
I think that I have all the necessary skills and information to move on to the next grade.  I have learnt a lot in grade 8 and will use my problem-solving skills, collaboration and communication in the further grades ahead.
Conclusion:
Overall, my time in PLP has taught me a lot of new skills and things that I would have not learnt in the regular curriculum.   I have also really enjoyed my time learning with the other PLP learners as we go into a new grade.  Next year, I hope to advance my vocabulary for Humanities and Maker.  Thanks for listening to my TPOL!
Some things I am proud of:
-Chris

The End of Destination Imagination (For This Year)

Hello people!

I have just finished doing Destination Imagination.  Doing this project was quite challenging but did quite well at the end.  My team managed to place 1st for our instant challenge and second for our challenge solution.  I hope you enjoy!


Check out my teammates:

Daniel

Brooke

Keira

Jasper

Francis

Seth (Didn’t attend tournament but helped)


What was our story?

Basically, our story was about a boy going to a mall and accidentally tripping on a plant causing him to go into the microscopy world.  When he wakes up he is greeted by 2 unfriendly guards that work for the king that rules this land.  He is immediately forced to go with them to meet the king.  When he finally is presented before the king he finds out that he was actually shrunk by him using a powerful shrinking gem with a lot of power .  After telling him that he is sent to a dungeon to prepare for an execution.  While staying in the dungeon, he meets another prisoner that explains why the king is doing this.  He was shrunk because whenever humans walk past the plant it causes massive earthquakes destroying there town.  Due to this, they all have to live within a castle.  After learning about this he protests that if he knew, he would have stopped doing it. He is told by the person that the king is always making unfair judgements.  Not only that, the king has also executed thousands of humans in the past.  Together they decide to start a riot against the king.  With the help of all the villagers the manage to over throw the king by throwing him off the tower that holds the shrinking machine.  After defeating the king, he uses the gem to go back to the normal world.

Now that I am finished recapping the story your probably wondering how we executed our plan.

The first thing we decided to do was to write our script.  Brooke and Keira wrote out the script whilst the others edited their work.   While we were doing that we also decided who would be the different characters.  Daniel was the protagonist, Keira was the person he met in jail, I was the king, Brooke and Jasper were the guards and Francis was a villager.  Here is our script.

Di Story Script

After finishing the script and assigning the roles, we moved onto building.  Daniel and I had to build a frame for our backdrop.  We first went into the woods to find some wood planks.   We ended up finding an old campsite that Daniel used.  Unfortunately, all the planks were nailed in so we had to use rocks to smash the ends off.  We then went over to Daniels house to finish building the set.  Here are some photos.

The next thing we did was to paint the backdrop and make the props.  Every Mondays, we would meet up after school to either paint our backdrop or make some props.  However, I think we ended up neglecting the backdrop and waited until the last week to complete it.  i think that it turned out pretty well towards the end.  For our props we created a crown, a big leaf, a mall sign and a gem.   I helped create the gem and the mall sign while my teammates did the rest.  Here are some more photos:

The last major thing we did was creating our costumes.  The knights had chest plates and swords, the king had a cloak and crown and the others were just casual clothing.   I created the knights armour and helped a bit on the crown.  Photos of our costumes:

What were our team choice elements, how were microscopy techniques used and what was our mysterious object?

Our 2 team choice elements were art and music.  I created soundtracks for different parts of the story whilst we painted our crown in an artistic way.  For our microscopy imaging technique we used dark field microscopy.  On top of the microscopy world there was a big leaf covering everything.  Our mysterious object was a gem that the king kept protected with his life.  It was a gem with the power of changing the size of other entities.  We also added fairy lights in the middle to enhance it.

We were finally ready to perform.  I think that the performance went alright because the transitions were a bit slow and messy.  Here is a video of us performing:

In conclusion of this project, I found that this was quite a unique experience.  I learnt how to build things with saws to doing a budgeting sheet.  Not only that, I also built new connections to people I wouldn’t usually talk to.  Next year, I plan to start building earlier.  On the day of the performance we still had to build some props that we forgot about.  Overall, It was pretty interesting and challenging to do and I learnt a lot from this.

Thanks for reading!

-Chris

Destination Imagination! (Mid post)

Hello world!

Today, I will be talking about what I have been doing for the past couple weeks.  It has been quite hard and difficult doing this task.  I hope you enjoy!

Check out my teammates:

Daniel

Seth

Keira

Brooke

Jasper

Francis

What is Destination Imagination? 

Destination Imagination is a tournament that is split into 4 different groups, Scientific; Up Close, Technical; Daring Escape, Improvisational; Festival Frenzy and Fine Arts; Tricky Tales.

I was assigned to Scientific with a bunch of other people and learnt about the rules.  We had to create a story about a person going into the microscopic world and meeting a mysterious object and manages to escape back into the normal world.  We also have a budget of $150 usd to spend and must perform for about 8 minutes.  Unfortunately, I cannot talk about the plot of the story because of the rules. 

The next part of Destination Imagination is the Instant Challenges.  Instant challenges (says in the name) are challenges where you have limited time and resources to create something.  One examples was when we had to create a tower out of pasta.  We only had a couple strands and a some mailing label.  Here are some photos:

How have I helped my team?

I think I help lead the group.  Sometimes, my team gets a bit off task and I usually help get them back on track.  I also help give out assignments to my group members and make sure to do all my assignments.  Also, when we have disputes, I usually try to defuse the situation.

Overall, I have found doing this project quite interesting.  I think my group works quite well together and has no problem communicating.  One think we could probably work on is staying on task, sometimes, other members gets a bit side tracked.

Thanks for reading!

-Chris

My MPOL! (2022)

Hello!

Today I will be talking about how I think I have improved over the course of this year.  I have enjoyed my time in PLP and I hope you enjoy my MPOL.  I will discuss what I think I have learnt over the course of this year and what things I can improve for each subject.

“You don’t learn from experience, you learn from reflecting on experience.” – John Dewey.


Humanities

Things we have done in Humanities this year:  Medium is the Message, The Outsiders and Working With Words.

How have I improved since the start of the year in Humanities?

I think my communication skills have gotten a lot better.  One reason that I have gotten better at communicating is because I have built multiple relationships with different people.  An example of my improvement is when we did The Medium is the Message.  I had to communicate effectively with my other group members so that we could set up meetings and plan out our advertisement.  Not only that, I also had to communicate to an owner of a business (Honey’s Doughnuts) and find out what they wanted in the advertisement.

(Click here to check out this post)

How else can I further improve inside Humanities?

I think that I could improve in my time management skills.  Sometimes, when I have a lot of homework, I have to work later in the night.  Instead, I think that I could wake up in the morning to finish my work (tutorial time).

Maker

Things that we have learnt in Maker:  Becoming a PLP Learner, Constructing Creative Communication, Destination Imagination and Geek Out Blog Posts.

How have I improved since the start of the year in Maker?

Since joining PLP, I have improved in multiple aspects, ranging from learning to use my iPad effectively to improving my teamwork skills.  During Constructing Creative Communication, we learnt how to use our iPad pencil (Carr) and camera (Herzog) quite well.  Our teachers taught us various techniques such as the rules of thirds.  I also improved my teamwork because of Destination Imagination.  We had to do special challenges that made us create things in a limited time span.   This helped improved my teamwork skills because I had to constantly do these challenges that made me work with a team.

(Click here to check out my Herzog and Carr post)

How else can I further improve inside Maker?

Inside Maker, I think that I could participate in discussions a bit more.  I feel like I am sometimes a bit quiet.

Scimatics

Things we have done inside Scimatics: Fractions of Time, Tectonic Chances and Laser Laws

How have I improved since the start of the year in Scimatics?

One thing I have improved since joining Scimatics, is observing how science and math are in daily life.  For instance, there is a lot of probability when playing board games.   I also learnt about different scientific concepts like law of reflection.

(Click here to check out this blog)

How else can I further improve inside Scimatics?

For Scimatics, I think that I could go above and beyond.  In some assignments, I did not do some optional extensions that I could have done.

Overall, I have enjoyed my time in PLP and have learnt quite a lot.  I hope you enjoyed listening/reading this blog!

-Chris

How to Pick Your First Switch!

Hello people!

Unfortunately, due to unforeseen circumstances, I could not build my custom keyboard because some of the parts had not arrived in time (Feb 4th).  However, when it does come, I will make a blog post not related to this project.

In this blog post I will talk about how to find your perfect switch.

Like said before in a previous blog post, there are 2 different sound signatures, clacky and thoccy.  Thoccy keyboards (I prefer), have a lower sound signature whilst clacky keyboards produce a higher sound signature.

There are 3 different types of switches, with the 1st one being linear (my personal favourite.)  Linear switches are a more softer switch that most gamers use because of their consistency.  If you like linear switches, I suggest the Gatereon Black Inks (more expensive) or the Gatereon yellows (more budget-friendly).

The next type of switch is called tactile, they are moderately loud and are the most popular out of the switch types.  I recommend the Holy Pandas, like the Gatereon black inks, they sound very nice but are quite expensive. Another good tactile switch is the Glorious Pandas, they are based on the holy pandas and are quite loud and snappy and are good for gaming.

The last type of switch is what you probably think of custom keyboards, clicky switches.  They are the most loud and obnoxious out of all of them.  I would suggest Kalih Box Jades if you like clicky switches, they are very crisp and nice to type on.

If you are looking for the best switch, there isn’t one, it is all based on preference.  Anyways, I hope you enjoyed.

-Chris


Mechanical V.S. Membrane – The Different Types of Keyboards

Hello people!

This is my third blog post and I will be talking about the different types of keyboards!  I will be going over their pros and cons so I hope you enjoy!

Mechanical keyboards

Mechanical keyboards are often more expensive and customizable, they can come in louder or softer sounds, it depends on your taste.  However, like mentioned, they usually come in really expensive prices.  A decent custom mechanical keyboard usually costs about 200usd.  Not to mention the shipping, the shipping for keyboard parts usually take months to arrive, plus, if you live in a more remote country, it can potentially cost a third of your budget.

Pros

  • Usually has a nicer sound (preference)
  • Usually looks nicer (preference)
  • Has more customizability, you can change the sound and how it looks
  • Fun to build (preference)

Cons

  • Really expensive
  • Shipping time sucks (unless it’s from amazon)
  • Building it takes time and can be very boring


Don’t have a photo on standby because my keyboard hasn’t arrived.


Membrane keyboards

Membrane keyboards are often more cheaper and lighter, most membrane keyboards are made out of plastic.  They are also a lot more common compared to mechanical keyboards, this is because of their affordable price.  Not only that, they are also a lot more softer than mechanical keyboards even when typing at fast speeds.  Membrane keyboards also tend to be more resistant to water.

Pros

  • Really cheap
  • Easy to find
  • Softer than mechanical keyboards (preference)
  • More resistant to water

Cons

  • Feels cheap – made out of all plastic
  • Cannot customize at all
  • Can’t build one by yourself (preference)

To be honest, keyboards is just preference, some people like membrane keyboards, some people like mechanical keyboards.  I personally prefer mechanical keyboards of their customizability and how they sound.  For the next blog, I will be building my keyboard (hopefully).

Thanks for reading!

-Chris

Parts of a Keyboard.

Hello people!

This is my second post on custom keyboards and I will be explaining what parts you need to  make your very own custom keyboard.  Lets get started!

Keyboards have different sound signatures, if it has a deep sound signature, it is commonly referred to as “thoccy,” if it has a higher sound signature it is commonly known as “clacky.”  I personally prefer more thoccier keyboards because I prefer a lower sound signature.

The first component you will need for a custom keyboard is a case.  The case is what holds the keyboard together, and without it, the keyboard will fall apart. The usual material for a case is acrylic, aluminum, plastic and polycarbonate.  The casing material can also change the sound signature of the keyboard.  There are different types of keyboard sizes varying from 100%, which had all the keys, to 60%, which no longer has the F key, number pad and arrow keys.  A good starting case is the Idobao 67 which has a 65% layout.

The PCB is basically the motherboard, it,  makes the keyboard work and allow you to type.  You connect the switches using a soldering iron to the PCB so that it can register the keystrokes.  Some PCBs come with extra functions such as hotswap and RGB.  Hotswap makes it so you do not have to solder the PCB and automatically connects to the switches.  RGB is the lighting underneath the keyboard.  I do not have a specific recommendation because most PCBs come with the case.

The plate is a piece of material that lies on top of the PCB and switches and helps hold them together.  Like the casing, the most common material uses acrylic, aluminum, plastic and polycarbonate.  You can create a custom keyboard without using a plate, but the switches won’t stay in place that well.  Like the PCB, I do not recommend any plates because they usually come with the case.

The next item you will need is keycaps.  Keycaps is the illustrated button that lies on top of the switch.  You can customize the keycaps to have different fonts or colors.  2 good keycap brands I suggest is GMK and Akko (no specific key cap set).

After getting those items, stabilizers are the item you need to have.  Stabilizers stop the bigger keys (space, enter, etc) from wobbling and falling off.  They do not necessarily need to be bought because they come with the casing, however, the stabilizers that come with the Idobao 67 is quite rattly so I would probably change it to Durock v2s.

The last item on the list is switches.  Switches are mechanisms under the key caps that actuate when being pressed down.  It connects to the PCB and makes the keyboard work.  The switches are the main source of the different sound signatures.

Most of these products can be find inside Amazon, KBD fans and Idobao.  Keep in mind, to make a custom keyboard be prepared to spend hundreds of dollars.

Thanks for reading my 2nd blog on keyboards!

-Chris

The Deep Dark Hole of Custom Keyboards (And How I Fell into it)

Hello people!

Recently, I was assigned to make a series of blogs explaining a hobby that I have gotten into.

For the next couple of weeks, I will be talking about what custom keyboards are and why I like them.  You are probably wondering, custom keyboards, why?? I don’t know why, but I enjoy watching, listening to custom keyboards so be sure to stick around later to see how I progress.

The next post will probably be in about a week that explains what items need and how/where to buy them.  I will also be talking about how a keyboard works and what purposes it has.  When I finish that blog post, I will be constructing my own keyboard and will be telling you how to build one. These are some of the blogs I have planned with much more to come.

I hope you enjoy these blogs!

-Chris

Learning to take photos (Herzog)

Hello people!

Driving question: Is it important to use technology to further improve our ability to communicate and to think creatively?

In this blog post, I will be talking about how I learned different techniques to take photos.  We were split into 2 groups, Carr and Herzog.  I recently finished my Carr blog post and if you want to check it out, click here.  After finishing Carr (the first part), we moved on and now I am in Herzog, our new project!  I found that this course was pretty interesting and I learnt a lot from ranging from using the lines provided by the camera to using different filters.

The app we mainly used was the camera app provided by Apple (sometimes we used photo booth) .  It came with a bunch of features that helped improve our photo taking.   Some techniques were learned to use was birds eye, taking photos from really high up, worms eye, taking photos from a really short point of view, long shot, taking photos from really far away and close up, taking photos from really close up.  Click here if you want to learn it as well.  To help enhance the photos,  we used Snapseed and Pixelmator photo because it has many cool filters and tools.    Some tools that these powerful apps was the healing tool, it allowed you to remove things that you don’t want into the photo, to changing certain colours on photos.

The first skill we learnt was to create photos that personify a certain object.  I chose to use a soap dispenser because I thought it would be quite creative to use it.  I made it so that the mouth was the hole that the soap comes out from and drew in the eyes.  I think I did a pretty accomplished job in creating it.  Here it is below:

The second skill we learnt was to take a picture that tells a story.  We were assigned to recreate and old photo that was as accurate as possible.  I chose a photo of me reading a book while sitting on a sofa.  I chose this photo because I had a similar shirt to the one in it.  Personally, I think I did quite well recreating the photo.  Here it is:

After that, we learnt how to use different features and how to use Snapseed and Pixelmator.  When we finished, I was tasked to create a photo that conveys an emotion that I am given.  I received the word zany, it means to be peculiar or unique in your own way.  I decided to dress up in a really odd outfit and added some cool features that I learnt to use.  This is a photo of it:

Then next thing I had to do was we created collages that showed of who we are.  The first thing I did was to create my name out of random objects that I found around.  We also created a page on it so if you want to check it out, click HERE.  Some things that I put in that was piano, gaming and seals.  I also created a collage that I don’t like.  Some things I put in there was Fortnite and prawns.  Look down below to check out my 2 collages:

The last thing we learnt to do was to create a gif that conveys an emotion and tells a story.  We learnt how to do this on an app called Keynote that has many cool functions that allows me to create gif’s.  The word I chose was melancholy which means to be depressed or really sad.  How did I choose this word?  I went on a random adjective generator and was chosen this word.  I used a black and white filter to make it look more sad and added a cloud raining on me.  Below me is my gif.

In conclusion for this project, I think that I have an extending/ proficient understanding of this topic.  To answer the driving question, without technology, a lot of things would be restricted, like you wouldn’t be able to take photos.  We can also use creative media to convey emotion by using different colours and different perspectives.  If I created a photo that is black and white, then the photo is most likely conveying a sad emotion.  One thing I think I did well was the task called manufacturing mood.  I used all the skills we learnt and managed to show my emotion.  Overall, if I could do something better, I would make sure to check the assignment because some times I forgot to write reflection that explains our media.

How does this relates to the adult world and how will it help me?

Some jobs require these skills – such as photography and cinematography.  This also builds on our competencies that we have been learning.

-Chris

Learning to draw (Carr)

Hey people!

Today, for this blog post, I will be showing my journey through drawing.  A few weeks back, we got separated into two separate groups, one focusing on photography (Herzog), and the other one focusing on drawing (Carr).  I got picked to be in Carr, so I learnt many new techniques and secrets for my Apple Pencil and iPad.  It was really fun learning perspective and all sorts of things, and will probably use it whenever I draw.  After I finish this, I will be moving onto Herzog, so look out for a future blog post.  Without further ado, let me begin.

The main app we used was called Sketches Pro.  It was an app with many cool features ranging from pens to layers.  The first assignment we I had to do was to create my name using the wide variety of pens and to use pressure to create either a darker or lighter colour.  It was interesting experimenting on the pens, some were light and thin while others were more darker and thicker.  Personally, I really liked using a pen called the watercolour brush.  I liked how it was slightly transparent and was quite thick.  When I finished creating it, I used the marker pen as the outline, coloured the text in the water colour brush, and spray painted the outside.  I think the work I had created really showcased what I learnt while in Carr.  Here it is:

After completing that, we learnt how to sketch doodle.  Sketch doodling is basically creating a series of drawings and text instead of just note taking.  I think this skill is more useful because you can compress more info by using pictures and your not limited to only using text.  We watched a video Ted-Ed that shows us how to take proper sketch doodles.  While we watched, we were tasked to try to sketch doodle while watching the video.  I found it quite hard watching while doodling on my iPad because it was going at a rapid paise without giving us any time.  Eventually I completed the task and I think I did a good job.  In the future, if I am having a lecture in University, I can create a sketch doodle instead of writing it all out.

For the next assignment, we had to draw something that was 3D with shading included.  I decided to chose a cup because I find cups more simple and easier to create.  We learnt how to see the different shapes in complicated objects so that it would be easier to draw out.  In total, I drew out 17 different shapes ranging from circles to triangles.  After drawing the shapes, I added minor details and started shading it.  I used the water colour for the cup because it is semi transparent. For the shadow I used the marker because it was I felt that it looked nice with it instead of using the watercolour. 

The next thing we did was learn how to use perspective.  We experimented by creating a 3D room with a person in it.  2 key terms that I learnt was the vanishing point, the point in the picture where the land disappears, and the horizon point, the line that separates the middle ground between the background.  When we finished the room we moved onto trying to create a landscape of somewhere you have been to.  I chose a national landmark in my old country (a mosque.)  I used all the skills that I learnt previously to create this drawing varying from shading  to using shapes to simplify the photo.  Overall, I feel like I did a very good job in recreating the photo.  

For our final project in Carr, we had to create our very own logo for a business of our choice.  I chose to create a mattress company because my parents use to own a furniture company.  We also zoomed with a woman named Chloe Devine.  She is a graphic artist and alumni of Seycove that designs logos for clients.  She gave us some tips like to keep it simple and to start of with a mood board.  Due to time constrictions, we could not create a mood board but instead created a design brief.  I found that this assignment was much like the advertisement project we previously did.  I named my brand Sealser because my mattresses are as soft as seals.  My plan for the logo was to have a seal on top of springs with random accessories to signify that my mattresses had a lot of functions.  I also made it so it had a blue background because it looked kind of dull without it.  Here it is below:

In conclusion, I learnt many new techniques to create drawings.  Something I think did well was how didn’t give up when I was having a hard time.  One time when I was using Sketches Pro, it suddenly crashed and all my progress was deleted.  At first I was really annoyed and felt like giving up but I kept going.  One things I did not do as well was how my drawings are usually more messy.  My lines are usually not straight and I think I could improve in that aspect.

How this helps in the real world:

If I do not know how to draw, a lot of different jobs, such as architecture, will be restricted.  I also learnt how to sketch draw, which is really useful because they are more faster than just not taking.  I also know that colour can convey emotion, like if a painting is black and white it is most likely sad.

-Chris