Welcome back to my blog! We have reached the end of our ultimate design challenge!
So, what was this project about? The goal for this project was to be able to design a 3D object with basic 3D shapes, and then confidently be able to calculate the total surface area and volume of the design you made.
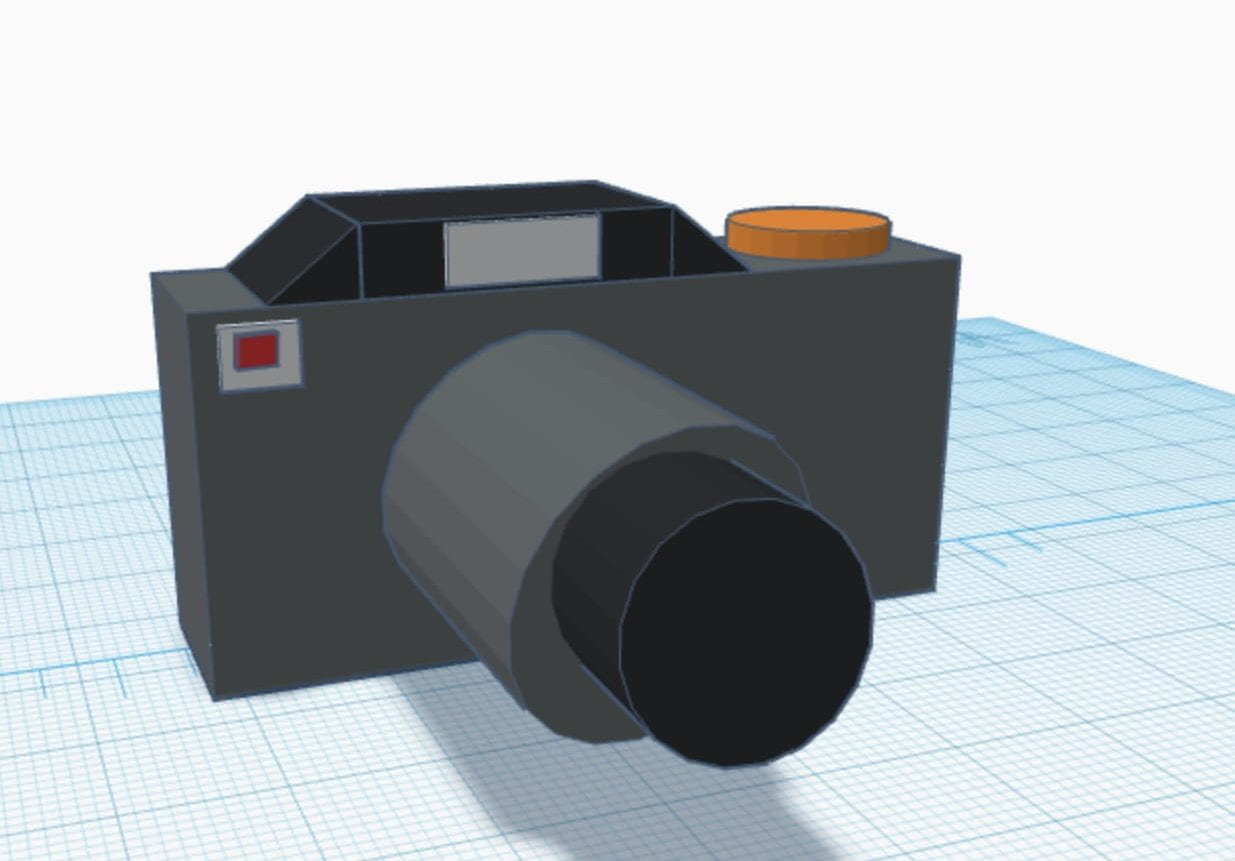
The driving question for this project was : “How can we design an object to optimize its shape?”. Each student created their own driving question for Milestone 1 of this project, stating what they were going to design, and if they were trying to optimize surface area or volume. My driving question was : “How can I design a camera for maximum surface area?”. A camera seemed like an appealing object to design, but compared to some other people’s designs, it didn’t have much of a reason for needing a lot of surface area. For example, a skateboard, table, refrigerator or truck need a lot of surface area, so that you can put other things in or on top of them. I spent about 1 class time creating my design using an app called Tinkercad. Here’s my design:
You had to use a minimum of 10 3D shapes for your design. I used 15 shapes in total, but I could’ve done way more if the time allowed. I used the basic 3D shapes that we had practiced calculating the Surface Area (SA) and Volume (V) of, so that I knew the math formulas when it came to calculating the SA and V of my 3D design.
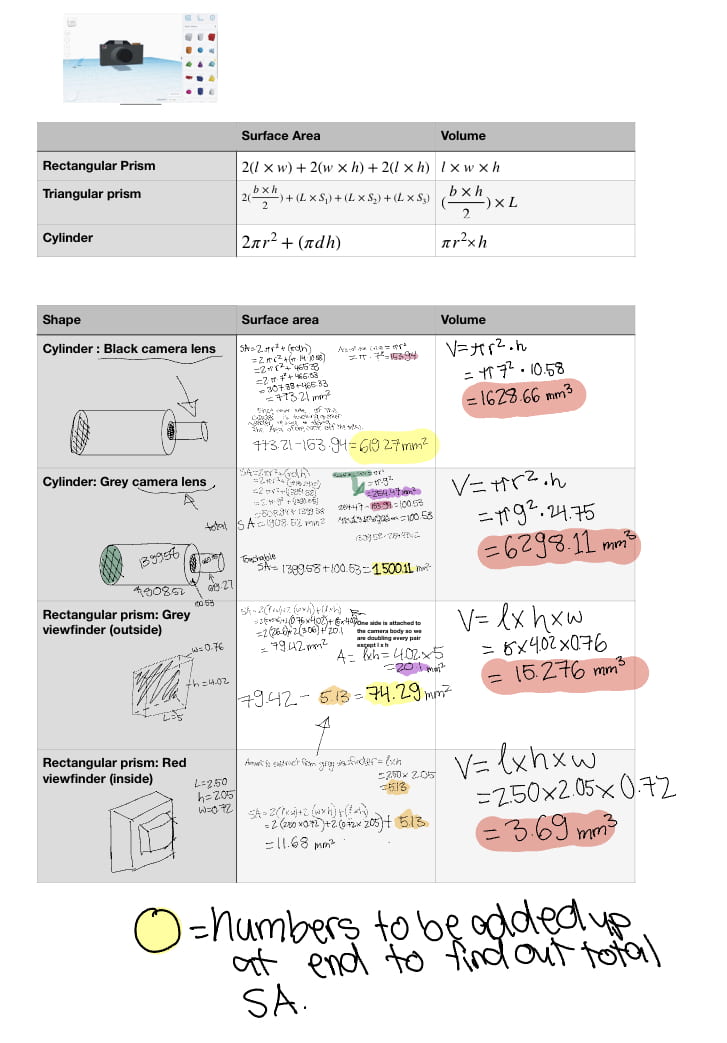
Now that I was finished designing my camera, it was time to do the calculations. Up until this point in the project we had been practicing finding the surface area and the the volume of rectangular prisms, triangular prisms and cylinders, by doing several workbooks for each 3D shape. So by now, I was able to find the right answers by inserting the numbers into the mathematical formulas for each 3D shape. Since we were working on our iPads, I could always revisit the formulas, and thus, do not have each one memorized. When you tap on an object in your Tinkercad design, it gives you almost all the measurements you need to for calculating the SA and V. Calculating the SA of my camera design was more elaborate than calculating the volume because I had to subtract all the surface areas of the shapes that were touching another shape.
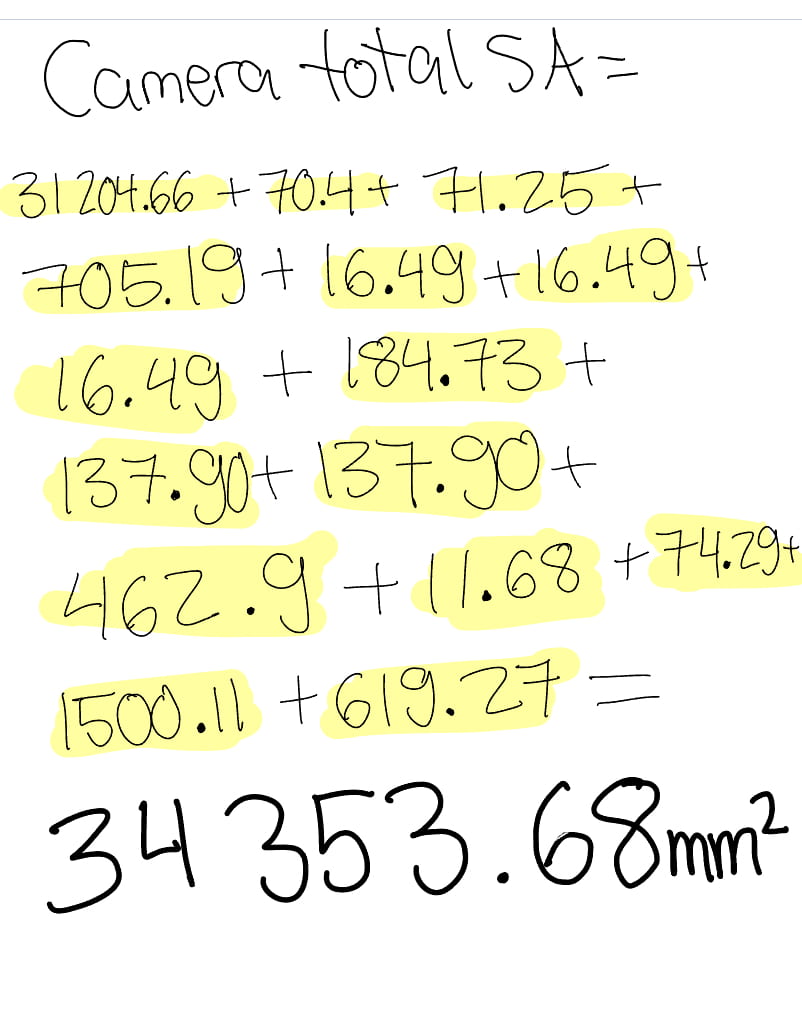
I used a highlighting system to keep my calculations organized, so that I knew which ones to subtract from another shape’s SA or to addition together at the end to find the total SA. To make sure that the teacher understood my highlighting system, I did a small color legend in between the pages. I also had to use the Pythagorean theorem that we learnt about way back in our Laser Laws project earlier on in the year. I had to use the Pythagorean theorem to find the length of the hypotenuse of my triangles, because it didn’t tell you the measurement for the hypotenuse.
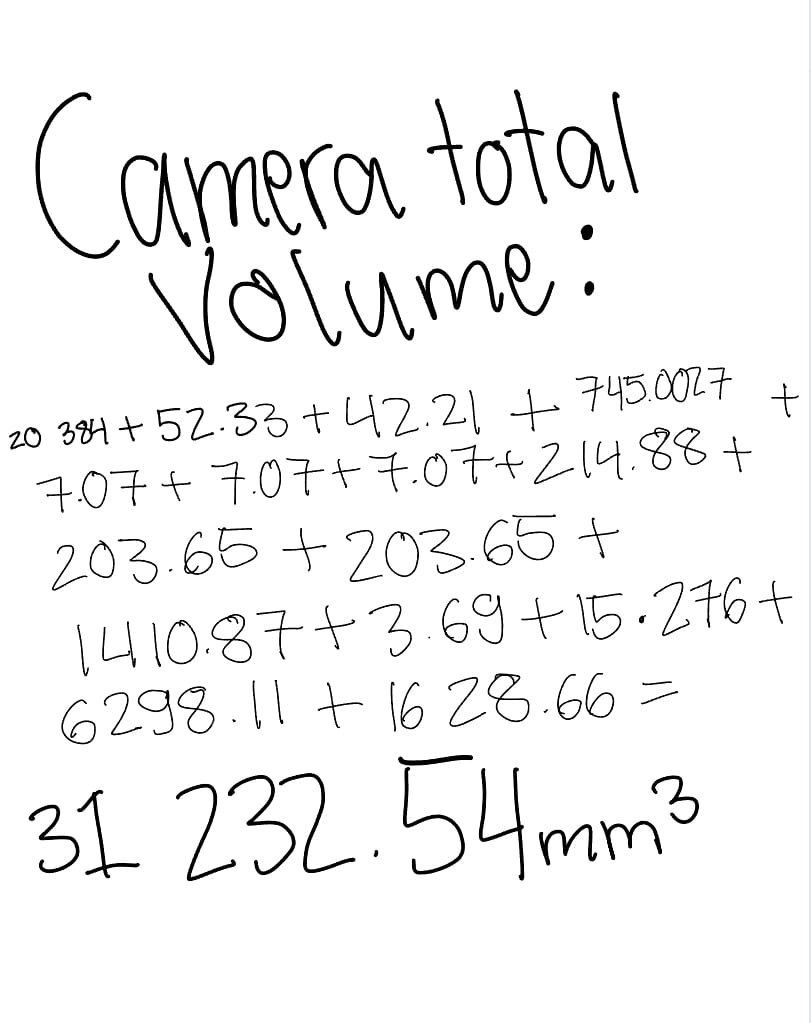
The volume was easier and took less time to calculate, because you didn’t have to subtract the parts where objects were touching another object, like you had to when calculating the total surface area of my camera. When I had the volume of each 3D shape, all I had to do was add them all together to find the total volume.
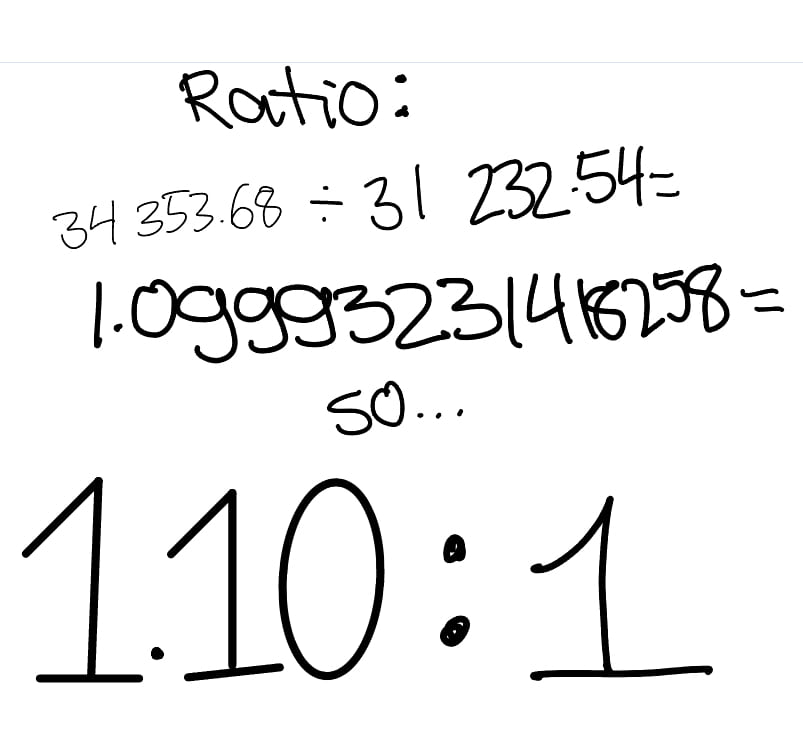
And then to mathematically show just by how much I optimized the surface area, we had to compare the total SA and V in a ratio.
The total surface area of my camera = 34353.68
The total volume of my camera =31232.54
To find the total ratio, you divide the bigger number by the smaller number, and that will be the number in ratio to 1. So…
34353.68 ÷ 31232.54= 1.09993231418258 ≈ 1.10
My ratio of surface area to volume is 1.1: 1
I just barely achieved my goal of maximizing surface area. If I were to go back and alter my Tinkercad design to decrease the amount of volume for my camera, I’d make the camera lenses wider, but less long. I would also add more cylinder buttons to my camera, as well as a semi-sphere button. To wrap up the project, I presented my design and the calculation process in a Keynote presentation to the class. Instead of just reading out all my calculations like some of my classmates did, I explained the hard parts, how I used the Pythagorean theorem, and my total ratio to keep the audience engaged.
Reflecting on the curricular competencies
Applying and innovating: Contribute to care for self, others, community, and world through personal or collaborative approaches.
Throughout this project I used almost all my time in class to get things done, so that I didn’t have loads of homework for Scimatics and Humanities. When I started doing the math, I just wanted to get it done, keep working so that I didn’t have to do it at home. If I didn’t understand, or needed clarification, I would ask questions.
Reasoning and Analyzing: Model mathematics in contextualized experiences.
I was able to deign a 3D digital camera model using the Tinkercad design software. My design was composed of 15 shapes, which was exceeding the minimum amount of shapes you had to use. I decided to try to optimize the surface area of my shape, and I succeeded, because the surface area was bigger than the volume.
Communicating and Representing: Explain and justify mathematical ideas and decisions.
When calculating the SA and V of my camera, I used the correct mathematical formulas and made sure to show all the steps of my calculations. When doing my presentation, I explained what was hardest to calculate, what was the easiest to calculate, and what I could’ve improved on. I presented my math, a screen recording of my camera design from each angle, and my final ratio in my presentation.
Overall, I enjoyed this project because it was more of a math driven project that science, and I feel we’re not learning enough math compared to non-PLP grade 8’s. I felt like I got my math brain working again!
Thanks for reading!

