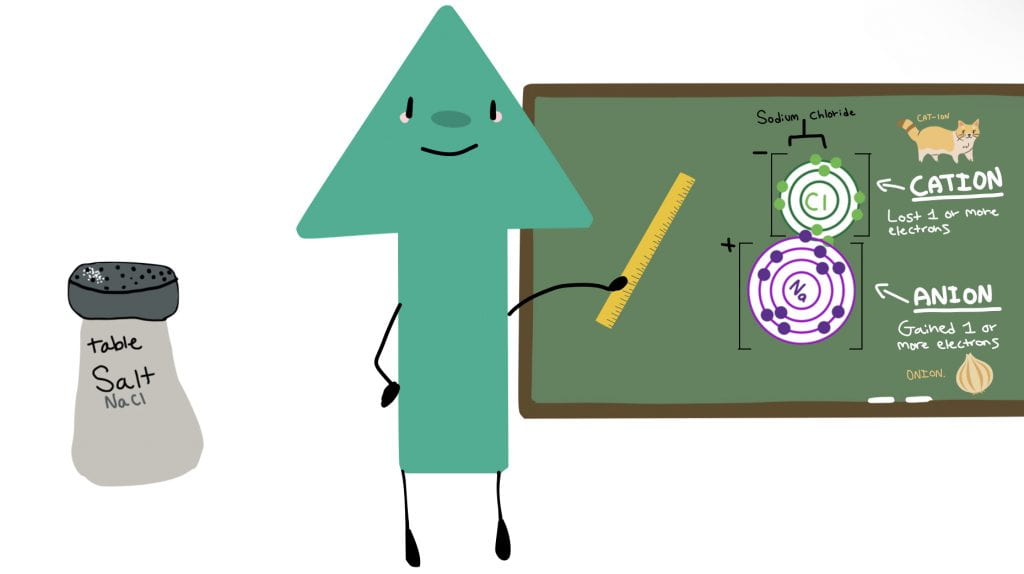
🌲How do the Electron Arrangements of Atoms Determine the Chemical and Physical Properties of Elements and Compounds?🌲
🌲Hello and welcome back to the forest of learning! In this project, “Chemistry Stories”, we were instructed to create an animated video about chemical bonding. I will be reflecting on my process of learning about chemical bonding, learning to animate, and, of course, creating the animation! This project was a bit strange, as we had a 3 week break in the middle of it, which caused some problems in the process.. but, it’s okay, because it turned out well in the end! So, if you are interested, keep reading!🌲

As always, we followed the project path throughout the course of the project:

To start this project off, we created a project start mindmap. In this mindmap, we accumulated all of our previous knowledge on chemistry and animation as well as any questions we had about the project. For the animation portion of the project, we primarily focussed on animating using Keynote. Luckily, we had already had practice with Keynote animation and magic move in this PLP Humanities 8 project, so, it wasn’t like we were starting from scratch. But, when it came to the knowledge about chemistry, specifically, bonding processes we hadn’t had as much practice with it. Although we did have some knowledge about atoms and different forms of matter built up from our PLP Scimatics 8 project, it still wasn’t enough for anyone to be confident at this stage in the project.

Once we had created our mindmap, it was time to start building some knowledge about chemistry! Throughout the entirety of the project, we were reading textbooks and completing workbooks to help us gain knowledge about the information we will be using in our animations. Usually textbooks aren’t my preferred method of learning, however, I found that these specific concepts in the textbook was actually very well written and packed with information, so, I actually did learn a lot about the materials we were reviewing. The workbooks helped solidify and test our knowledge on these concepts, and it allowed me to have a sufficient tool box for my endeavours ahead!
In those textbooks, we learned about pure substances and mixtures, elements, the periodic table, non-metals, semi-metals, and metals, parts of the atom, ionic compounds, covalent compounds, and diatomic molecules, as well as binary ionic and covalent bonds, multivalent metals, polyatomic ions, and, finally, writing chemical formulas for chemical bonds.

After completing our first workbook about substances and mixtures, it was time to get excited about chemistry! To do so, we participated in a lab experiment in class, but, before we could get into it, in order to ensure we understood the instructions fully, we created an animation using keynote that demonstrates what we will have to be doing in the experiment.
This lab animation helped refresh our animating knowledge (which, at the time, I was not very confident with) and also ensured we were prepared for the experiment in class.
Also, while I was definitely not procrastinating, I created this short and very professional, thought out, and specularly genius animation for my cool beans friend Fraser who was in need of some motivation:
Here is a photo from the lab as well as the lab report we completed afterwards!

Click to view more!⬇️
Continuing to build some knowledge, we also learned about atoms through this website that was actually very helpful to help us visualize what an atom actually is as well as what neutrons, protons, and electrons do to the atom to make each one unique. This website was actually so cool and really helped me understand the value of each component of the atom!
Check out the website HERE
After gaining knowledge it was now time for the fun part: creating our animation! As I mentioned earlier, the animation will be explaining the chemical bonding process, but, you may be wondering, what does that even mean? Well, in our animation we should be including two forms of bonding: one covalent and one ionic. So, you should have an ionic compound as well as a covalent compound in your animation.. but there is a twist: it must be a story! So, you must explain, using proper scientific language and detail how bonding works and also an interesting story line with your characters being the atoms/compounds.
I’ll explain my process of creating this animation in 6 stages:
Stage 1:
So for the first stage, let’s call it the “choosing stage”. In the choosing stage, we reviewed our gained knowledge and chose our atoms, compounds, and basic story. You could always change your mind later, but it would be ideal to choose everything at the start so you had a solid idea from the get go. This required a lot of research to find the right compounds that would fit into a story, which, took a long time. By the end of this stage, I decided on two compounds: “Copper Oxide” for my ionic compound, and “Acetic Acid” for my covalent compound. – I’ll explain more about why I chose them in the next stage.
Stage 2:
Stage two, the “concept stage”. Now, I knew that from previous experience (-cough cough- DI) coming up with a story would be fairly challenging to tie into a scientific video. So, keeping that in mind, I decided it would be pretty cool if I started big rather than small. I mean, since atoms make up everything around us, if I started off with, instead of choosing the atoms first, choosing my objects in the real-world. That way, it would be cool to start off with an object and zoom in in order to learn about the atoms and bonding processes with a sense of realism. Doing it this way actually helped me a lot so that I could tie in humour, realism, relatability, and connection between my two stories. So, with that, choosing “copper oxide” that is the main compound which makes up pennies, and “acetic acid” which makes up vinegar, was the perfect compounds to start off making an engaging story.

Stage 3:
Let’s call stage three the “story/mapping it out stage”. So, after deciding my main concept, I needed to create a story. So, within my animation, I decided there would be multiple stories. The main story would be a human finding a lucky penny on the street and polishing it with vinegar, zooming into the penny, there would be a love story about Copper Oxide, and zooming into the vinegar there would be a friendship story about Acetic Acid. To make it flow and connect to one another even more, I also decided to have some narration segments to explain the scientific processes more professionally.
At this point, I believe I showcased growth in my “Communicating” and “Processing and Analyzing” competencies while creating my story board. I constructed diagrams that contributed to my story, and communicated a story in a scientific yet creative way.
In class, we created a story board with the plan for our animation:
Click to view more!⬇️
Keep in mind: After finishing our story board, we actually had an extended winter break (3 weeks), so, as I said in the introduction, it was definitely a challenge. You see, the ideas just weren’t as fresh in my mind as they were initially, so, it was harder to be exited and stay motivated about the animation.
Stage 4:
The “design stage” was mainly just drawing all of my characters and pieces. To do this I used Notability and Canva. You see, I am definitely not an artist, and, creating drawings, especially when it is expected to be neat and professional, is the equivalent of bitter chia (a.k.a not my cup of tea). Needless to say, this was not my favourite stage. In the end though, I am pretty happy with my characters!
So, let’s meet my two favourite characters!
First, Dude-Bro Hank. Dude-Bro Hank is a fonky fellow who is the human of the story. He is easily identifiable with his purple bow tie, bright red rain boots (based off of a pair I own) and his beautiful top hat. Being incredibly handsome, he takes the main role of the story.

Second, Timothy the Arrow. Timothy is actually a character I made exactly one year ago in a PLP 8 project called “Laser Laws”, and, as tribute to his first debut in “The Creation of Timothy the Arrow” (a.k.a, laser laws), he is featured as the narrator of my animation.

As you can tell, I had a lot of fun with my character design.
Stage 5:
Now, for the main stage: the “animation stage”. First, in keynote, I mapped out my story in slides. Each slide represented a different point in my story, which I would then expand and animate (and thus adding more slides). I created the layout for each slide and made it very easy for me to add onto later. I then started animating a basic (and pretty terrible) animation at first so that, if I experienced burnout or loss of excitement for the project, I would still have something to hand in regardless. (I do this with most of my projects, that way, the work I do is not out of necessity, but instead just for deepening my knowledge and keeping me excited).
While making my animation, I found that I demonstrated a sustained intellectual curiosity about the scientific topics we reviewed in class. I expressed growth in the core competency “Questioning and Predicting” at this point in the project, and I am proud of my work.

After over 21 hours of work (and procrastinating through just looking at a blank page), ensuring the scientific aspects were correct, adding text, all of the animations, transitions, and voiceover, I was finally done!

Let’s take a moment of silence for my screen time that week.
Here is how my animation turned out:
To end the project, we also added to the project start mindmap and created a project end mindmap with our updated understanding of the concepts we reviewed in class!

🌲Overall, I absolutely love my animation. It’s not that impressive or great from an outsider’s perspective, but, I love it because I improved so much on my animating skills and genuinely understood and enjoyed the scientific concepts we learned about. I love my characters and storyline, and I love how I love it. I used to be pretty bad at animating, but, after this project, I feel a lot more confident with my animation skills, and I am excited to use them to my advantage in the future! So, how do the electron arrangements of atoms determine the chemical and physical properties of elements and compounds? Well, each atom has a unique set of electrons that help determine which compounds they will bond with, thus allowing you to predict their behaviour. Each element has their own properties that can help identify what they are and what they will become! This project was pretty fun, and it has to be one of my favourite Scimatics projects yet! 🌲
As always, thank you for watching me grow in the forest of
🌲learning🌲


Leave a Reply