Tell Me A Story

Back before the Christmas break, our PLP 10 class was extremely busy. We had our Vancouver Sins of the City project to work on, and then we were given another massive project. We knew that the project was coming, but we didn’t know what was coming.

If you are familiar with the PLP program, you’d know that every December there is an exhibition where all the PLP grades showcase a big piece of work, and it usually has a theme. For example, this year, the grade 8’s and 9’s had Star Wars as their theme, just like my grade did in Grade 8. But this year, us and the grade 12’s were trying something different.

Since we have been working on podcasts this year, and working on our interview skills, our teachers thought that they should combine the two. We began this unit thinking about how to be a great interviewer, and how to get great answers. We turned to an organization called StoryCorps. They know all about interviewing, as that is what their buisness is all about. They made this video with basic interview tips:

But one of the main topics we were focusing on, and I mean really focusing on, was storytelling. And our theme for this project:

“Everyone has a story.”

Since back in grade 8 we have been  breaking down stories, from the hero’s journey, to our frankenstuffies, to our Disneyworld videos, and now to podcasts. We were learning about what made a good story, and how to apply it to our writing, videos, and now audio.

So, before the exhibition, we worked on creating two different podcasts. These podcasts would be in an interview format, where we interview different people. For the first one, me and Michael (from grade 10) teamed up and interviewed our grade 12 partner, Cashel, and interviewed him about his experiences in Seycove. Here is the podcast I made:

Before sitting down and recording this podcast, me and Michael brainstormed about 12 questions to ask Cashel.  We wanted to ask questions that wouldn’t get a yes or no answer, since we wanted him to share stories. To do this, you want to ask questions that begin with “What…” This would then force them to explain more of an answer. Once we got the go-ahead from our teachers on our questions, Michael and I interviewed Cashel. I thought that the interview went well, we got good answers from Cashel and it didnt take long. I think that this is because he already knew exactly what we were doing, and what he should say.

The next podcast we had to make was with a family member. We needed to interview someone that we consider family, so it could be an aunt, grandparent, younger or older sibling, someone who had been a part of your life for a long time. But, since most of my family lives in Edmonton I decided to interview my two parents. I asked them both the same questions, but separately, and I got some interesting answers. You can definitely tell my mom is more detailed than my dad…

In this podcast, my parents had less of an idea of what I was doing, and what they should say. My mom was a lot more detailed, and she responded to my questions with stories from her childhood. She had a more serious tone, while my dad had a more laid back and humourous attitude. I found it quite interesting tp see how my parents responded differently to the same questions. Maybe that just me because they’re my parents and I know them really well.

And then we had only one more thing to do. After creating two 4-7 minute podcasts in a week and a half, I was ready to be done with podcasts. But, as it usually is in PLP, you always have a bit more than you think.

The final task: Record an interview with a random person during the PLP winter exhibition.

At first, all of us were confused how this would work. But then once it was explained more thoroughly, we all kind of understood. Here’s the run down:

While the grade 8’s and 9’s were presenting their projects in the library and PLP room, us grade 10’s would have the 7-8 classrooms down the hall. In our assigned classroom groups, about 5 people per room, we needed to bring in items from our house that would make our classroom look more like a comfortable seating area, for two or three people. I would be in the textiles room with Michael, Cashel, Lucas, and his grade 12 partner. Our classroom is where we would conduct our interviews, one a time. Here was our final set up:

So, to get our interviews, the grade 12’s would be wandering around throughout the rest of the exhibition, where the grade 8’s and 9’s would be presenting their projects, and they would find and bring us people to interview. The goal was to have three interviews recorded for each grade 10 student, and we could choose the best one for the final project – our podcast.

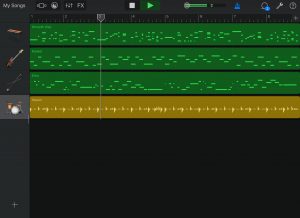
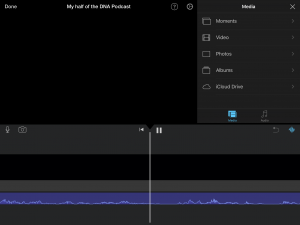
Once we sat down with the interviewee, we would ask them our meticulously planned out questions, while the whole conversation is recording in an app called Ferrite, which I really like for podcasting. The app lest you record and edit in one place, which makes it really easy.

Phew.

That’s a lot of work to be done. But, we managed to pull it off, and I think it went rather smoothly.

I enjoyed myself during the entire event, as it was fun to see everyone’s rooms, and exciting to talk with new people. I felt that we had just enough time to set up after school, all of our room decorations looked really good, and we all had fun. Setting up wasn’t too hard, we figured out how to use our rooms to the best of their abilities quickly, and clean up was even shorter. The only complaint I have is that there was a lot of talking in the halls outside of the recording rooms, and you could hear it on our recordings. If I could do this again, I’d focus more on the wording and order of my interview questions, since sometimes I wasn’t getting the answers I wanted.

But since we had about 3 interviews recorded, the next step was to choose the one that I think has the best potential to make a good podcast, and make a good podcast out of it.

I had the privilege of interviewing Mr. Jack van Laethem, who lives here in North Vancouver and is a dentist. This podcast was also edited in Ferrite, and it did not take me long at all to create. Here is my final project, where you can hear more about him:

A big part of any grade of PLP is critique and revision. So, as I finished, I sent it to my grade 12 partner Cashel, and he gave me this critique:

So far in our year, that was the most amount of work we’d done in only a few weeks, and I’m very happy its all over. But I’m sure that we will bump that time down to second place when we get closer to our California trip.


That’s all for now,

See you

The Man That Hacked Xbox

In our PLP class, we have just began a new unit. We have been focusing on technology and how it has changed our world as we know it. We’ve been looking at our lives and seeing how technology has changed our daily routines, work life, and school life. In this unit, we will be researching and creating projects through the lens of technology as a disruption.

Our driving question for the unit: How has technology acted as a disruption with its creation throughout history? 

The first thing we did over the Christmas break to kick off this unit was read a novel called Little Brother by Cory Doctorow. It’s a fiction novel about some teenagers who live in San Francisco, in an unstated future time. The technology in this city rules over everyone, and the government is monitoring everything everyone does. I don’t want to spoil the book, but the main idea is that there was a terroirs attack on the bay bridge. A massive bomb was set off, and the government scrambles to find out who is responsible. They use unjust and wrong ways to do this, and the main characters use their internet and hacking skills to fight back.

This book  is related to our driving question because it shows how technology has disrupted our lives. To me, it seemed that technology has taken away the freedom of the characters in the book, because the government is watching everywhere you go, everything you do, in real life and on the internet. The main characters were constantly having to use secure servers to talk and outsmart security devices.

But we also had another aspect to this assignment. The book we read had mentioned a whole list of other topics, from people to computer programs, that were related to technology. We had to choose one topic from the list to reseazrch and write a blog post on.

And my research topic:

A man named Andrew “Bunnie” Huang.

So far, the most interesting thing about him, unless you already know who he is, is his strange nickname. His nickname is short for vorpalbunnie, which is the name of a creature in Monty Python and the Holy Grail, that he used as a BBS screen name. Here is a video of a presentation he did about himself, if you’re interested in knowing more about him:

In the book Little Brother, his place in it was writing the afterword, where he talks about being a hacker, and how Little Brother shows what it is like as a hacker.

Andrew Huang is an American researcher and hacker, and has a Ph.D in electrical engineering from MIT. He is most well known for when he hacked into Xbox. As he said in Little Brother’s afterword, “When I hacked the Xbox in 2002 while at MIT, I wasn’t doing it to rebel or to cause harm; I was just following a natural impulse, the same impulse that leads to fixing a broken iPod or exploring the roofs and tunnels at MIT.”

He also explained that hackers are sort of looked down upon, as misfits looking for trouble. “I was lucky.” Huang said, “The fact that I was a graduate student at MIT when I hacked the Xbox legitimized the activity (of hacking) in the eyes of the right people.”  He also was the hardware lead at Chumby, meaning he designed and lead the production of the Chumby devices.

He has many other technological achievements, including designing the worlds first fully integrated photonic-silicon chip that runs at 10 Gbit/s and participating in designing of wireless transceivers for use in Bluetooth networks.

He also is well known for his long history with reverse engineering. He even wrote a book about hacking the Xbox: Hacking the Xbox: An Introduction to Reverse Engineering. This was one of the first published books about reverse engineering. While hacking the xbox, Xbox, the organization, put lots of legal pressure on Andrew not to release any details on the systems he was hacking into. MIT also sent him a letter saying that they were not a part of what he was doing.

But what does all of this have to do with our driving question?

Well, in Little brother, the main character Marcus was a computer hacker as well. He wasn’t doing any hacking to cause legal trouble, only for his own fun and interests. But after the bombing, he was kidnapped, and after the government saw what he was doing with his technology, they falsely accused and held him prisoner as terrorist suspect. This is showing that technology has disrupted our ability to explore, since the government was watching Marcus, and stopped him from going further with what he likes to do. Andrew Huang once said this:

“Without the right to tinker and explore, we risk becoming enslaved by technology; and the more we exercise the right to hack, the harder it will be to take that right away.”

He is saying that we have a lot of great technology at our fingertips nowadays, and people who want to dig through and tinker should be able to, just like a mechanic with a car.

Andrew Huang isn’t the answer to my class’s driving question, but he does explain that some technology is blocking the freedom of individual people that want to explore more in computer programming. He says this in the afterword of Little Brother:

“We win freedom by having the courage and the conviction to live every day freely and to act as a free society, no matter how great the threats are on the horizon.”

When I first started writing this, I didn’t have that many ideas on what to write. But as I got going, I realized how everything I’ve been reading about connects. I actually enjoyed the writing part of this assignment, and reading about Andrew Huang. I also didnt understand parts of the book Little Brother, but I began piecing more and more together as a wrote this. It also helped me understand more about what our driving question is asking. Overall, I learned a lot about computer programming and was thoroughly interested in my topic.

That’s all,

See you


The Good and the Bad of Vancouver

For the first term in PLP 10 Humanities, we have been studying what makes a story, and asking good interview questions. And for most of our projects so far, we have made different types of podcasts. We made 2 during our Camp Capilano trip, one for our WW1 soldier podcasts, one for science, and a few drafts before creating our big Vancouver Podcasts, (mine was about labour rights). But all of that writing, editing, recording, thinking, and hard work were only building us up for what would come next.

Over the course of this first term, we have been working on breaking down the building blocks of good stories, and storytelling. We first read a graphic novel on WW1, and that lead to watching more videos on the War, and eventually to our own video. We teamed up in groups to make videos on why we think the Great War started. If you want to read more, look at my other post about this project. The reason I’m mentioning this project is because it is the beginning of the long road to the final demonstration of our podcasting skills.

After that video, we began working on our first major podcast of the year. We needed to research and explain how the war had influenced the identity of the people involved, and Canada’s identity as well. We had to really focus on what we were saying in the script, because everything we said mattered, since there are no visuals to support what you are telling the listener. Look here for more on the creation of the WWI Podcast I made. This project was a real taste of the amount of detail we need to put into the script, overall feel of the podcast, and finding a good place to record. All of which were vital to the coming hurricane of work we would have to do.

And here it was. The second biggest workload of audio editing we would have to face:

Our Vancouver podcasts. In this project, we would be looking at large topics that take place in our city, like labour Rights, city growth, immigration, and environmentalism, to name a few.

To kick off this project we took a field trip to the local Vancouver Museum, located near Granville island.

There, we learned all about Vancouver’s history, the good and bad. In the days before we arrived, our teachers kept reminding us that we were there to learn, and also choose a topic of the history that interests us. We needed to choose our top three favourite topics, and have a story from the museum for each topic that grabbed our attention. We would be put into groups based on our preferences.

I ended up with Labour Rights, my third choice, with city development and immigration being my top two. My other group members were Ryan, William and Kyle. After visiting the museum, we sort of had an idea of what we would talk about in our podcast, but we definitely needed to research more.

For this podcast, the driving question was: Through the emergence and growth of Vancouver, was everyone treated the same?

And the driving question that my group and I made for our podcast, which fits with the greater driving question:

What labour rights were in place in early Vancouver, and how were Asian immigrants treated differently during this time?

In our podcast, We would talk about how Asian people came across to Vancouver to start a new life, and then they would end up working the more difficult or dangerous jobs. They wouldn’t have much pay at all, and the working conditions would be terrible. For example, while working on the Canadian Pacific Railway, the workers would be working all day, for only a few dollars per day.

In our podcast, we explained what was happening, and how through the growth of Vancouver labour rights were put into place. We also got to interview a youth worker from Worksafe BC when she came to our class to talk to us about our worker rights. The program was called Alive After 5:00 If you want to find out more.

After we wrote our our script, got it critiqued by both our peers and teacher, we moved on to recording our first draft. Our group went to Seycove’s recording booth, which is equipped with a Mac computer in a small editing room, and then through a small window behind the computer, you can see the even smaller recording room which is where we set up our mic to record.

We each took turns sitting in the mostly-soundproof recording booth, and read through all the parts of the script we wanted to say. This part didn’t take us long, and we moved onto the editing stage. We each took a small portion to edit, and then sent it to Ryan to put together and hand in. In this stage, we didn’t have our interview, but a few days later we were able to interview Faye, the Worksafe BC worker. We took her into the recording booth, and I asked her the questions we prepared. We asked her about what she knew about the labour rights in early Vancouver, and when the labour rights were implemented. She gave us some really good information, and it helped our podcast a lot.

We then editied in the interview, and made a few other changes. One other thing we had to do for the whole podcast, (9 minutes), was make our own music in an app called garage band. We each made a short 2 minute song, and then we had enough music, since it sounds nice when you change the music from one song to another at specific times.

Well, here it is, the big Labour Rights in Vancouver Podcast we spent so long on:

This took us a long time to make, and I think I can speak for my whole group when I say we learned a lot. We learned about what went on during the construction of the CPR, the growth of Vancouver as a city, and we learned a lot about the amount of work it takes to make a big podcast like this. We learned that research is very important, we had a lot to look up, and we wouldn’t have been able to write the script based on the knowledge we already possessed, obviously.

Although, it really didn’t take us that long to find all the facts and information we needed, it took us a long time to put it into the right order and wording to really make a good story. We needed it to be interesting, and for a full 9 minutes. This is where I felt that we slowed to a crawl in the creative process. We were really stuck on how to write it. Then, one day, I sat down during a spare block and really took a look at what we had, and saw that we had a strong podcast, but it needed some work. And so I reorganized, added, took away and edited my way through the some 1,700 words we had. And, after draft one, we realized we did a good job, and just needed our interview.

And this is where I think we got lucky… super lucky.

A few days before the final one was due, our future interviewee waltzed right into our class and talked to us about our worker rights as a teenager. During the talk, I had the idea that after this class we should interview her. And, after class she agreed to do so at lunch. We ended up with a great interview, and we all relaxed a little bit.

Our podcast was complete.


Overall, I thought this was a great project to do, since it really showed us the real amount of work it takes to make an almost-professional podcast. My group did a good job in the overall workload, although we definitely procrastinated a lot…

We didn’t exactly start the next step until a few days before the due date, and we wouldn’t have gotten an interview if it wasn’t for the random guest speaker for our planning 10 class. But, I did enjoy working with this group, Will, Ryan and Kyle, we had good times, and more stressful times. If I could do one thing differently, I think I’d get my group and I to work harder in the editing stage, as I feel that wasn’t our strongest point. Some of the audio clips are really fuzzy, and the interview could’ve been integrated in a better way. All in all, I feel we did a great job, and I’m finding myself sort of looking forward to the next podcast we will have to tackle in the new year.


If you noticed, I was hinting at another big project that we had to tackle, right after we finished this one. Look for my next post describing this experience.


That’s all,
See you

You Know About Ratios, But What About Golden Ones?

For our last unit in math class before the Christmas break, we looked at a mathematical theory/ phenomenon called the Golden Ratio.

Like me, you’ve probably never heard of it. Well, let me tell you. It is a design that has a rectangle outside, and on the inside, smaller squares that repeat in an endless spiral. Here is a picture of one on its own:

Now, what’s special, is that this rectangle has a special ratio for its side lengths. The ratio is      1 : 1.61803…

The second number, 1.61803 goes on forever, and is similar to the more popular number Pi. The ratio means that on the rectangle, and measurement on the short side will be a multiple of 1, and the measurement on the longer side will be a multiple of 1.61. These two sides will always have that ratio, otherwise it’s not the golden ratio.

For example, if the side length is 2 on the short side, the longer side will have a length of 3.23, and so on.

The golden ratio has been used by many famous artists, like Da Vinci in his famous The Last Supper painting:

Its also been used in lots of architecture, like the well known landmark The Parthenon, in Rome:

The reason it is used in these places is because it is believed that it is aesthetically pleasing to our human eye. And so, this became our project. We needed to design and create a work of art that showcased multiple golden ratios. It could be anything from a poster, to Music, and to drawings.

After some thought and research, I decided to draw my own picture, even if I’m not really artistically gifted.

The first step was to research the golden ratio more, and find my inspiration for my drawing. It took me a while to choose an idea, and I went through several different sketches. I finally settled on a skier coming down a mountain. To draw my thoughts and ideas, I used an app called Sketches Pro, which I grew to like. A great feature is that this app lets you draw on many different layers, so your different objects you draw don’t interfere with each other. This helps it stay neat. At first I didn’t know about this feature, and got stuck once my drawing looked like this:

But then, I re-started and it was a lot better. I traced my skier onto the canvas, and then added my backgrounds and things around him. I then finished, and after looking at how I could bring everything together, I put each thing in specific places to fit with the golden ratio. This is my drawing before I overlayed the golden ratio diagram:

And this is after:

But I still needed more golden ratios. I then used the rock drop in the snow to be the central object that the golden spiral loops around on. I used this technique, moving my objects around, to help me find more golden ratios in my drawing, and came up with this as my final project:

For each golden ratio, I used a different labeling method. For the big one over the whole image, I used a fraction method that works for any numbers that fit the golden ratio proportions:


For the skiers arm, I used an algebraic method that shows the ratio of the sides of the rectangle and how they work together to make a golden ratio. This also shows how you can replace those letters with numbers, and it will help you add them together easier:

And for the rock in the center, which, believe it or not is its own golden ratio, I marked it with the actual measurements I got from measuring the rock on my ipad screen. If you divide 2.87 by 1.78, you get 1.61, which is the golden ratio. I also like having the second golden ratio under the big one, because it shows how the golden ratio repeats itself infinitely.

Well, that sums up this unit and project. At first, I didn’t think this project was going to be fun. I had no idea what the golden ratio was at first, and didn’t know how to apply it to art. But then once I researched and got going, I felt more prepared. I actually really enjoyed the drawing part of the project, since I love skiing and I liked using the app. Overall, I had fun during this project, and learned a lot more about ratios, even the golden one.


See you

Naming Waterfront Station

As a short mini project in PLP 10 Humanities we were to research and make a maximum 2 minute video on one location in Vancouver that has been around for a while, or made a difference in Vancouver’s history. We were doing this project since our whole Humanities unit right now is about the history and growth of Vancouver in all its different areas. And to start off the project, this was the list that Ms. Maxwell gave us to choose from:

Keefer Street
Joe Fortes (restaurant / library)
Seymour Mountain – Simon, Reid, Spencer, Calum
Stanley Park – Isobel, Ruby, Hannah
Gastown -Claire, Sydney
Caufield
Lions Gate Bridge – Will, Ryan
British Properties
Robson Street
Kitsilano – Kate, Adam, Aiden
Lonsdale Ave / Quay – Lucas, Micheal, Alex
Waterfront – Kyle, Sam, Robbie
Cambie Street
Nootka Sound
SFU / Fraser River
Blood Alley – Willa, Ethan, Sofia

We were in either a group of two, three or four, and my partners were Kyle and Robbie. And since all the locations we wanted to do were taken, we asked if we could do Waterfront Station, and we got a go-ahead.

So me, Kyle and Robbie planned to go across the sea bus to get some clips of waterfront station for our video. We decided on getting a few time lapses of going across the seabus and pulling into waterfront station, a few timelapses of all the people going through, some clips of the trains, the buses and also just of the building. So the next day after school, we headed out to the seabus.

By the time we were getting in the seabus, it was close to 4:05 pm, and the sun sets at around 4:37 pm, so we had to get our clips fast. We timelapsed the seabus ride over, and the sun was just behind the skyline of downtown Vancouver, making for an amazing shot.

This was was the most enjoyable part of the project for me. I really liked this shot of the ocean, the setting sun, and the skyscrapers of Vancouver looming over us as we pull in closer and closer.

Then, once we got in we ran over the bridge across the train tracks, through the station, and went outside to get our shots of the exterior of the building before the sun set. We looked around at the busy street and Kyle had a great idea of going to the top of a parkade to get a great  shot of the building.

We then also filmed the back of the building, and then got the rest of our shots inside. Once we finished we headed back home.

After we researched Waterfront station, we put our research into a script that we would add to our video as a voice over. I actually learned a lot from this research, as I didn’t know that Waterfront station was built so long ago, and that it’s apparently haunted!

Then, the next step was to do the editing. We used the app iMovie to put all the photos, video and music all together into one product. I really like iMovie for this exact reason. You can even record the voiceovers into the video wherever you want them, which makes it super easy to create this type of video. In the end, our video was done a few days before it was due, and after critique from our teacher and the class, we just had to balance or re-record some audio to finish it.

I really enjoyed this project because it was looking at something in our home town, the Waterfront station. And since I’d been through it many times, I was interested in it’s history and I was determined to make an engaging video on it. I think that being able to go to the location is really helpful because it helps me understand what I want to show in our video.

Overall, my group worked together well, even though Kyle went on vacation halfway through, and we produced a great video together.

That’s all,

See you

Working Safe

In our Planning 10 course, before we get to anything else, we’ve been looking at safety in the workplace. This is very important for anyone who has a job, or is looking to get one (me).

We first started out with a short quiz on our  work experience we already have, but since I haven’t had any work experience, I didn’t have to answer many of the questions.

In my near future, I think I’d like to be a ski instructor, hockey referee, or just work at a local store.

The next item on the to-do list is to watch a video about real people who were injured on their job, and what their life is like now. We watched this because it really shows us how our life could change in an instant if we don’t know what we are doing while working.

This video was very realistic in the fact that we do need to be careful, and to know our rights as a worker to refuse anything we don’t feel safe doing.

Another small activity we did to find out the rules and regulations between the employer and the employee, was to search the regulation!  In this task we had to look up different rules in this worksafe BC website that will help us find the answer to the questions. These questions were about different situations that could happen while you’re working, and what you can do about it.

This helped me because I know now that I don’t have to anything I feel is unsafe when I get a job, and that I have rights as a worker, wherever I work.

To finish off this assignment, we needed to create a visual that would summarize what we just learned. And this is what I created:

I created this to show what really could end up happening if you’re not careful, and to show the importance of knowing that you can say no to working something unsafe.

Thats all for this unit so far,


See you

Genetics: Small Stuff, Big Importance

Like we do most years in science, we just went through a unit about DNA. I’ve never really enjoyed this unit, as it is always a little confusing, and it’s not very appealing to me. But this was more about traits being passed down from parent to child, and what makes those certain traits pass down. We also were learning about twins and their DNA.

The driving question for this unit is:

“How does DNA and genetics determine the characteristics of living things?”

In this Unit  looked at what makes us different from each other as people, and how and why we look similar to our parents. We looked at how to predict what traits would be passed down from parent to child, and the probability of each. We also looked at genotypes and phenotypes, all before we started working on our project.

And once we got to the project stage, the driving question is:

It’s kind of strange to think about, and at first it sort of makes sense. But we jumped into a lot of learning and research. We learned even more about these following topics and fancy scientific words:

Genotypes and Phenotypes
DNA
Genes, Dominant and Recessive
Traits being passed down
Punnett Squares
Pedigree Charts
And much more

Me and Spencer, my partner for this project, needed to know all about these concepts before we started our project, which was to make a 5-10 minute podcast explaining the answer to the driving question. The podcast had to include the explanations of those words, and since in class we’d been going through this website that teaches us step by step about each of those, that’s what me and Spencer turned to to gather our information. We went through the information, picking out facts and important parts to use in our script. We also watched a few of this guys videos:

Once we’d gathered what we needed, we began turning the facts from bullet points into a podcast script. It didn’t take us long to put together, and we got to the recording stage fairly quickly. But before we got there, we proofread our script of course.

Our recording and music making was smooth sailing, we used GarageBand to record our voices and make the music, and iMovie to put all the recording clips together. But since it’s just a podcast, there wasn’t any visual we could use in iMovie, so the screen is just black. But it’s exported as a audio file.


Once we had our full version put together, we listened to it, balanced the audio a little, and then we were ready.

Overall, I was happy with the way it turned out, but I also felt I could’ve improved the grammar in some places to make it more engaging and easier to understand. I also would definitely add some humour of some kind in there somewhere to spice it up. This project, just like my math trigonometry one, was tough to get started on, but then once me and Spencer got going, it got easier. I had fun recording and just like all my podcasts and videos I’ve made, I enjoyed listening/viewing how it turned out in the end.

To sum up my learning in this unit, I have two visuals that help demonstrate how much I learned. At the beginning of the unit, we did a mind map of what we knew then, and then we did another mind map at the end of the unit, showing what we know now.

Before the unit:

I guess I have learned a lot in this unit, and it wasn’t too terrible. Overall the unit was interesting, and me and Spencer’s Podcast was good, so I’m happy about that.

Thats all for today,


See you

Trigonometry Sounds Scary… It Is…

This year our first unit in math is about trigonometry, which is math that helps us find the relationships between triangle side lengths and angles. We hadn’t done any trigonometry in past years, but we’d done some algebra, which sort of ties into trigonometry.

On the first day of math class, we were briefed on our unit project. It was called the Ideal Angles Project. It was going to be due at the end of the unit, but we were to start thinking of what we want to do for it from the beginning. We were to design a 3D model of a house with a solar panel attached to its roof, and we had to use trigonometry to find the best angle to position that solar panel. Here’s the brief we were given:

That day, we also learned about SOH CAH TOA, which are three trigonometric functions we use to find side lengths or angles of triangles, depending on what angles or side lengths we already have. This was shown to us in this YouTube video:

Throughout the unit we would be going through a notes package with lots of different problems and equations in it, giving us practice on the key parts of trigonometry we needed to know. We were given this package digitally, and filled it out in a great notes app, Notability.

We would also do an occasional partner quiz, which is where we would create an equation, solve it, and then see if my partner would be able to answer it correctly. This was a good way to learn, because it teaches you the structure of math problems, and how to answer different ones.

Over the next few math classes we worked on the notes, had some homework pages and a few more partner quizzes. All the while, we were to be working on our project, gathering ideas and planning our model.

But to help us with finding the correct angle, we first did a lab where we positioned a wooden test divider at certain heights and angles with a mini solar panel on it. We filled out a chart to go with each angle, and saw which angle caught the most amount of sun rays. Here’s a picture of what me and Spencer got for the best angle from the lights in the classroom:

And here’s the chart we filled out that shows us the different angles and how much light power each angle got:

So, after this lab experiment we now know that a good angle will be around 45° because we got the highest amount of energy when the mini solar panel is positioned at that angle. But that is just getting small amounts of energy from the lights, our actual project needs to be positioned to the angle of the sun, in a certain location and season.

And so, I began my project research. I looked up the way to figure out the angle for Vancouver in the winter, and I found this formula:

49 (Van. Latitude) x 0.9 + 30 = 74.1° (recommended angle)

So, that was to be my solar panel angle. Now I just had to build a model that has that exact angle. But first I had to figure out the other side lengths of the soon-to-be triangle with trigonometry. The first side I needed was the hypotenuse, then the adjacent side, and then the opposite side. All sides were important because I had to build my model roof size to those exact numbers. So, I got started.

I chose my hypotenuse length to be 15 cm, which is the solar panel length because the hypotenuse of the triangle is my solar panel, and then from there I calculated the rest of the sides using trigonometry. My triangle then looked like this:

That would be half of my roof. Now I was ready for construction. For the base, I used a section of an old foam tri-fold board, and for the house I used popsicle sticks. For the main part of the house I only had one measurement that I had to use. The width needed to be 8.2cm, (twice the bottom side of the triangle I drew.)

The first thing I did was build 2 rectangles that would be the top frame and the bottom frame. I then cut and glued lots of popsicle sticks that run vertically and connect the two rectangular frames (the walls.)

https://youtu.be/5Jbem1m4hGE

I then added my solar panel (also the foam tri-fold board) to the angle 74.1° using my eyeballs and a protractor. To finish my model off, I glued orange narrower popsicle sticks to the side of the triangle I’m trying to show, to bring it out. Then I glued my house to the base.

I also wanted to show how the sun would hit my solar panel, and so I took an orange hockey ball and suspended it above my model using a thin plastic pole, some string and a small block of wood. And viola, I had me a math/solar panel model!

Overall this project was hard for me in the beginning, I had my idea for the model, but I didn’t know how to use the trigonometry to show it. But once we did a practice test, and marked it together, I started to understand the concepts a lot more. I then was able to get going, and after that, my whole project came together perfectly. It was exactly the way I wanted it. If I could change one thing about it, I’d change the angle of my solar panel since after putting my model together I think that it wouldn’t receive as much sun as it could at a different angle. Anyways, this project was as fun as a trigonometry project could get, and I learned the skills I need to apply trigonometry to not only just math questions.

See you

World War One In A Podcast

As you probably know based on recent posts by any grade 10 PLPer, we have been learning all about World War One in humanities class. The whole unit this year is about identity, and we are relating the First World War back to Canada’s identity. That’s what this post is about. Our big project for the WWI unit is a 5-6 minute podcast about the impact of WWI on Canada. But before we started the podcast, we did lots of smaller assignments first.

One of the first things we did was read a graphic novel that was online, called Shattered Ground. It was a story following a soldier that went to WWI and fought for Canada. I liked this story because it was extremely detailed, and very interesting to see this one guy fight through multiple well known battles. The drawing were really well done, and really portrayed what it was really like. The graphic novel also featured real photos and video from the War. Overall, It really gives you insight on what is what like to be a soldier in WWI.

Next, we read a section of a textbook that explained what was happening in Canada while the war was being fought. We then answered a true/false page about what we just read:


Then we watched a very interesting video about Vimy Ridge, a battle Canada is very famous for, and we made notes about this video as we watched.

I really liked the video, because Vimy Ridge was a very famous battle, and Canadian soldiers fought with true grit to gain a victory.

After learning all this new information, our next step was to write our podcast script. This was the big project of the unit, and we’d had it in the back of our minds while we did all those assignments above.

The aim of this podcast is to explain how the war affected Canada, but also have another aspect to it. We went to this Canadian Soldier War Memorial website, and chose a soldier that we thought could support our story. This soldier fought and died in World War One. The soldier I chose was named Henry Jackson. I chose him because the website gave me the information I needed and there was a lot of photos and letters of him and his life.

The next step: to write my script.

I ended up writing 1,300 words, which is a little long. My theme for the podcast was a WWI radio show podcast. My soldier was integrated as if I’m interviewing him, but he’s not there. I talked about the war and how Canada participated. Before handing in our script to our teacher, we first did some peer critique. Me and Simon switched iPads, where I read his, and he read mine. Here’s the feedback he gave to me about mine:

After this, I handed in my first draft of my script to my teacher and got some great feedback from her. Here’s the notes she wrote on my script:

After this feedback we had to record our draft 1 of the actual podcast. Then, on the Monday, we traded iPads with the person next to us, listened to each other’s podcasts and then gave feedback. Here’s my first podcast:

And here’s the feedback I got from Izzy:

The next step was to take that feedback, and change our script/re-record based on it. But before we did that, we focused on making a good hook for our podcasts. We did that by listening to other podcasts that more professional podcasters made, but only listening to their hook/intro. We then made a chart that states the way the podcaster hooked you into each podcast:

After that, we wrote out a script that would only be about the first 30 seconds of our podcast and then recorded it. We added Music and then the next class we were to listen to all of our intros, and get even more feedback. When I plugged my ipad into the classroom speakers and played it, you could barely hear my voice for some reason, so I just got feedback on my music. I then went back and re-recorded it later on, and then put it in the beginning of my podcast. Here it is, just the first 30 seconds:

Then to finish off this project, after talking about and listening to more professional podcasts, we were assigned a WWI Podcast Final Draft. We were to fix anything, add more music, change it based on any critique, and so on. And after adding different music, cutting out some sentences from my original script, and re-recording it all, this was my end product:

Overall, I really enjoyed learning about the First World War, and making a podcast on it. I especially liked researching about a specific WW1 soldier because it made it more personable, and it was interesting learning about their stories.


See you

Planning Our Life On A Quote

This year, since we are in grade ten now, we are doing a course called Planning 10. This course makes us think about our future career and how to get there. This post is about the first project we are doing in this course.

Our first step: Quote

The first thing we needed to do was find a quote that is meaningful to us personally. It can speak to us anyway we want and can be from anywhere. I first started looking for my quote by looking up quotes from some professional athletes I know, but didn’t find anything from them. Then, I kind of came across a quote I’m pretty sure I’ve heard before, but I didn’t know where from.

I chose this one because it can relate to many areas of my life, and it says that what you put in, you get out. It applies to my schoolwork, sports like hockey or mountain biking, and my personal life. I will have a better reward from a stronger effort.

Second Step: Visual

Now that we have our quote, we needed to find a photo that we think supports or goes with that quote. This is the photo I chose to represent the quote:

We then had to take that photo, and using our new drawing app, Sketches Pro, draw or trace a similar image. Since I hadn’t used Sketches Pro before, it took a while to get used to, but I figured it out as I went on.

That was my finished product. I just traced myself, then the boards in another layer, and the ice surface in another layer, with the layer of me on top.

Third Step: Audio

With our image ready, we needed to add our quote to that image. But not just writing it onto the photo. I recorded myself saying the quote, and who said it, Les Brown, and then we had one more thing to do. In GarageBand, we had to make copyright free music that suited the tone of the quote. I used the Strings section, which is an orchestra of violins and chellos, and I used the keyboard. I added the music to my voice, and viola! I had me a soundtrack.

Final Step: Final Product

My last task was to put the pieces together. I opened iMovie and inserted my image, and then imported my GarageBand song from iCloud. And this is what all the steps put into one short video look like:

https://youtu.be/XNA6RDw4Iis

This project was fun, and interesting. My favourite part was tracing the photo and learning about Sketches Pro. The project didn’t take long to do once the photo was drawn out. Putting it all together and seeing the product of my hard work is what I like about these projects.

Anyways,

See you